In search of sandwich heaven.

Is there a food more versatile than the mighty sandwich?  It can be all things to all people and after years of being a favourite snack for those on the move, it is still being used as a testing ground for flavours and textures.

If the quiche has been blighted by mass production, then the sandwich has often fallen foul of plain apathy.  We take the sandwich for granted.  We don’t always take the time to prepare sandwiches with quality bread or quality ingredients, but by golly, it is so worth the effort when we do!

Cafes and even supermarkets have certainly picked up on the demand for inventive flavour combinations and well-sourced ingredients.  Nowadays, England is no longer full of train stations with wilting tomato sandwiches on rubbery white bread.  Ingredients are hand-picked, sun-blushed, vine-ripened, oak-smoked, oven-roasted, lightly salted, gently aged and freshly prepared for the discerning consumer.  Add to that a description on the packaging that would be quite at home in a H.E Bates novel and you’ve got a fairly accurate snapshot of the English attitude towards food right now.  People want basic food with a touch of luxury.  Simplicity coupled with quality and effort.

With our little boy napping and a natural lull in the rhythm of the day, I realised that it was way past lunchtime and we were due some sustenance.  I knew that I wanted a sandwich and seeing some fresh baby spinach in the fridge, I recalled a tuna melt that I used to buy from the same place that got me hooked on smoothies.  Their tuna melt was made with mozzarella, baby spinach and some red onion.  I decided I could easily top that with just a few of the ingredients at hand.

I wouldn’t make this sandwich too often because it takes time and care, but with the rain coming down in grey sheets and nothing else to pique my interest, I was more than happy to devote a little time to constructing this delightful treat.  The flavours are full without being overpowering and the textures are a joy.  The tuna melt is not a new invention and in the past I’ve gone for the bigger is better approach.  However, this toasted sandwich is going straight into the top 5 of a sandwich chart that I haven’t compiled, but probably exists somewhere in my food subconscious.  It’s nothing short of awesome, so simple that it’s hardly a recipe and definitely worth your time.

My perfect tuna melt (This will make two generously proportioned sandwiches)

4 slices wholemeal bread

1 tin tuna in sunflower oil

1 onion (sliced into rings)

2 handfuls fresh baby spinach

6 tblspoons grated Red Leicester

6 tblspoons grated mature Cheddar

3 tblspoons grated Grana Padano

3 tblspoons mayonnaise

1 tblspoon dried oregano

2 tspoons Dijon mustard 

half tspoon Cayenne pepper

butter

black pepper

I began by finely grating the cheese and tossing it all together with the oregano and plenty of black pepper.

Next, I drained the tuna and mixed it in a small bowl with the mayonnaise and Cayenne pepper.  Meanwhile, I gently fried the onion rings in a little olive oil until brown and almost crispy and set them aside.

I spread a slice of bread with Dijon mustard and lay the baby spinach on top in a thin layer.  Using a fork, I spread a very generous amount of tuna mayo onto the spinach and topped it with the fried onions.

Now the sandwich was ready to receive a pile of the finely grated cheese mix.  I pressed the pile of grated cheese onto the sandwich with the palm of my hand to keep it all from crumbling and then did the same with the final slice of bread.  I gave it a quick buttering on the outside before laying it onto a hot griddle.

A couple of minutes on each side and the melt was ready to dive into!

What’s your perfect sandwich?

God save the quiche.

Too many people say that they don’t like quiche.  In my experience, quiche gets a rough press and often deservedly so.  The problem is that there’s an abundance of bad quiche out there.  Who’d want to bring children into a world where so many crusts are soggy, fillings are meagre and texture is akin to a fritatta left out in the rain?

Join the fight then, to bring taste and texture back to the long-besmirched picnic regular.  Champion the cause of quality quiche!

For my own part, I’m focusing on three key areas that will ensure a quiche that anyone would be eager to polish off in one sitting: A dry and crumbly base, a firm, yet creamy filling and as much flavour as you can pack into every bite.

I too have been left saddened after tasting another soggy shop-bought cheese and onion quiche.  My memories of the worst buffets include a quiche covered in soggy tomatoes and a bendy base.  I’ve eaten more watery quiche Lorraine than I’d care to mention and always with the feeling that someone had picked all of the bacon out of my slice just before I got to it.  No, quiche is at the very bottom of many a food list.  Something has to be done.

The recipe I’m posting today is a favourite of mine.  I first made it about four years ago after deciding that I wanted a quiche that would sate my hunger for a really cheesy flavour and the freshness of chives.  I didn’t want a mere hint of cheese, I wanted an unmistakable celebration of it.  With that in mind, I present to you, my first (but certainly not the last) volley in the battle for great quiche!

Chutney? Don't mind if I do.

Dimitri’s double cheese & onion quiche

500g shortcrust pastry

260ml double cream

150g Red Leicester cheese (finely grated)

100g mature Cheddar cheese (finely grated)

5 spring onions (sliced)

2 eggs

2 egg yolks

1 bunch chives (finely chopped)

1 tspoon black pepper

1 tspoon sea salt

Grating the cheese finely ensures plenty of cheese in every bite.

I use frozen pastry, but feel free to make your own.  I begin by rolling it out on a floured surface until it is just less than a centimetre thick.  I place it in a nine-inch sandwich tin (which I normally use for cakes) lined with baking paper.  You can use a quiche dish or anything similar as long as it is at least an inch deep.

If you don’t have baking beans, pour in dried pasta or any type of dried bean so that they cover the base.  Bake the pastry in the oven at 180C for about fifteen minutes on the middle shelf.  Remove the beans and return the pastry to the oven until the base is golden.  This will ensure that you avoid soggy pastry.

In the meantime, beat the eggs, yolks and double cream together in a large bowl.  Add plenty of salt (so that you don’t end up with a bland quiche) and black pepper.  Next, add the spring onions and chives and finally the cheese.  Mix it all well so that the thick mixture has an even distribution of cheese, onions and chives.  You can use other types of cheese that you like.  I chose mature Cheddar for sharp flavour and the Red Leicester for colour and a mellow aftertaste.

If your pastry was overlapping, now is the time to trim it with a sharp knife.  Pour the filling into the pastry and cook in the oven for about forty-five minutes.  The middle needs to be set, so test it with a skewer after forty minutes.  If it comes out clean, the quiche is set.  Cover the quiche with tin foil if it begins to burn on top.

Let the quiche cool slightly before tucking in.  This will help it to set nicely.

You can serve the quiche hot or cold.  Either way, you’ll convert a lot of quiche naysayers.  I guarantee it.

My cookies are the best…on this street.

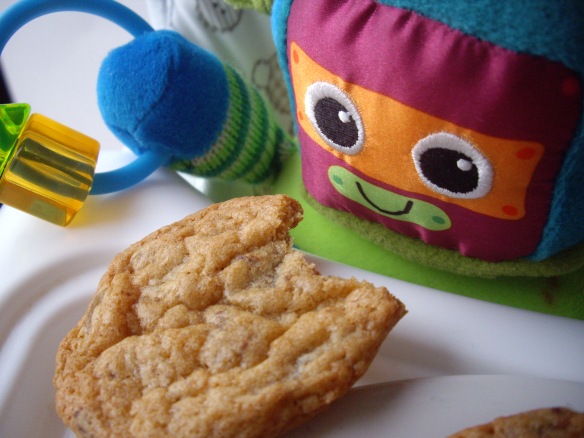
It’s true.  My tummy said so…and my tummy’s bigger than your tummy!  Granted, England isn’t known for its cookies and most of the population over forty would probably choose tea and cake over milk and cookies.  There will be countless more across the pond who no doubt will stand up and be counted for coffee and donuts.  However, what I’m sharing with you today is nothing less than my ultimate, works-every-time, so-easy-to-make, can’t-wait-till-they’re-out-of-the-oven recipe.  I’ve tried so many recipes over the years and often been disappointed.  That’s why I decided to combine the best bits of every recipe I’ve tried to make these beauties.

The dough recipe is nice and easy, but the best part is that once you’ve got the dough recipe, you can make any type of cookie you want.  That’s why I love these.  Today I’ve made a batch that give a little tip of the hat to my favourite biscuits, dark chocolate gingers.  I have quite a thing for them and I’ve had to stop buying them lest I begin to resemble one.

You, dear friend of food, can load up your cookies with whatever takes your fancy.  I’m sure you have your own amazing cookie dough recipes and it’s likely that they will make my attempts look like My First Cookies, but let me tell you, when I’m going for an ice-cold glass of chocolate milk (and I do so far too often), these cookies are the perfect partner!

What’s your favourite type of cookie?  What should I put in my next batch?

Dark chocolate & ginger cookies

300g plain flour

215g light brown sugar

200g dark chocolate (chopped into little chunks)

170g melted butter

120g caster sugar

120g glace ginger

1 egg

1 yolk

1 tblspoon vanilla extract

1 tspoon ginger powder

1 tspoon salt

half tspoon bicarbonate of soda

Beat together the egg, yolk, butter and sugar.  Add the vanilla and combine with the soda, salt, ginger powder and flour to form a thick dough.

Tip in the chocolate and the glace ginger (or whatever ingredients you are using) and work them into the dough with your hands.  Wrap the dough in clingfilm and refrigerate for half an hour.

Preheat the oven to 180C.  Line a baking tray with baking paper.  Break off small chunks of dough, roll them into balls and press them between your palms so that you have little pucks to place on your baking tray.  The cookies will flatten and spread out in the oven, so leave enough space between them.  They’ll be done in less than ten minutes.

For years I made brittle, crumbly cookies.  It was because I used to bake them until completely brown all over (thinking that they were done).  For perfect, chewy cookies, however, it’s important to take them out of the oven to cool while they are still soft.  Wait until they are beginning to brown at the edges and then use a fish slice to transfer them to a wire rack.  They will firm up once cooled.

Enjoy and let me know how they turn out!


There are many reasons why I will not entertain becoming a vegetarian. Steak and ale pie is one of them.

My concern for animals extends beyond owning and loving our over-sensitive collie/lab cross.  Like many who enjoy food, my consumer conscience pushes me to find out about the origins of what I eat and how well animals are treated before I will make a purchase.  The best way of doing this is to get to know your butcher, which may seem like an alien concept if you’ve spent the last decade putting sealed plastic trays of chopped meat into your trolley.

In truth, the household budget has more impact on our attitudes towards food than perhaps we’d like to admit.  In my student days, the last thing on my mind was the welfare of livestock in our county when looking for the main ingredient in the curry I’d promised to cook for my flatmates.  Was the meat I bought even from this county?  From this country?  Who knew?  One person who does know is your local butcher, which brings us back to the issue of shopping close to home and supporting independent businesses.  The supermarkets are winning.

However, well-sourced, good quality meat that you know has come from animals treated properly, is not the reserve of the affluent members of each community.  By simply speaking to your butcher and telling them what you are going to cook, you’ll find which are the most suitable cuts and what offers value for money.  Good cooking starts with good shopping.

Of course, many among you will shake your heads knowingly and state that vegetarianism offers a wonderful diet with fewer pitfalls in sourcing.  However, I know deep down that I will always eat meat and that even the most insightful arguments against it cannot compete with steak and ale pie.

Steak and ale pie

800g stewing steak (cut into chunks)

500g Robinson’s Unicorn ale

500g puff pastry

4 large carrots (sliced)

8 mushrooms (sliced thickly)

1 onion (sliced)

4 cloves garlic (sliced)

4 tspoons Dijon mustard

2 beef stock cubes

half tspoon cayenne pepper

butter

sea salt

black pepper

plain flour

1 egg

I made this recipe using Robinson’s Unicorn, but any quality ale will do.  You could even try it with good, old Guinness.  I’m sure it would work a treat.  I drank Unicorn beer on my stag do in the Lake District and it’s a cracking pint!  I washed this pie down with a bottle of Hobgoblin and I can recommend that too.

First of all, heat a nob of butter in a heavy pan and brown the beef.  I sprinkled in some plain flour to coat the beef as it was cooking and I ground lots of black pepper in too.  No salt at this stage.

When the beef was brown, I added the onions and garlic and put the lid on to help soften them.  This only took a couple of minutes and with some stirring, the onions were cooked through.  I threw in the carrots and poured in 250ml of beer before stirring in the mustard.  Make sure everything is well combined, add more black pepper (if you love it like I do) and the stock cubes and let it simmer for about fifteen minutes.

Meanwhile, in a small frying pan, fry the mushrooms in some butter and then add them to the beef.  Sprinkle in the cayenne pepper.  Pour in the rest of the beer.  Stir.

Pop a tight lid on the beef and put it into the oven at 170C for about two hours.  Stir it every now and again and season to taste with the sea salt.

To top the pie, roll out the pastry and tip your pie dish onto it.  Cut around the pie dish carefully leaving a few centimetres more than needed around the edges.  The pastry will shrink in the oven.  When the beef is cooked and the gravy is nice and thick, tip it all into the pie dish and cover with the pastry.  Beat the egg and use a brush to coat the pastry.  This will give your pie a nice glaze.

Put the pie into the oven for as long as it takes for the pastry to puff up and turn golden.  Serve it with vegetables and your favourite beer.  Next time, I think I’ll serve it with the same ale that went into making it…and some mashed potato.  Lots of buttery mashed potato.  Winter fare doesn’t get any better than that.

Laos, ‘Nam and jam.

Jam in Japan?  Loaves in Laos?  Well, yes, actually, it’s not all noodles and rice.  Western travellers can enjoy the delights of local cuisine the world over, but sooner or later, the comfort of home comes calling.

You can thank the French for bringing their beautiful bread to Laos.  After jungle treks, boat rides and back packs, believe me, you will.  In Vietnam, street snacks often take the form of small baguettes smothered in  La vache qui rit. I can almost smell the freshly baked, crispy baguettes!

It’s a very personal thing, so I guess that everyone will have their own image of that go-to comfort food.  For my wife, no matter where we go and what we eat, eventually, that yearning for something familiar comes calling.  When it does, there’s nothing I can do to dissuade her; only spaghetti in a rich tomato sauce will do.  Try ordering that in the Mekong Delta.

I’m easier to please.  When I’ve had my fill of local dishes, I think of bread.  Good, fresh bread with butter and jam.  Plenty of jam.  You don’t have to travel to appreciate good bread though.  Recently, a friend (who knows me very well) bought me a beautiful loaf tin filled with very tasty jams, spoons, ribbons, recipe cards and wax discs.  There’s everything needed to make jam and a simple bread recipe to make a loaf too.  Needless to say that I’ve been dying to give it all a try.  Yesterday I got stuck in and made a gorgeous loaf to slice up and pile jam onto.

I used the recipe card that came in the set, but adapted it (the dough was too wet to work with at first).  The loaf came out crispy on the outside and fluffy on the inside.  I’m not a master bread maker, but I’m very happy with it.  Looks like I’ll be eating bread and jam every day this week.

Observe, if you will, the beauty of bread baked at night. Time to fetch the butter.

Honey bread

700g white flour

1 pint warm water

1 tblspoon honey

1 tspoon salt

1 tspoon dried yeast

Sift the flour, yeast and salt into a large bowl.  Stir the honey into the warm water until dissolved and pour into a small well in the middle of the flour.  Use one hand to hold the bowl and the other to mix until you have a dough that will come away from the sides.  If it is too wet, add more flour.

Tip the dough onto a floured surface and knead it gently.  Place into the large prepared loaf tin.  Cover with a damp tea towel and leave to prove for an hour or so.

After an hour, run a sharp knife down the length of the loaf and drizzle more olive oil on top.  Place in an oven at 180C for about half an hour.  To check if the loaf is done, tip it out carefully and tap the base.  It should have a hollow sound when ready.

Let the loaf cool on a wire rack for a little while.  Then, of course, it’s time to slice it thickly and let butter and jam do the rest.  If you’ll excuse me, I’ve left my loaf unattended and in my house, that’s what is known as a “schoolboy error”.