To choc or not to choc. Is that really a question? 

Seems silly to post a recipe for chocolate torte on the day I decide to get into shape. I never was one for convention. I stare down at my tummy with a mixture of contempt and satisfied pride…it’s been a fun journey. Now things must change.

For some time I’ve managed to consume inordinate amounts of sugar and fat through various favourite treats and done little to redress the balance. So today I am posting a gorgeous recipe for something that may well come to be the last piece of cake for some time; except that it’s not a cake at all. It’s a torte and it’s so dark and satisfying, that I couldn’t think of anything better to finish my run of gluttony on.

Oh, I’ll be posting yummy goodness as usual, but I’ll be doing my best to preserve my arteries too. A tricky balance to strike. We all need a cheat day though and that’s when I’ll be cooking up a sugary storm and sharing it with you. You didn’t think this was going to become one of those healthy lifestyle blogs did you? Ha! Onwards! Chocolate awaits!

Dark chocolate torte.

600ml double cream 

300g dark chocolate (70% cocoa solids)

3 tblspoons golden syrup

1 packet cookies (crushed) to cover the torte

Such an easy recipe. It’s no wonder staying in shape is a challenge for me.  Begin by lining a 20cm loose-bottomed cake tin with cling film. 

Melt the chocolate, syrup and 200ml of the cream in a saucepan on the lowest heat. Stir frequently to get rid of lumps. People recommend placing the chocolate in a bowl and heating it gently over a pan of hot water, but I’ve got a life to live and I just want the ingredients melted…this is a kitchen, not a spa retreat.

Meanwhile, whisk the rest of the cream in a bowl until it is just about to form stiff peaks.

Leave the melted ingredients to cool slightly before folding them into the cream. Be sure to take time with this stage. Patience will pay off because you’ll achieve a smooth and even consistency throughout the torte.

Carefully pour the torte mixture into the lined tin. You could leave this in the fridge overnight, but that’s what boring people do. Instead, reclaim some of your teen spirit by putting the torte carefully in the freezer for a couple of hours. Stick a knife through the middle to test it. The torte is ready when the centre is firm. Turn the torte upside onto a plate and slowly remove the  cling film.

To finish, I blitzed a dozen Maryland chocolate chip and hazelnut cookies and then covered the entire torte. Done.

Just a small note: this torte is darker than a January morning and the chocolate hit is deeper than an abandoned mine shaft…be careful. 


Where do you find the time?

20141214_114005[1]

A colleague of mine recently spent some time making her own Christmas cakes with her children.  The very idea of finding the time to buy the ingredients, guide the children through the process of baking and then clean it all up was enough to elicit praise from other colleagues.  Consensus was that with four children, my colleague was a heroine who had attempted and achieved the impossible.  I was in agreement.  The Christmas rush combined with the daily rigor of raising children is surely enough to fill our waking hours.

Upon reflection, I realised something that has always made sense to me:  we all find time to do what we value.  No matter how busy we get, it is possible to carve out time for something that really matters to us.  In baking with her children, my colleague wasn’t doing something extra.  It was part of what was important to her and her family.

Time is no friend at this time of year, but here is a recipe that you could make in minutes and would be easy to try with children too.  Melt all the ingredients in the microwave and then pour into a tray that can be refrigerated.  The outcome?  One of the simplest and most fun chocolate recipes in the universe.  Not convinced?  Take a few minutes out of your evening and step on the path to chocolate heaven.

Chocolate fudge truffles

350g sweetened condensed milk

250g dark chocolate

150g milk chocolate

50g salted butter

cocoa powder for dusting

Break the chocolate into pieces and put into a plastic bowl that fits into your microwave.  Pour over the condensed milk and then add the butter.  Melt in the microwave and stir every minute or so to ensure that the mixture doesn’t get too stiff.

Once the mixture is thoroughly combined and looking glossy, pour it into a small tray lined with baking paper and place on a shelf in the fridge until set.  I usually leave mine overnight to be sure.

Remove from the tray, place on a chopping board and carefully cut into little squares with a sharp knife.  Dust the whole batch with cocoa powder and enjoy!

These truffles will keep in the fridge for at least a couple of weeks and make a great gift!  Enjoy.

20141214_114039[1]

Beef mole. No, really!

It’s funny what you can end up cooking when you’re looking for inspiration.  What began as a search for a fun chocolate recipe ended as a mini voyage into one of my favourite cuisines; Mexican!

I was looking for some ideas for a recipe that made use of what I already had in the cupboard and I specifically wanted to use some dark chocolate that’s been looking at me for a few weeks now.  Before I knew it, I was reading about mole and beginning to feel inspired.  In Central America, a mole is a thick, often spicy sauce made with numerous ingredients that can include chillies and dark chocolate.  There seemed to be a handful of variations and each of them sounded delightful.  Being a nacho fiend, I was beginning to see a serious dipping opportunity.

Having made the decision to use only what I had in the cupboards and fridge, the mole I made included minced beef.  Mole is especially popular because of its complex flavours and satisfying kick.  I couldn’t wait to experiment with it.  What ensued was an attack on my cupboards as the ingredient list grew and grew.  As always, I’m conscious that the recipe I’m sharing with you today is not necessarily a traditional mole, but one that I came up with over the course of a very hot afternoon.  With that in mind, some of the ingredients may alarm you, but trust me when I say, the taste is not disappointing!  I managed to surprise myself and I hope this recipe surprises you too.

This is one recipe that I’ll be making for years to come and I suspect that I’ll be trying other moles using chicken, pork and all kinds of chilies.  The sauce itself is more like a chilli con carne in consistency and I’m not saying that it can compete with an authentic Oaxacan mole.  It is however, fun to make, delicious and open to all kinds of adaptions.  Get ready then, for something different, something that I wasn’t expecting.  Is it a chocolate recipe?  Well, not exactly, but I hope you love it as much as I do!

Beef mole

400g chopped tomatoes

250g minced beef

200g tinned kidney beans

2 onions (quartered)

2 Chipotles (soaked in water)

1 red pepper (roughly chopped)

4 garlic cloves

1 medium red chili (roughly chopped)

35g dark chocolate

1 tblspoon smoked paprika

2 tspoons coriander seeds

2 tspoons chili flakes

1 tspoon ground allspice powder

1 tspoon garlic salt

1 tspoon dried oregano

2 tspoons mint sauce

1 and a half tablespoons peanut butter

black pepper

1 tbslpoon sunflower oil

olive oil

sea salt

I began by browning the beef mince with plenty of black pepper in a little olive oil and then setting it aside.

Next, I gently toasted the coriander seeds in a dry pan until they began to release their flavour.  I added them to a container with every ingredient except for the beef, Chipotles, kidney beans, chocolate and sea salt.  Using a handblender, I made a puree and then heated it in a heavy based pot for about twenty minutes on a low heat.  During this time, I added the Chipotles and the water they’d been soaking in, the kidney beans and all of the beef.  I also grated the dark chocolate into the mole and stirred it occasionally so that the sauce didn’t stick.  I removed the Chipotles when the sauce was cooked.

Once the mole was thick, I tasted it and seasoned it with sea salt.  I wanted to use the mole as a dip, so I didn’t add too much salt- my tortillas are already salted.  This mole is not very spicy, but you could add more chilies if you want a real kick.  This has just enough fire to make it fun.  Let me know if you make it.  I’d love to hear what you think!

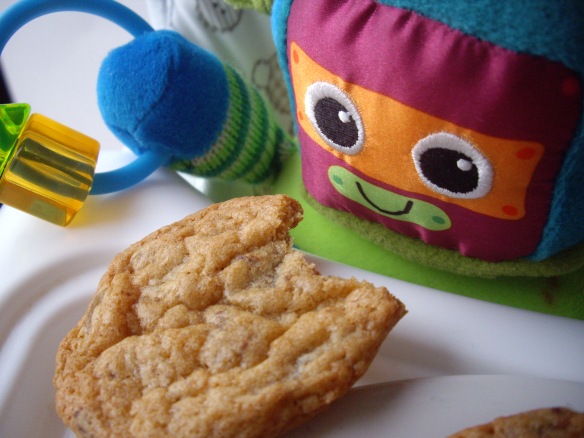
My cookies are the best…on this street.

It’s true.  My tummy said so…and my tummy’s bigger than your tummy!  Granted, England isn’t known for its cookies and most of the population over forty would probably choose tea and cake over milk and cookies.  There will be countless more across the pond who no doubt will stand up and be counted for coffee and donuts.  However, what I’m sharing with you today is nothing less than my ultimate, works-every-time, so-easy-to-make, can’t-wait-till-they’re-out-of-the-oven recipe.  I’ve tried so many recipes over the years and often been disappointed.  That’s why I decided to combine the best bits of every recipe I’ve tried to make these beauties.

The dough recipe is nice and easy, but the best part is that once you’ve got the dough recipe, you can make any type of cookie you want.  That’s why I love these.  Today I’ve made a batch that give a little tip of the hat to my favourite biscuits, dark chocolate gingers.  I have quite a thing for them and I’ve had to stop buying them lest I begin to resemble one.

You, dear friend of food, can load up your cookies with whatever takes your fancy.  I’m sure you have your own amazing cookie dough recipes and it’s likely that they will make my attempts look like My First Cookies, but let me tell you, when I’m going for an ice-cold glass of chocolate milk (and I do so far too often), these cookies are the perfect partner!

What’s your favourite type of cookie?  What should I put in my next batch?

Dark chocolate & ginger cookies

300g plain flour

215g light brown sugar

200g dark chocolate (chopped into little chunks)

170g melted butter

120g caster sugar

120g glace ginger

1 egg

1 yolk

1 tblspoon vanilla extract

1 tspoon ginger powder

1 tspoon salt

half tspoon bicarbonate of soda

Beat together the egg, yolk, butter and sugar.  Add the vanilla and combine with the soda, salt, ginger powder and flour to form a thick dough.

Tip in the chocolate and the glace ginger (or whatever ingredients you are using) and work them into the dough with your hands.  Wrap the dough in clingfilm and refrigerate for half an hour.

Preheat the oven to 180C.  Line a baking tray with baking paper.  Break off small chunks of dough, roll them into balls and press them between your palms so that you have little pucks to place on your baking tray.  The cookies will flatten and spread out in the oven, so leave enough space between them.  They’ll be done in less than ten minutes.

For years I made brittle, crumbly cookies.  It was because I used to bake them until completely brown all over (thinking that they were done).  For perfect, chewy cookies, however, it’s important to take them out of the oven to cool while they are still soft.  Wait until they are beginning to brown at the edges and then use a fish slice to transfer them to a wire rack.  They will firm up once cooled.

Enjoy and let me know how they turn out!


Blame it on the baby.

Most of the time, what I choose to cook is based on factors like the time of year, what’s in season, what I haven’t eaten in a while and perhaps an idea for something new that I’d like to try.  My wife (N), is usually happy to be the guinea pig and give me some constructive criticism.  We tend to agree on meals for the coming week and then shop for the ingredients we need if we’re super organised.  Other weeks seem to be a blur of what I can throw together with the impulse buys from a previous trip to the supermarket.  It’s not very often that N will make a specific request, but when she does, boy, do I get excited!  I get a real kick out of preparing stuff to order, as it were.  There’s just enough pressure to make me aim for perfection and I find that making food for others feels very different to making it for myself alone.

A couple of nights ago, N happened to say, “Ooh, d’ya know what I could just eat right now?  A nice chocolate mousse!  Not that I want you to make one now.  I’m just thinking aloud.”  It was all I could do to remain in my seat and passively comment, “Hmmm..I’d eat one too.”  The next day, I rushed out to get enough eggs so that I could prepare the mousse while N was out with friends.  Chocolate mousse is very easy to make, but I managed to mess up just about every stage of it and can only blame it on my baby boy, who was curiously watching me drop eggs on the floor, spill yolk into the bowl of egg whites and generally make a silly mess.  I’m happy to say that no adults were present to stifle sniggers as I went from one disaster to the next, though I could have done with someone sensible to assist guide me.

The lavender in my garden has exploded this year and I haven’t used it much in the kitchen yet.  The chocolate mousse was a perfect chance to add some background flavour.  I cut about five or six buds and steeped them for 20 minutes in boiling water in a mortar.  I then used the pestle to grind the buds for a minute before passing the liquid through a fine sieve.  Next, I passed the liquid through a couple of paper kitchen towels and then once more through a single piece of kitchen paper into a white ramekin so that I could make sure the liquid was completely clear.  It sounds like a chore, but I ended up with a good amount of lavender water that I could use to add flavour to food.  The taste is not a dominant one, so if you decide to do the same, don’t expect the flavour to be obvious.

The recipe for dark chocolate and lavender mousse below is a good one, in my humble opinion.  One element falls short of being completely successful though.  The dark chocolate overpowers the lavender and I regret not using milk chocolate instead.  Here, it was my own taste rather than my common sense that determined what should be in the mousse.  Dark chocolate works much better with equally powerful colleagues such as chilli, cinnamon, cardamom, orange or ginger.  Milk chocolate is light enough to take on the flavour of lavender.  The method for making the chocolate mousse is still useful and I hope you get as much pleasure out of the result as N did.  You may wish to substitute the dark chocolate for milk chocolate if you want to really taste the lavender.  Alternatively, you could just leave out the lavender and enjoy a bit of dark indulgence on its own!

Dark chocolate and lavender mousse

175g dark chocolate

4 eggs (separated)

50g caster sugar

5 tblspoons lavender water (optional)

Break up the chocolate and melt it gently in a glass bowl over some hot water.  Melting it too quickly will give you a grainy texture, so patience is the name if the game.  You could melt it while separating the eggs.  Beat the yolks with lavender water and in a separate bowl, whisk the whites until they form soft peaks.  Add the caster sugar to the whites and whisk again for a couple of minutes until incorporated.

Take the chocolate off the heat and stir until there are no lumps left.  Allow it to cool slightly before pouring in the yolks and stirring well.  Add the chocolate mixture to the whites and fold in with a spatula.  After whisking lots of air into the whites, you don’t want to undo your work by stirring.  As the proteins in the egg whites unravel, they link to one another forming tiny structures that we see as air bubbles.  Stirring destroys these bubbles which is what can make your mousse dense and gloopy.  Take your time and you will see the colour of the mixture change gradually as the whites take on the brown chocolate.  Once it is completely brown, pour the mousse into glasses or ramekins and refrigerate for two or three hours.  With this recipe, I was able to fill four small white ramekins to the top.  It works out roughly as one egg per person, but you will need to increase the amount of chocolate too if you plan on making larger quantities.

This slideshow requires JavaScript.