Breakfast- Last Piece of Cake style!

I suppose you could call it breakfast.  After all, I ate it before midday, certainly before brunch, and a good deal earlier than elevenses.  Is it the best start to the day?  Well that depends on what you’re doing.  For me, it was perfect.

Some call it French toast, but in these parts, it is rather less romantically known as eggy bread.  I wonder how people would react to seeing that on a hotel menu.

I remember eating eggy bread with a good sprinkling of sugar and cinnamon and feeling incredibly satisfied.  It seemed to generate feelings similar to those brought on by eating lots of pancakes.  Lovely!

Perhaps you’ve noticed that I’ve become determined to include vanilla paste in recipes recently.  My fantastic mum got me some last month and I can’t get enough of that dark, dotted, vanilla syrup.  It’s so intense and so wonderfully perfect for all kinds of sweet fun!  I knew that I would have to include it in my indulgent breakfast.  The following recipe is not recommended to those on a calorie controlled diet.

Vanilla French toast with raspberries

1 slice thick white bread

1 egg

3 tblspoons soft brown sugar

3 tblspoons caster sugar

1 tblspoon milk

handful of frozen raspberries

half tspoon vanilla paste

butter (for frying)

I prepared the raspberries by heating them in a milk pan with a little water (two or three tablespoons) and stirring in the caster sugar until it had dissolved.  I continued to heat the raspberries until they began to soften and resemble a chunky jam.

Next I  started to whisk the egg, milk and brown sugar together.  Then I stirred in the vanilla.  I poured this mixture into a bowl and then lay the bread in it to soak up the vanilla loveliness.  After that, I turned it over to soak up the remaining liquid.

In a frying pan, I heated some butter until it was beginning to froth and then placed the slice of bread in it.  I cooked this gently for a few minutes on each side until the egg was cooked through and the bread not soggy.

Taking it off the heat, I used a fish slice to transfer it to a plate and drizzled over the raspberries.  There are prettier breakfasts, but by now I’m sure you’ve come to realise that here at The Last Piece of Cake, it’s all about the taste.  Enjoy!


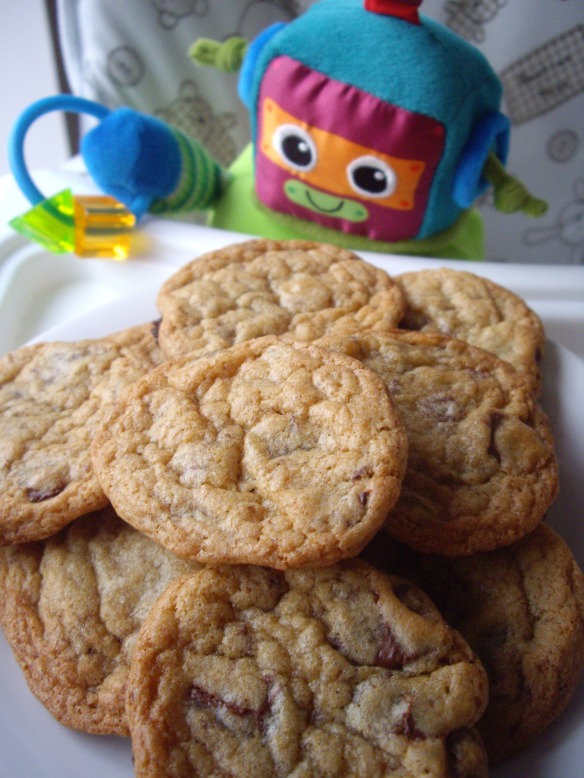
My cookies are the best…on this street.

It’s true.  My tummy said so…and my tummy’s bigger than your tummy!  Granted, England isn’t known for its cookies and most of the population over forty would probably choose tea and cake over milk and cookies.  There will be countless more across the pond who no doubt will stand up and be counted for coffee and donuts.  However, what I’m sharing with you today is nothing less than my ultimate, works-every-time, so-easy-to-make, can’t-wait-till-they’re-out-of-the-oven recipe.  I’ve tried so many recipes over the years and often been disappointed.  That’s why I decided to combine the best bits of every recipe I’ve tried to make these beauties.

The dough recipe is nice and easy, but the best part is that once you’ve got the dough recipe, you can make any type of cookie you want.  That’s why I love these.  Today I’ve made a batch that give a little tip of the hat to my favourite biscuits, dark chocolate gingers.  I have quite a thing for them and I’ve had to stop buying them lest I begin to resemble one.

You, dear friend of food, can load up your cookies with whatever takes your fancy.  I’m sure you have your own amazing cookie dough recipes and it’s likely that they will make my attempts look like My First Cookies, but let me tell you, when I’m going for an ice-cold glass of chocolate milk (and I do so far too often), these cookies are the perfect partner!

What’s your favourite type of cookie?  What should I put in my next batch?

Dark chocolate & ginger cookies

300g plain flour

215g light brown sugar

200g dark chocolate (chopped into little chunks)

170g melted butter

120g caster sugar

120g glace ginger

1 egg

1 yolk

1 tblspoon vanilla extract

1 tspoon ginger powder

1 tspoon salt

half tspoon bicarbonate of soda

Beat together the egg, yolk, butter and sugar.  Add the vanilla and combine with the soda, salt, ginger powder and flour to form a thick dough.

Tip in the chocolate and the glace ginger (or whatever ingredients you are using) and work them into the dough with your hands.  Wrap the dough in clingfilm and refrigerate for half an hour.

Preheat the oven to 180C.  Line a baking tray with baking paper.  Break off small chunks of dough, roll them into balls and press them between your palms so that you have little pucks to place on your baking tray.  The cookies will flatten and spread out in the oven, so leave enough space between them.  They’ll be done in less than ten minutes.

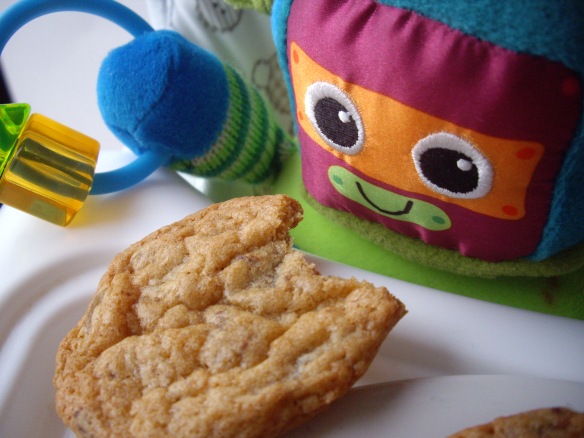
For years I made brittle, crumbly cookies.  It was because I used to bake them until completely brown all over (thinking that they were done).  For perfect, chewy cookies, however, it’s important to take them out of the oven to cool while they are still soft.  Wait until they are beginning to brown at the edges and then use a fish slice to transfer them to a wire rack.  They will firm up once cooled.

Enjoy and let me know how they turn out!


Folklore in the kitchen.

It has been one heck of a Christmas and believe me when I say that it is highly unlikely that anyone in the Northern Hemisphere was the recipient of more chutney than me.  I’m in the enviable position of needing more and more things to put the chutney on.  Spicy tomato chutney vies for my attention with rich, roasted flavours and a chilli kick. Pear and honey chutney jumps out with sweetness and subtlety.  What to do?  Decisions, decisions.  It gets tougher still:  good friends presented me with a chutney packing a real punch.  A chutney simply known as Folklore–  chunky, fruity and full of depth from the dark, yet noble real ale that it is made with.  It is formidable to say the least.

Cast into this fruit-filled arena a newcomer, an unknown from the cupboards of a kitchen in the north of England.  It was time to make my own chutney, one that I would be proud of, one that I could share with you and my family at Christmas.  I’m very happy with what I came up with.  It contains all of the flavours that I love at Christmas with a little chipotle for  fun and goes particularly well with my pork and apricot terrine.  Without further delay, I present to you my Christmas chutney and wish you all the very best for the New Year!

Christmas chutney

250ml red wine vinegar

230g soft light brown sugar

200ml cider vinegar

200g dried apricots (chopped)

1 onion (chopped)

1 chipotle chilli

3 cloves garlic (chopped)

2 tblspoons grated ginger

2 tspoons coriander seeds

zest and juice of 1 orange

1 tspoon salt

Before you begin this recipe, be aware that your kitchen will smell of vinegar from the moment you begin heating the mixture.  You may want to open the windows at the beginning.

Put everything except the coriander seeds into a pan and heat gently until the sugar has dissolved.  Meanwhile, heat the coriander seeds in a dry pan until they begin to crackle (but not burn) and then grind them using a pestle and mortar.  Add the powder to the chutney pan.

Bring the mixture to the boil and then simmer gently for an hour with the lid on.  Stir the chutney every now and again. Take the chutney off the heat when you are happy with the consistency.  Chunky and tender with not too much liquid is best.  Transfer to a glass jar to cool and thicken and remember to remove the chipotle.  Serve with your favourite meat and cheese.  This chutney is great with pork.  Liven up your sausage sandwiches or pair it with a pork pie!

Oh, you expected a full jar nicely labelled? Sorry, this chutney is in constant use!

All’s fair in love and cheesecake.

Which wonders of the food world make you salivate at the mere thought of them?  For me, it’s a good pizza, a slice of bougatsa, Japanese curry, Cajun shrimp, souvlaki or egg and chips- probably all served on separate plates, but not necessarily.

For my favourite little food guinea pig (N), it’s likely that white chocolate cheesecake will make the list.  Alongside blondies, white chocolate cheesecake is one of my few creations that provokes such an excited reaction from her.  I always have white chocolate and cream cheese on hand in case there’s trouble at the ranch.

Perhaps there are wives or husbands across the world right now, preparing a favourite meal for their spouse: a tasty cushion to soften the blow of some bad news, an apology for dessert.  Perhaps there are families gathered around their go-to dish for particular events.  Does anyone else have an “In case of emergency eat this” dish?

I’m happy to report that I’ve not needed to break the glass on the emergency white chocolate for a long time.  In fact, it’s been over a year since the cake has made an appearance (and even then, it was to brighten up a rainy weekend).  Time then to share with you that most precious of recipes: the recipe that puts smiles on me and my dearest no matter what.  Her smile for the cheesecake, mine for her smile.  “For goodness sake!  He’s supposed to be writing about  food!  What’s is he playing at?”  Relax, here’s the oh-so easy recipe.  Enjoy.

White chocolate cheesecake

300g cream cheese

200g white chocolate

175g digestive biscuits

100g caster sugar

120g butter (melted)

60ml double cream

1 tspoon cinnamon

1 tspoon vanilla extract

Begin by crushing the biscuits and stirring in the melted butter and cinnamon.  Press the biscuits into the base of an eight inch round cake tin and place in the fridge for at least thirty minutes.

Next, use an electric whisk to combine all of the sugar, vanilla, cream cheese and cream in a bowl.  Melt the white chocolate gently over a pan of hot water and blend into the cream cheese mixture.

Tip the mixture onto the biscuit base and spread evenly using a plastic spatula.  Place the cake in the fridge for an hour or more to make it firm and easier to cut.  You can now decorate it in any way you wish, but I’ll be honest, I never get as far as that stage.

No bake chocolate cake.

I can only apologise for the delay in food action this week.  Preparation for my baby boy’s baptism have given me little or no time to get close to my beloved oven.

There’s no way that I can resist making something, so it was a real guilty treat to knock together my no bake chocolate.  Essentially, it is nothing more than melted chocolate and some tasty bits, but it does the trick.

No oven, no special techniques or weird ingredients.  Just plenty of chocolate and a gorgeous cake in no time at all.  Been promising to try a recipe out, but not had the time?  Perhaps this is the one for you.  Enjoy!

No bake chocolate cake

250g dark chocolate

230g butter

200g chocolate digestive biscuits

60g demerara sugar

4 tblspoons black coffee

100g pecans

100g glace cherries

100g mini marshmallows

half tspoon vanilla extract

Melt the butter, chocolate and sugar together in a pan and then stir in the vanilla extract.  Crush the biscuits, but not too finely.  Plenty of biscuit chunks is what you’re looking for.  (Plain digestives work just fine, but I’ll take any excuse to get more chocolate into the recipe!)

Stir the biscuits and cherries and pecans into the chocolate.  Add the marshmallows last so that they don’t melt into the chocolate, but keep their shape.

Tip the mixture into a lined loaf tin and place in the fridge until it is set.  Cut thin slices and serve with coffee.


Caramel monster cake.

The first Halloween at The Last Piece of Cake!  I’ve been determined to make something special for Halloween, but I promise to spare you the awful puns and themed vocabulary.

The marketing monsters have really cranked Halloween up in England and not a shop is without a splash of orange, a little purple or a cobweb in the window.  Yes, I think America would be proud of the influence it has had on Halloween festivities here.  Soon, however, the plastic spiders, the chattering skulls and glow-in-the-dark witch’s fingers will be packed away and quickly replaced with snowy scenes and glitter-covered dangly decorations.

Swiftly then, let’s get onto the good stuff!  As I’ve mentioned before, my mum is The Queen of Puddings.  It’s not an official title and to be fair, it’s likely that somewhere in the world, there is a genuine Queen of Puddings who would become rather flustered if she were to hear me bestowing the title on my mum in a food blog.  The fact is, my mum lives for everything that is sweet in this world and far from simply gorging on it, she also creates a fair amount of sugary awesomeness for her adoring family.

This week, mum made some very chocolatey brownies to welcome us back from a trip to London.  Yesterday, she visited with the rest of the brownies because there were too many for her to get through.  You can see how hard my life is, can’t you?

My childhood was one long list of amazing birthday cakes and scrumptious bakes as mum enjoyed being creative and serving up beautiful, warm, joy fresh from the oven.  Birthday cakes ranged from wonderfully iced squares with our name and age to WWF (as it was then) wrestling rings complete with sugar laces for ropes and marshmallows for turnbuckles.  Whatever me and my brother were into at that time, mum would find a way to make a cake from that theme.  She did it with so much love and it has always touched me that she used her creativity in such a wonderful way.  It’s something I’d like to do for my family and I’ve got a feeling that this caramel monster cake will be making an appearance beyond Halloween.

I’d spotted the red food colouring weeks ago during a re-shuffle in my ingredient cupboard.  I knew there and then that the cake I’d make for Halloween would be bright red, but I didn’t know what kind of cake it would be.  Where to start?  Well, red velvet cake is pretty simple to make, but doesn’t really taste of anything.  I wanted a cake that was tasty and not just a novelty because of how it was decorated.  My mum’s cakes always tasted fantastic, regardless of the theme.  Why make a cake that isn’t full of flavour?

For some reason, the internet is awash with recipes involving caramel and salt combinations recently.  No complaints from me, but I’m not sure where the trend has come from.  I love caramel and I thought it might be cool to cover the cake with caramel frosting.  Now that would be tasty!  Plenty of salt crystals would keep me happy and stop me from reaching for the peanut butter (which I think would be a brilliant base for some frosting).  I didn’t want a peanut flavour, I wanted pure caramel.  It was an experiment from start to finish, but I’m happy with this little monster.  Maybe I can scare away the trick-or-treaters with it!

Caramel monster cake

200g self-raising flour

200g butter (softened)

100g dark muscovado sugar

100g demerara sugar

4 eggs

2 tblspoons milk

1 tblspoon ground cinnamon

2 tspoons red food colouring

1 tspoon baking powder

(For the frosting)

1 tin (390g) sweetened condensed milk

100g demerara sugar

60g dark muscovado sugar

2 tblspoons butter

2 tspoons red food colouring

1 tspoon vanilla extract

The cake itself is similar to a basic sponge cake.  The method is certainly the same.  Begin with a bowl of the flour and baking powder and cinnamon.  Add the eggs, milk and sugar and beat until smooth with an electric hand mixer.  Add the food colouring.  You may need to add more to get a really good red.

Divide the mixture between two 20cm sandwich tins lined with baking paper.  Bake in the centre of the oven at 180C for about twenty-five minutes.  The middle should be springy and a skewer should come out clean when the cakes are done.  Cool them on a wire rack until ready to decorate.

To make the frosting, heat all of the ingredients in a small pan until the butter has melted and the sugar dissolved.  Stir constantly to avoid burning the pan.  Make sure the heat is not too high so as to prevent the sugar from burning.  I was careless and burned the bottom of the pan- what can I say?  I’m a genius.

Bring the caramel to the boil and cook for two minutes.  Take it off the heat and continue to stir as it cools.  At this point, I sprinkled lots of sea salt into the pan for extra texture and the lovely saltiness that complements caramel so well.  The caramel will begin to set so you need to start working with it while it is still warm, but not too hot.  I frosted between the two cakes to make a sandwich and then coated the entire cake once assembled.  All that was left to do was to add the mouth and eyes.  I used mini marshmallows for the teeth and found some Halloween jelly sweets for the eyes.  A final sprinkle of sea salt, and the caramel monster cake was complete.

How to ruin a low GI recipe.

I made a lovely low GI recipe and what was the first thing I did?  Buried everything under sugar.  Well done, Dimitri.

The glycaemic index is a ranking of carbohydrates in different foods and how quickly they are absorbed into the bloodstream.  Foods that release their energy slowly usually have a rank of fifty-five or less and are therefore low GI foods.  Apart from a lower calorie intake, the benefits of eating low GI foods is that your body will have energy for longer periods and a reduced risk of health problems.  Sounds good, doesn’t it?

As I’ve said before, I’m not a breakfast person, but this recipe has changed that…at least until the batter runs out.  I found a really cool low GI recipe for hotcakes and thought it would be fun to try one morning.  Of course, the original recipe lasted all of three minutes.  Well, this blog isn’t called The Last Piece of Fruit!  I wouldn’t have any readers if it was.  Truth is, I have a responsibility to you and to my taste buds and I take that responsibility very seriously.  Tasty food and nothing less.

I’ll certainly be writing about a true low GI recipe in the next few weeks, but until then, why not start a Saturday morning with a batch of these fruity hotcakes?  A jolly name for a jolly breakfast.

Fruity hotcakes

800g Greek yoghurt

280g wholemeal self-raising flour

250g frozen forest fruits

130g apricot jam

3 egg whites

1 egg yolk

 1 tspoon vanilla extract

Using an electric mixer, beat the egg whites until soft and fluffy.  In another bowl, mix the flour, yoghurt, fruit, vanilla, jam and the egg yolk.  Once combined, fold in the egg whites.

To cook the hotcakes, heat a little vegetable oil in a pan and drop spoonfuls of the batter in.  Let the hotcakes fry gently and turn them over as they begin to brown.  To completely ruin the low GI qualities of the hotcakes, sprinkle with lots of caster sugar and serve hot.

Where’s the treacle?

Is the following recipe any good?  Well, put it this way; it’s so good, that my wife went back for a secret slice and accidentally destroyed my beautiful, sugary creation.  It slid off the plate as N was putting it back (with an unnoticable slither missing) and was sadly reduced to a crumpled wreck.  It wasn’t intentional, but the fact remains: this is a treacle tart you’ll go back to again and (if it’s still in tact) again.

As a child, treacle tart held no appeal for me.  It was always served hot (a no-no for Dimitri) and didn’t look particularly exciting.  Nothing looks as exciting as chocolate cake.  Even the name of this super-sweet pudding seemed strange to me.  What on Earth is treacle and why would anyone eat it? 

As an adult, I’ve spent time discovering the food that I rejected at earlier intervals in my youth.  The dishes eaten by my parents and grandparents, the food that was popular before the advent of television chefs and giant supermarkets.  My mum is the Queen of Puddings and describes her favourites with delight and a wonderfully descriptive style.  Listening to her describe a good treacle tart is enough to inspire anyone to make this classic pudding.  The ingredients are simple, widely available and for me, surprising.  For a start, where’s the treacle?

Perfect treacle tart

350g golden syrup

250g shortcrust pastry

125g wholemeal breadcrumbs

125g double cream

1 tspoon vanilla extract

Roll out the pastry and use it to line a 20cm cake tin.  Trim the edges and prick the base with a fork repeatedly.  Put the tin into the fridge for half an hour and set aside the pastry trimmings.

Meanwhile, put the breadcrumbs into a medium bowl and pour in the syrup.  Add the cream and the vanilla extract and mix well.

Use the pastry trimmings to make some shapes that you can place on top of the tart before baking.

After thirty minutes, take the cake tin out of the fridge, pour the mixture into it and place your pastry shapes on top.  Bake on the middle shelf of the oven at 190 degrees Celsius for about thirty-five minutes.  The tart will be golden and just set when ready.

If you value your tongue, let the tart cool for some time before attempting to taste it.  When baking, the tart itself is hotter than the surface of the sun.  I like to serve it with ice-cream, but some double cream would be good too.

If you decide to get a sneaky slice when nobody is looking, be careful not to let the tart slide off the plate.  I forgave my lovely wife, but I got the impression that she felt the loss of the tart more deeply than the pang of guilt.  I don’t blame her!

Natural sugars don’t count- part 2: Raspberry & almond smoothie.

Some foods should not be tampered with.  Fresh, juicy tomatoes; a little salt, maybe some olive oil, but nothing more should detract from them.  Freshly made sweet pancakes; fresh lemon juice and a sprinkling of sugar to make them perfect.  Freshly baked bread; some good butter is all you need.

My problem, is that I mess things up by over-complicating them.  I look for new ways to enliven familiar dishes.  Putting twists on classic meals gives me a secret buzz, but inevitably ruins the meals I’m trying to bring to life.  There’s a reason that some things become “classic”.  They were good in the first place and they don’t require a tune up.  Why can’t I just leave things alone?

You know what I’m talking about, right?  That unnecessary topping on an otherwise perfect pizza.  One ingredient too many in the smoothie that would have been fine.  It’s sad to say, but I’m so guilty of messing up perfectly good combinations that it’s a wonder anybody in my family is still willing to try my creations.

There is, however, one bit of tampering that I don’t feel guilty about and one that yields good results every time.  It’s what I could refer to as “The Excess Sugar Technique”.  Spotting a legitimate opportunity for sugar, I simply crank up the amount until it is sweet enough to qualify as a dessert and therefore sweet enough for me.  Exhibit A; my raspberry and almond smoothie.

I realised that smoothies could be enjoyed in a way that is not really intended or endorsed by those with an interest in health.  It wasn’t long before I was having a ‘treat smoothie’ every now and again, instead of the usual healthy glass of fruit and yoghurt.  Far be it from me to recommend this as a regular alternative to your protein-packed blended wonders.  Instead, the next time you are feeling subversive, reach for the caster sugar and load up.

Raspberry & almond smoothie

300ml semi-skimmed milk

2 scoops raspberry ripple ice-cream

150g frozen raspberries

4 tblspoons caster sugar

2 tblspoons Greek yoghurt

1 tspoon almond extract

Blend everything together until smooth.  I sometimes add a couple of soft Amaretti biscuits before blending, but this is optional.

Natural sugars don’t count- part 1: Pear & pecan toffee crumble.

Given the amount of marketing that goes into promoting fruit and vegetables as the way to protect your heart and ensure longevity, it’s amazing how many adults still choose to eat nutritionally poor food on a daily basis.  We’ve never been more aware of the content and nutritional values of food, and yet, obesity is prevalent in a number of wealthy countries with high levels of literacy.  Why don’t people make the right food choices for their bodies?

In my humble opinion, I think choice itself is part of the problem.  Sugary food, food laden with flavourful fat and food containing too much of what we don’t need is often more appealing than healthier, natural options.  I adore peas, love broccoli, would kill for olives and feel incredibly happy when eating sweetcorn, but burgers, pizzas, chicken korma and anything covered in melted cheese is hard to resist.  What hope do greedy folk like me have?

The best thing to do is to treat yourself to the unnecessary sugary and fatty items every now and again and most importantly, to acknowledge that they are just that; a treat.  A couple of days of eating poorly is all it takes for me to get back on track.  Too many treats and they stop feeling like a treat and I enjoy them less.  Over the last few weeks I’ve been making an effort to cut down on the naughty things so that I begin to appreciate them again.  Baking every day is not conducive to this, so I’ve started giving away almost everything I bake to friends and family.  It feels good, but it’s hard to wave goodbye to the freshly baked goods as they leave my flour-covered hands forever.

Vegetables will always be on my plate, though and I love them.  However, what my diet has in vegetables, sadly, it lacks in fruit.  I’m just not a fruit fan.  I love watermelon and I’ll eat just about every fruit going, but I’ll never ask for it or make an effort to eat it.  For all the colour, variety and goodness in fruit, it just doesn’t register on my food radar.  And pudding?  No.  Fruit, no matter how nicely presented, is not and never will be an acceptable pudding.  Scanning a dessert menu, my eyes narrow scornfully should they come across fruit.  Disgraceful.  I want the finest sugars known to humanity and I want them now!

Natural sugars don’t count.  They don’t cut it with me.  I’ve decided to try to address the lack of fruit in my diet by incorporating fruit into my treats.  The first of these is about as sugary as it gets and so delightful, I almost talked myself out of giving it to my mum today.  I said almost.  Mum got the pudding to serve at dinner with my brother and uncle and I got to make what I believe is the nicest fruit-based pudding I’ve tasted.  It wasn’t too difficult to give it away because I’d made a test version last week and the poor pudding didn’t even see the next morning!  I’ll wait a few more weeks before making it again.  Moderation is the key.  Meanwhile, I’ll see what other ways there are to turn fruit to the dark side.  Watch this space…

Pear & pecan toffee crumble

(For the filling)

6 pears (peeled and roughly chopped)

4 tblspoons demerara sugar

3 tblspoons golden syrup

2 tblspoons dark muscovado sugar

30g butter

1 tblspoon milk

(For the crumble topping)

120g self-raising flour

100g butter (diced)

5 tblspoons demerara sugar

2 tblspoons pecans (finely chopped)

Rub the flour and butter together to make the crumble topping.  They should look like breadcrumbs in yoru bowl when you’re done.  Pour in the pecans and the sugar and bake in the oven for five or six minutes at 200 degrees Ceslius until golden.

Next, make the toffee sauce.  In a milk pan, gently heat the syrup, muscovado, demerara, milk and half of the butter.  Once it has come to the boil, let it simmer for five minutes and stir constantly.

In another pan, cook the pears in the remaining butter for about five or six minutes.  Pour the toffee into the pan with the pears and cook for another five minutes on a gentle heat.  Stir the pears so that the toffee doesn’t burn.

Finally, put the mixture into an oven-proof dish and then spread the crumble over the top.  Sprinkle extra demerara sugar on top, if you’re a sugar fiend like me.

Bake in the oven at 200 degrees Celsius for twenty minutes.  The crumble should be golden brown, but not burned.  It might be a little too sweet for some, so a scoop of vanilla ice-cream is a good choice when serving.

Tower of turnovers.

Are food bloggers only writing to fuel their inflated egos?  I think not, but I did read a very aggressive post while checking out some food-related blogs recently.  The blogger was angry at food bloggers who wanted nothing more than to show off about what they were eating, where they were eating and how skillful they were in the kitchen.  Fair enough, nobody wants to read a blog full of boasting, but sadly the writer of this post did not believe that people were genuinely passionate about food.  In fact, he said that the only types of food blog that he could possibly permit were those written by experts in the field, or those that provided recipes for people with special dietary requirements.  Thankfully, I do cater for those with special requirements.  In fact, I’m sure that many of the loyal readers of this blog are butter and sugar-dependent just like me.

Well, there’s only so much negativity I can put up with and it wasn’t long before I’d stumbled across a much more interesting article about the proposed Kingdom Tower in Jeddah that could exceed a kilometre in height!  Yeah, that’s gonna need some serious window cleaners.  Now, if we’re talking about self-aggrandisement, surely there is no greater project that exemplifies this.  It seems such a waste.  All that work and cost for another Four Seasons hotel?  Instead, why not get hold of some cherry jam and some puff pastry and construct a tower made of cherry turnovers? I did! Okay, it didn’t create any jobs and the impact on the economy was negligible, but boy is that cherry jam putting a smile on my wife’s face!

Cherry & marshmallow turnovers

1 block puff pastry (500g)

1 jar cherry jam

80 mini marshmallows

1 egg

coarse white sugar

This is such an easy recipe.  Looking for inspiration and a way to use up the frozen pastry I had, I spotted a jar of unopened Morello cherry jam.  Turnovers sprang into my head, but suddenly, a little food blogger with mini devil horns appeared on my shoulder and hissed, “You’re so obvious!”  I was incensed and let my eyes dart around the cupboard shelves for more ideas.  “Aha!  Mini marshmallows!  Not so obvious now, am I?”  Of course, there was nobody there; just me and some marshmallows, so I got on with the task in hand and tried hard to remember when exactly I first started talking to that little shoulder blogger.

Preheat the oven to 180 degrees Celsius.  Cut the defrosted pastry block into four equal pieces.  Lightly flour your work surface and gently roll out one of the pieces until it is quite thin (less than a centimetre thick).  Cut it into four squares.  Put a tablespoon of jam in the middle of the square.  Place about five mini marshmallows on the jam.  Beat the egg in a small bowl and then brush it around the edges of the square.  This will help to seal it.  Pull one corner over to meet the opposite corner and seal the edge by pressing with a fork.  This will create little ridges around the edge and you’ll have a smooth little triangular parcel.

Repeat these steps and then place the parcels on a foil-lined baking tray.  Brush each turnover with the egg wash and sprinkle lots of course white sugar onto them.  Using a sharp knife, make a couple of slits on the top to allow steam to escape during baking.  Bake in the centre of the oven until golden.  This should take no more than twelve to fifteen minutes.  Let the turnovers cool properly before biting into one.  Hot jam is painful!

I managed to make sixteen turnovers.  More than enough to make a tower.  It’ll never be a kilometre high, but the view (and the smell) from the top was much better than any skyscraper.  It’s amazing what I’ll do to entertain myself.  Feel free to just enjoy your turnovers with a coffee and don’t feel pressured to construct pastry fortifications.  However, if you feel compelled to make a tower and it turns out to be bigger than mine, I promise not to try to beat it.  Promise!

Aerial view of the tower. It houses over 80 mini marshmallows and is 8 turnovers tall.

Joy on a plate.

You’ve just created something and it’s really good.  It’s so good that you want to jump and laugh and shout out, so you do.  Then you want to go and tell someone, show someone and point at what you’ve created and exclaim, “Look what I made!”  Joy is kindled.

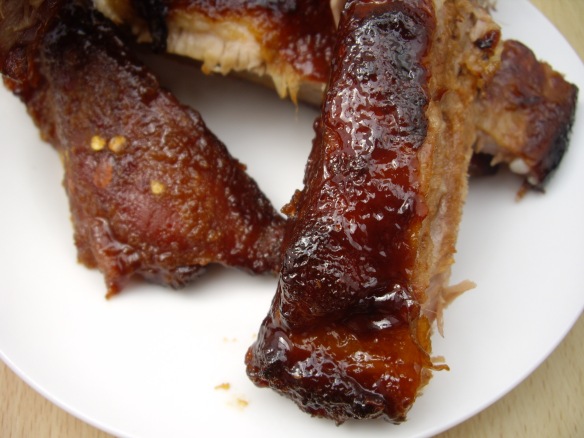
As an adult, there seem to be fewer and fewer of those moments.  Children seem to be constantly in the throes of creation and discovery is just around every ordinary corner.  Imagine the reaction I just wrote about happening in my kitchen about a year ago.  I’d just finished making barbecue ribs without the help of a book, a friend, or that white page with the little box for you to type in a question and click enter.  I’d just finished making barbecue ribs, I did it on my own, they were wondrous and they were mine.  Now I’m going to share the recipe for them.

My recipe for sweet and sticky barbecue ribs is tailor-made for domestic kitchens.  I know that you can get amazing results by cooking outside and getting so much smoke and flavour from blah blah blah.  Let’s get a cab and head for Real Street.  I live in a wet and windy part of the world with only glimpses of sunshine and a default setting of grey with a chance of greyer.  If you’re blessed enough to live in the sun and are adept at cooking outdoors, then…can I come and stay with you for a while?

The ribs require two hours of uninterrupted cooking, so plan ahead.  You’ll also have to trust me on a couple of things; namely the amount of sugar in the recipe.  I used all the things that I love for the ribs.  You could easily adapt the recipe for your own taste.

Sweet & sticky barbecue ribs

1 sheet of pork ribs

500g light brown sugar

40g garlic salt

1 tblspoon chilli flakes

half cup water

(For the glaze)

4 tblspoons clear honey

2 tblspoons dark soy sauce

3 tblspoons barbecue sauce

Preheat the oven to 160 degrees Celsius.  Place the ribs in a roasting tin ready for the rub.  Pour the garlic salt and the chilli flakes into a pestle and mortar and grind for a few minutes.  Rub this all over the ribs including the underside, making sure to be thorough.  Next, tip all of the sugar onto the top of the ribs and pat it down so that you have a thick layer of sugar on top with no meat uncovered.  I’m serious, trust me!

Pour the water into the bottom of the roasting tin (not over the ribs).  The water is going to help steam the meat during cooking.  This will keep it moist and soft.  Cover the roasting tin with two layers (or more) of foil and make a tight seal around the outside.  We don’t want any of that wonderful steam to escape.

Cook in the centre of the oven for two hours.  Don’t be tempted to take a peek lest all that steam disappear.

This slideshow requires JavaScript.

About five minutes before the ribs are due out of the oven, mix all the glaze ingredients together with a pastry brush in a little pot or ramekin.  Take the ribs out of the oven and carefully remove the foil.  Fire up your grill (or broiler if you’re from over the pond) ready for the final part.  The ribs will now be cooked through, but looking rather pale and sad.  Time to glaze!

Place the ribs on another tray lined with foil.  Brush the ribs with the glaze and put them under the grill on a medium heat.  As the glaze sets, remove the ribs and brush them with more glaze.  Continue to do this until you run out of glaze.  The idea is to build up sticky layers.  It won’t be long before the sugar in the glaze caramelizes and begins to burn at the edges giving you lovely crispy bits and oodles of flavour.  Did I just say oodles?  Hmmm…I’ve not seen that in type before.  Anyway, don’t panic if edges begin to burn.  A little here and there is perfect.  Just keep a close eye on the ribs because sugar burns quickly.

That’s it!  Done!  Now you just need to cut them up for your friends and soak up the silence as everyone tucks in.  There’s nothing like the slience that settles upon a table of happy eaters.  It’s up there with “Look what I made!”

Choc-a-block.

There’s a reason for the misspelt title of this post.  It’s the wonderfully aromatic (yes I said aromatic) chocolate cake that I’ve just made.  A new recipe from The Last Piece of Cake?  I wish!  The recipe has been posted by Aoife at Yumbolicious.

If you haven’t checked it out yet, click on the link and have a look!  I had almost all of the ingredients in the cupboard, but I had to make a few adjustments where I was lacking.  I used dark brown sugar, almond extract and added quite a lot of my Green & Black’s chocolate drink powder.  The cake was just as Aoife describes in her post.  The addition of cardamom is genius.  I’m off to cut more slices and smother them in chocolate spread!

A great chocolate cake recipe from Yumbolicious!