All the trimmings.

SAM_1613

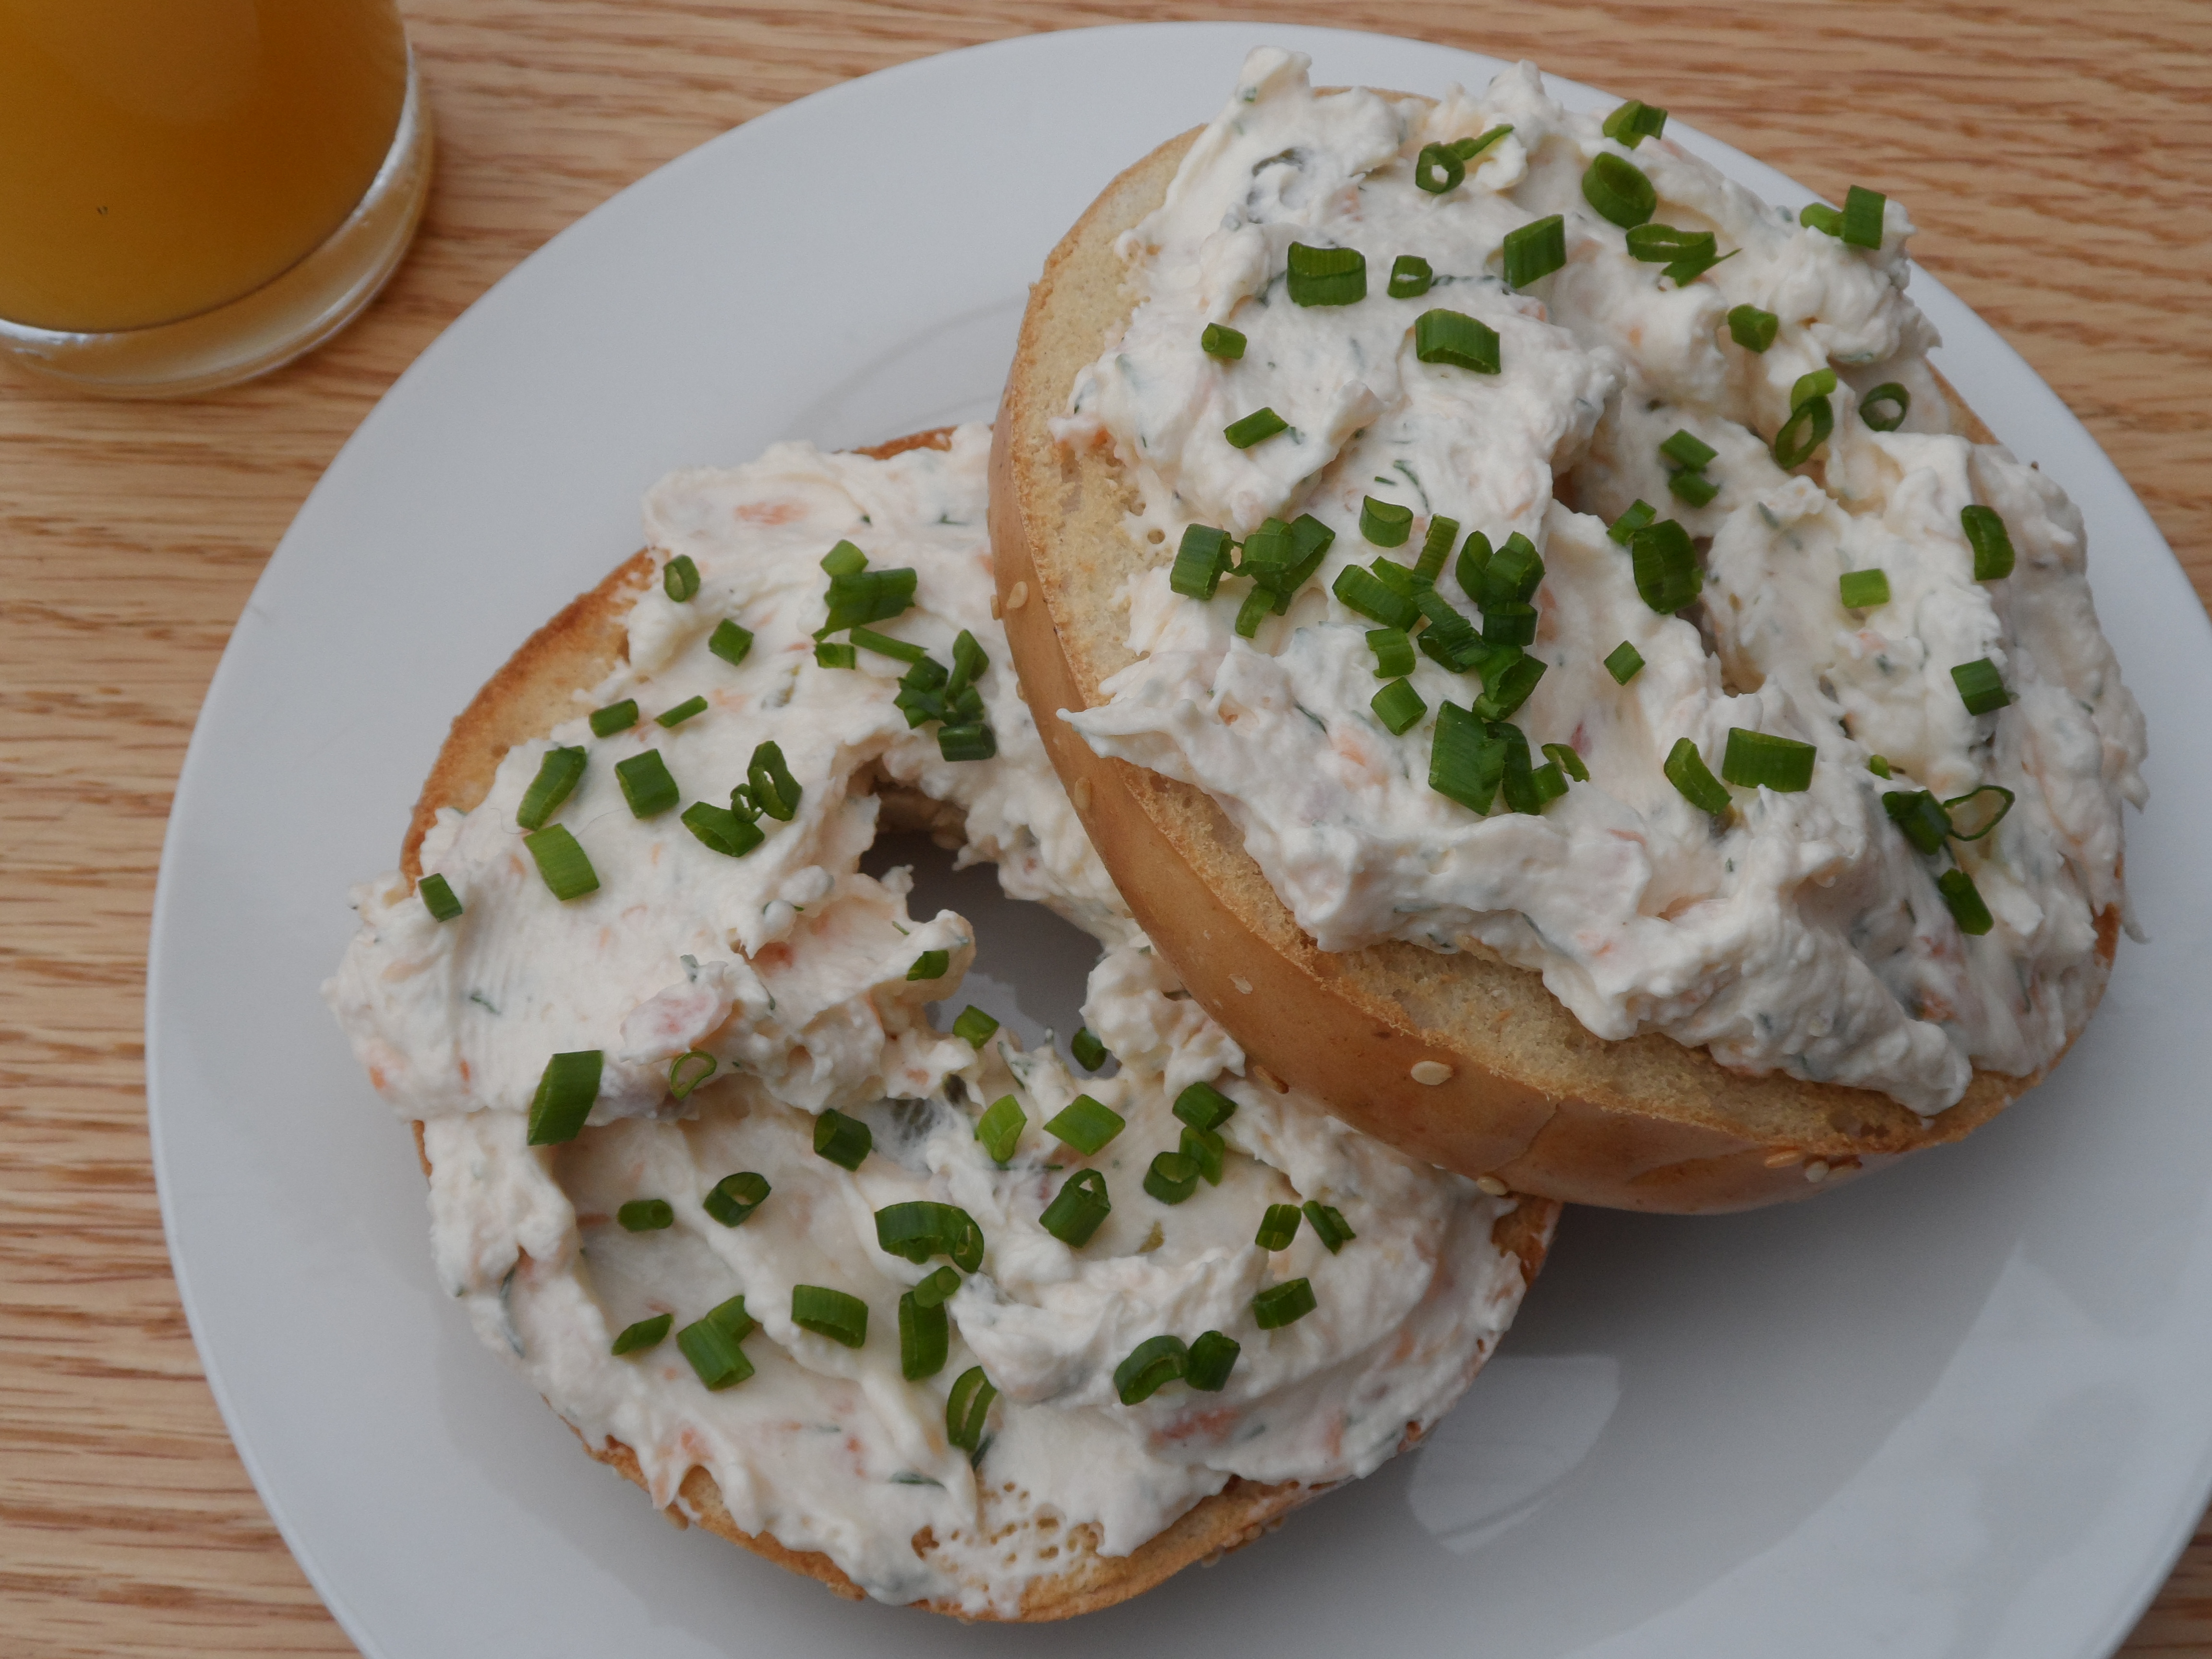
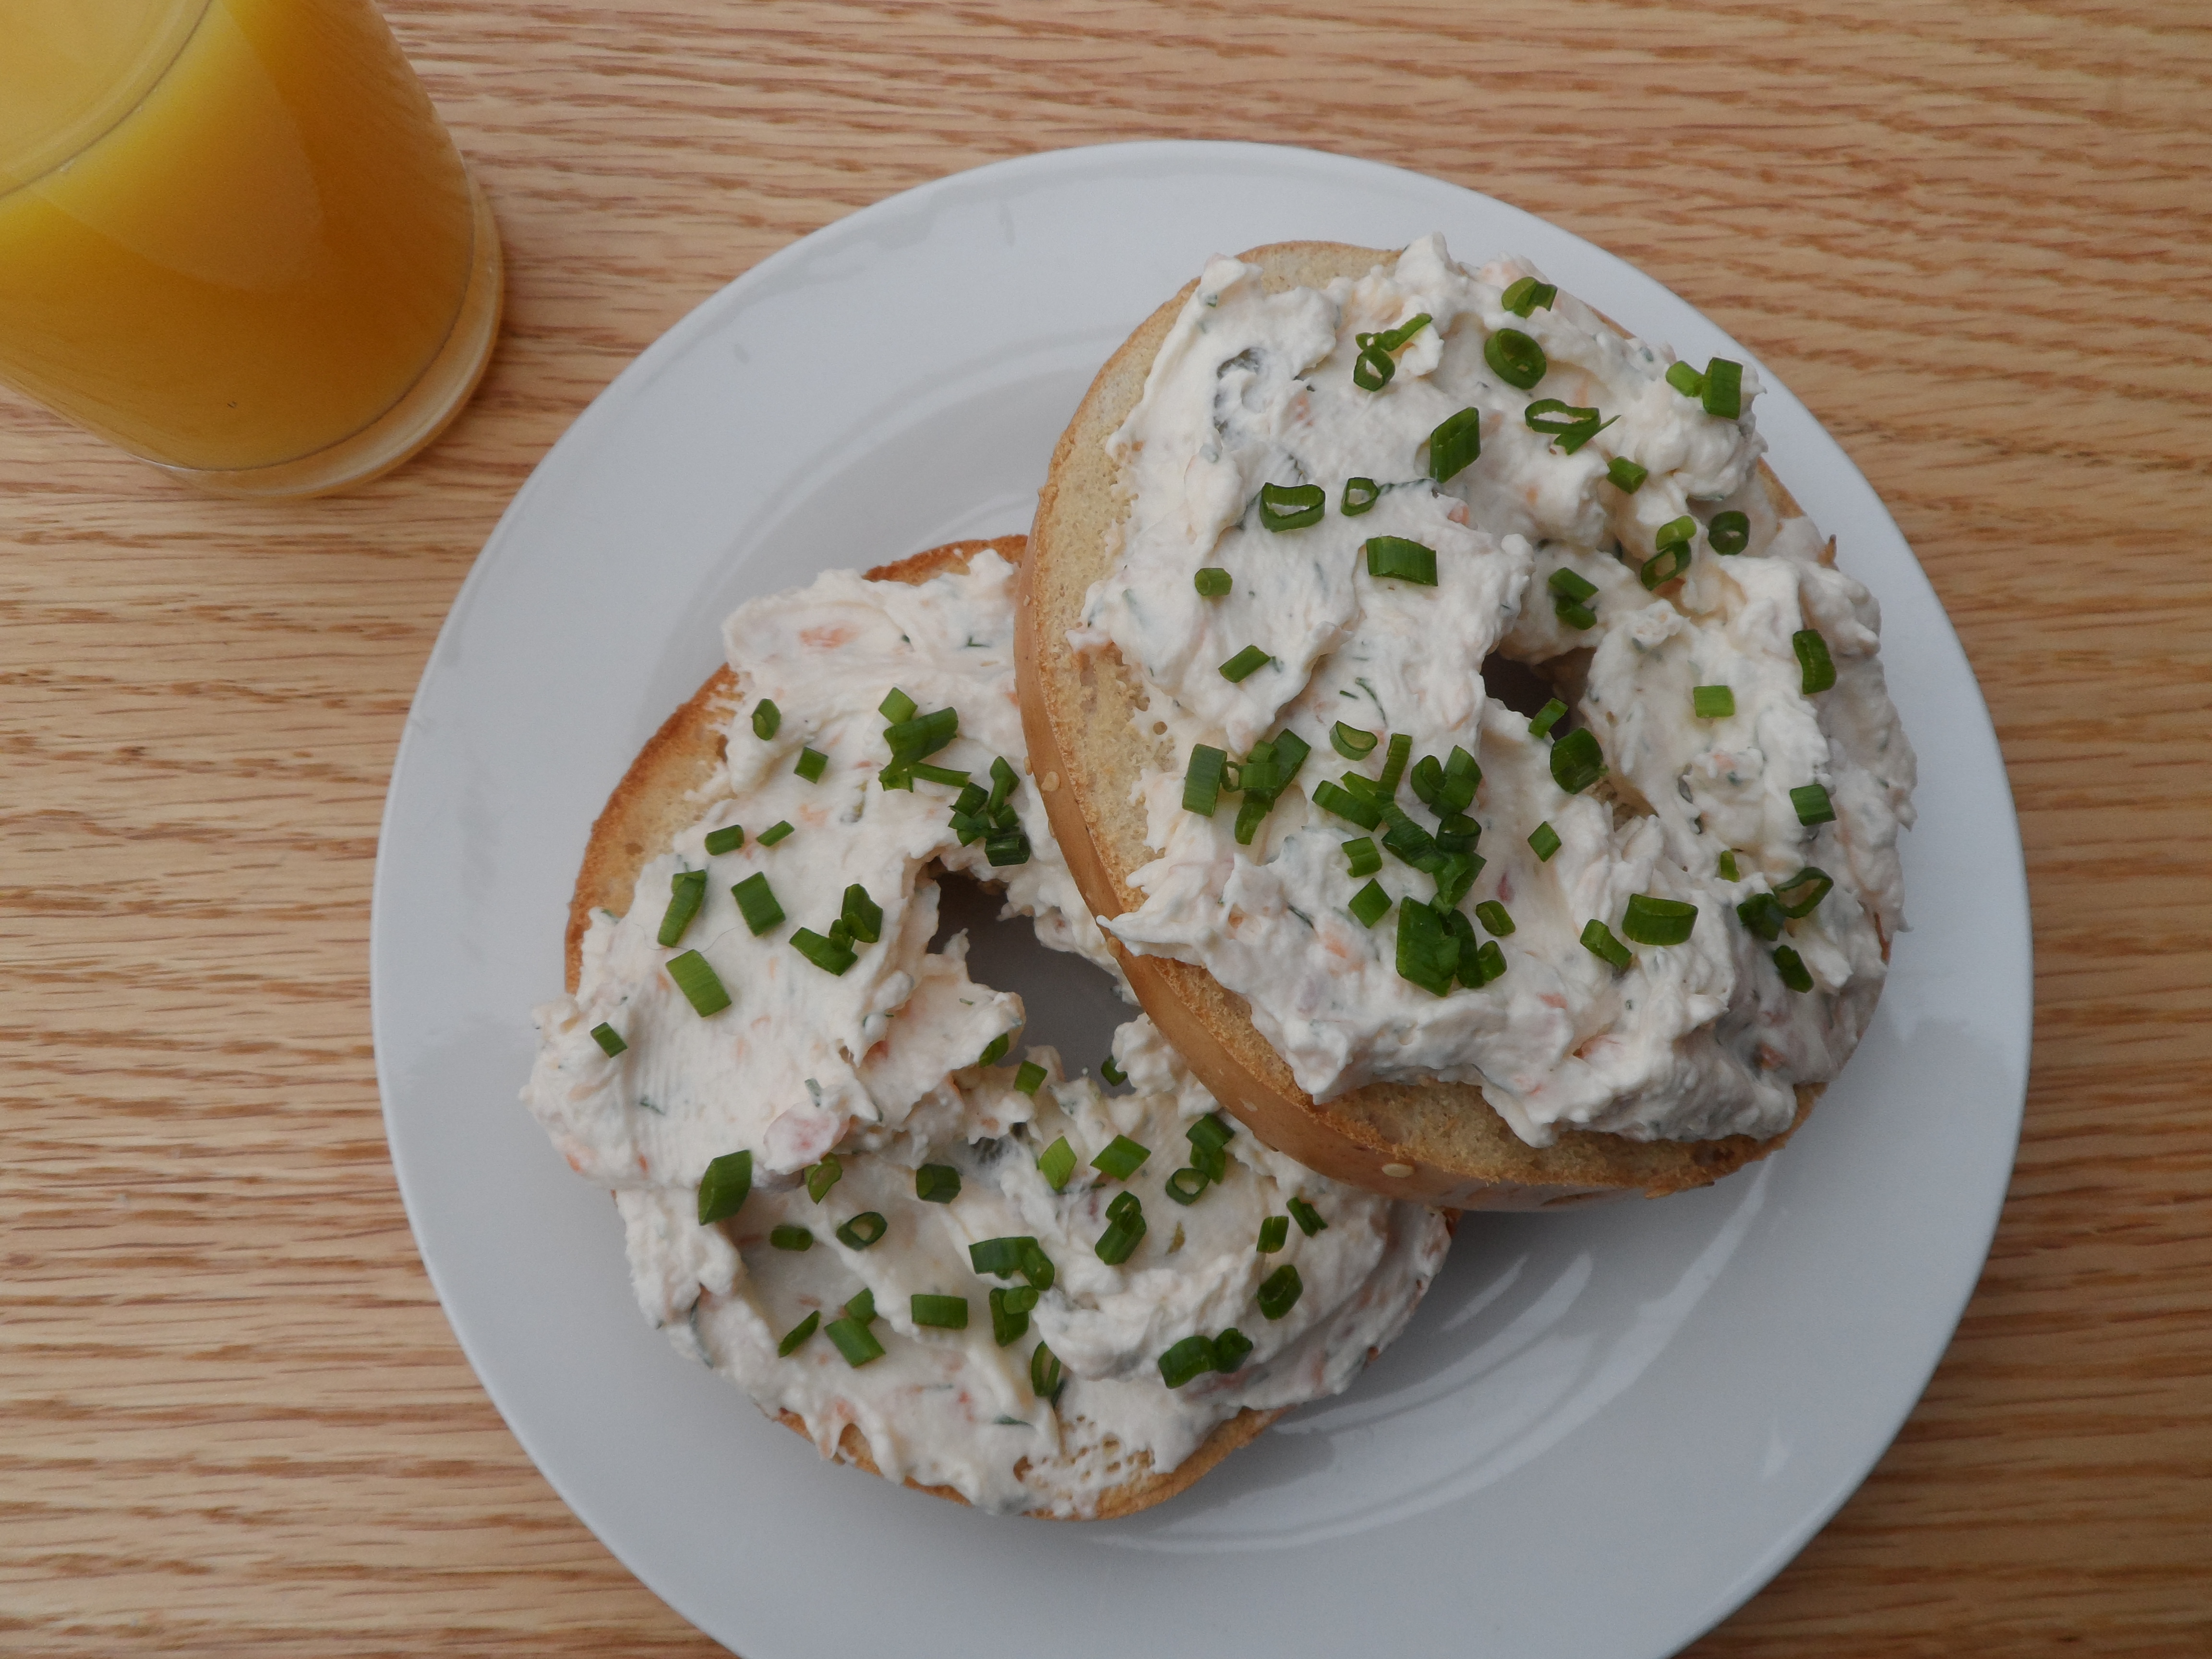
I’ve written before about my love dips and there are a couple of recipes on this blog that I use regularly.  A new favourite is this smoked salmon dip.  Me and N were looking forward to our wedding anniversary recently and I said I’d make us a nice breakfast.  Smoked salmon is perfect for occasions and I decided to make a tasty dip with some that could also be spread on bagels.

It was a perfect choice for breakfast because it was fairly light and great with some toasted bagels.  Later I made some bagel chips by slicing a bagel and toasting the pieces on a baking tray under the grill.  These were fun when I got into a dipping mood…and you know how that goes.

This dip can be made with some basic ingredients and the addition of smoked salmon trimmings makes it easier on the pocket.  In my opinion, using the finest smoked salmon you can buy for a dip like this would be wasteful and foolish.  The flavours are still just as smokey and delicate with trimmings and the result sublime.

SAM_1624

Smoked salmon dip

300g cream cheese

150ml double cream

150g smoked salmon trimmings

12 cornichons (sliced)

1 tblspoon fresh chives (chopped)

1 good handful fresh dill (chopped)

1 heaped teaspoon horseradish sauce

sea salt and black pepper

SAM_1612

You’ll love how easy to prepare this dip is; five or six minutes, tops!  In a medium bowl, use an electric mixer to whip the double cream until it just begins to stiffen.

Add the cream cheese, horseradish sauce, dill and pepper.  Combine using the mixer and finish by adding the cornichons and salmon trimmings.  Mix together and then taste.  Season with sea salt and plenty of black pepper.

However you choose to serve this, finish it by sprinkling a generous amount of freshly chopped chives on top.  It’s not just for colour, the faintly onion flavour goes so well with the salmon and helps keep everything light and fresh.

SAM_1623

Cherry crackle crispies.

What’s your memory of childhood birthday parties?  Whether I attended a party at a friend’s house or was lucky enough to have one myself, one delightful memory springs to mind: Scanning the party food and spotting a big plate of Rice Krispy cakes.

Melted chocolate mixed with lots of puffed riced and spooned into cupcake cases brought (almost) endless joy to this greedy little lad.  My tendency to scoff as much as possible coupled with my preference for savoury food, made me a fiend at buffets (and still does).  Even at the age of ten, however, Rice Krispy cakes had a power over me that sausage rolls and crisps did not.

For the last few days, I’ve had an image of those little bites of fun in my head and today I was able to sate my hunger for them.  Of course, I’ve added some surprises of my own, but you probably guessed that already.

Cherry crackle crispies

300g milk chocolate

100g Rice Krispies

100g glace cherries

50g mini marshmallows

7 tblspoons cherry flavoured popping candy

Half tspoon almond extract

I just love anything flavoured with cherries, so I adapted this ultra-basic favourite to include glace cherries, mini marshmallows and an extra surprise.  I used to buy the odd packet of popping candy and pour it onto my tongue to let it fizz and crackle loudly.  I’d never put it into a recipe before, but I certainly will again!  Adding seven packets of cherry flavoured popping candy gives these crispy cakes an unexpected and not entirely unpleasant sensation.  These “cakes” really do crackle!

Simply melt the chocolate in a glass bowl over some hot water and stir in the almond extract.  Believe it or not, the almond extract is a great partner for anything with cherries in it.

Pour the chocolate into a plastic bowl filled with the rest of the ingredients and mix together thoroughly until everything is completely coated.  I reserved a few mini marshmallows for decoration, but this is optional.  Isn’t everything?

Spoon the mixture into paper cases and refrigerate for a few minutes until the chocolate has set.  Eat at the earliest opportunity and let the party on your tongue begin!

God save the quiche.

Too many people say that they don’t like quiche.  In my experience, quiche gets a rough press and often deservedly so.  The problem is that there’s an abundance of bad quiche out there.  Who’d want to bring children into a world where so many crusts are soggy, fillings are meagre and texture is akin to a fritatta left out in the rain?

Join the fight then, to bring taste and texture back to the long-besmirched picnic regular.  Champion the cause of quality quiche!

For my own part, I’m focusing on three key areas that will ensure a quiche that anyone would be eager to polish off in one sitting: A dry and crumbly base, a firm, yet creamy filling and as much flavour as you can pack into every bite.

I too have been left saddened after tasting another soggy shop-bought cheese and onion quiche.  My memories of the worst buffets include a quiche covered in soggy tomatoes and a bendy base.  I’ve eaten more watery quiche Lorraine than I’d care to mention and always with the feeling that someone had picked all of the bacon out of my slice just before I got to it.  No, quiche is at the very bottom of many a food list.  Something has to be done.

The recipe I’m posting today is a favourite of mine.  I first made it about four years ago after deciding that I wanted a quiche that would sate my hunger for a really cheesy flavour and the freshness of chives.  I didn’t want a mere hint of cheese, I wanted an unmistakable celebration of it.  With that in mind, I present to you, my first (but certainly not the last) volley in the battle for great quiche!

Chutney? Don't mind if I do.

Dimitri’s double cheese & onion quiche

500g shortcrust pastry

260ml double cream

150g Red Leicester cheese (finely grated)

100g mature Cheddar cheese (finely grated)

5 spring onions (sliced)

2 eggs

2 egg yolks

1 bunch chives (finely chopped)

1 tspoon black pepper

1 tspoon sea salt

Grating the cheese finely ensures plenty of cheese in every bite.

I use frozen pastry, but feel free to make your own.  I begin by rolling it out on a floured surface until it is just less than a centimetre thick.  I place it in a nine-inch sandwich tin (which I normally use for cakes) lined with baking paper.  You can use a quiche dish or anything similar as long as it is at least an inch deep.

If you don’t have baking beans, pour in dried pasta or any type of dried bean so that they cover the base.  Bake the pastry in the oven at 180C for about fifteen minutes on the middle shelf.  Remove the beans and return the pastry to the oven until the base is golden.  This will ensure that you avoid soggy pastry.

In the meantime, beat the eggs, yolks and double cream together in a large bowl.  Add plenty of salt (so that you don’t end up with a bland quiche) and black pepper.  Next, add the spring onions and chives and finally the cheese.  Mix it all well so that the thick mixture has an even distribution of cheese, onions and chives.  You can use other types of cheese that you like.  I chose mature Cheddar for sharp flavour and the Red Leicester for colour and a mellow aftertaste.

If your pastry was overlapping, now is the time to trim it with a sharp knife.  Pour the filling into the pastry and cook in the oven for about forty-five minutes.  The middle needs to be set, so test it with a skewer after forty minutes.  If it comes out clean, the quiche is set.  Cover the quiche with tin foil if it begins to burn on top.

Let the quiche cool slightly before tucking in.  This will help it to set nicely.

You can serve the quiche hot or cold.  Either way, you’ll convert a lot of quiche naysayers.  I guarantee it.

Use your loaf (tin).

I trust your Christmas was filled with family, joy and inevitable chaos.  Mine too, hence the late post.  Despite the passing of the big day, I’m going to share the recipe for my very own pork and apricot terrine.  It’s perfect for a buffet and I make one (sometimes two) every Christmas.

You can easily adapt this recipe so that your own Christmas flavours are represented.

Pork & apricot terrine

500g sausage meat

14 slices streaky bacon

14 dried apricots

1 egg

2 tblspoons ground black pepper

1 tblspoon fresh thyme (chopped)

a pinch of ground allspice

a pinch of mace

a pinch of cinnamon

plenty of sea salt for seasoning to taste

olive oil

You have to admire the humble loaf tin.  So useful!  Line one with the bacon so that half of each slice is in the tin and the other half is draping over the sides.  The bacon keeps the terrine together as it cooks and will tighten up as water evaporates from it.

Grind plenty of black pepper into the lined tin.  Next, in a medium bowl, combine the remaining ingredients by mashing them together with the back of a fork.  A drop of olive oil into the mixture helps to keep it moist.  Tip half of the sausage mixture into the loaf tin and spread it evenly with the fork.  Gently press the apricots into the meat in pairs.  This will ensure that the apricots form part of each slice as you cut the terrine.

Top the apricots with the remaining sausage meat and once again, use the fork to even out the surface.  Now all you have to do is lift each bacon slice to cover the terrine and overlap them to form a parcel.  You can store the terrine as it is in the fridge until you are ready to cook it, or you can cook it immediately.

Place the terrine in a roasting tin and pour enough hot water into the surrounding tin to reach almost the top of the terrine.  Cover the loaf tin with foil and keep the edges sealed tightly.  Place in the middle of the oven at 180C for an hour.  The water surrounding the loaf tin will ensure even cooking and the foil will trap steam to help cook the meat without drying it out.

After an hour, remove the foil and continue to cook the terrine until the bacon on top is nicely done to your liking.  Using oven gloves, lift the loaf tin out of the water and drain of the excess fat rendered through cooking.  You may want to keep this fat and roast some potatoes in it later!  The meat will have shrunk away from the edges of the tin; this is normal.  Use a pair of tongs to turn the meat over.  Keep the meat in the little loaf tin and return it to the oven to brown and crisp up.

Once done, remove the meat and let it cool for quite some time.  When it is cooled, it will be firm and easy to slice.  Serve the terrine cold with a nice Christmas chutney.  You don’t have any Christmas chutney?  No problem.  Watch this space!


I will raise you as my own.

The English have big love for pies.  Sweet or savoury, pies are well represented on English plates.  I’ve made fruit pies sprinkled with sugar and I’ve made pies filled with meat and gravy, but I’ve never attempted a pork pie.  The classic buffet and picnic pie of choice for the English has always been something of a mystery to me.  Probably made by wisened old artisans whose knowledge of pie-making has been inherited and protected with the kind of secrecy alluded to in low-brow Templar fiction.  Or are they mass-produced vehicles for the less palatable parts of a pig?  It was time to learn something new and in the process, perhaps make something special.

First of all, what’s the appeal of a good pork pie?  The pastry is special.  A golden brown with an attractive glaze and a crumbly promise of savoury comfort.  Okay, too poetic, but pork pies are made with a hot water crust that contains lard.  This makes it tasty and gives it a wonderful texture upon baking.  The pastry is pressed against the sides of whatever it is baked in to form walls.  The walls get higher until they are ready to be filled.  Raising the pastry in this way produces what is known as a hand-raised pie.

Secondly, pork pies are good when they’re hot and even better when they’re cold.  Pickles, chutneys and relishes are fantastic with pork pies and the fact that their contents doesn’t ooze out makes them a perfect travel companion.

I looked at a few online recipes for the pastry before I attempted to make it.  In the end, I chose to use Delia Smith’s recipe for the pastry.  The contents of the pie, however, were a very successful little experiment and as I type, I’m finding it very difficult to contain my pride.  If you want a treat, go and buy a Melton Mowbray pork pie.  If you want to experience the joy of creating something tasty and beautiful (in the most rustic of ways), then it’s about time you made your very own hand-raised pork pie.

Hand-raised sausage & bacon pies

(Pastry adapted from Delia Smith)

225g strong white flour

75g lard

25ml milk

pinch of salt

black pepper

1 egg yolk (to glaze)

(For the filling)

275g sausage meat

6 slices smoked bacon

150g smoked ham

1 tspoon fish sauce

half tspoon ground allspice

half tspoon ground mace

black pepper

pinch of salt

It’s best to make the filling first so that you can work quickly with the pastry before it dries out.

I fried the bacon until crispy and then mixed it with the rest of the ingredients until well combined.  If you want to check the seasoning, you can fry a little of the filling and taste it once cooked.

As in Delia’s recipe for the pastry, begin by heating the milk and lard in a pan.  Add 25ml of water and bring everything just to the boil.  Pour it into a bowl containing the flour and use a wooden spoon to combine everything.

Now it’s time to build up the pastry crust ready to be filled.  I used little stainless steel pudding moulds.  I pressed a little ball of pastry into the base and began adding more pastry and forming the sides of the pie.  When I got to the top, I overlapped the edges and filled the pies with the filling, making sure that I pressed down firmly using the back of a spoon.  Once level, I folded the edges of the pastry in and made a little hole for steam to escape through during baking.

I used the beaten egg yolk to glaze the top of each pie before sliding them into the oven at 180C for half an hour.  I then carefully removed the pies from the molds, glazed the sides with more yolk and put them back on a baking tray to finish in the oven for another twenty-five minutes.  This made the crust golden and firm.

The pie filling looks quite pink in the photographs, but this is just the bacon.  I can assure you that the pies were firm and fully cooked through.  Their spicing was just right and the crumbly pastry was delicious.  I ate mine with lots of Branston pickle.  One thing’s for sure, I’ll be making these at Christmas and serving them with lots of chutney, cheese and some strong red wine.  Then in the spring, they’ll be coming with me to the beach and the park for some picnic action.  All in all, I’m glad I tried my hand at making these.  You will be too!