To choc or not to choc. Is that really a question? 

Seems silly to post a recipe for chocolate torte on the day I decide to get into shape. I never was one for convention. I stare down at my tummy with a mixture of contempt and satisfied pride…it’s been a fun journey. Now things must change.

For some time I’ve managed to consume inordinate amounts of sugar and fat through various favourite treats and done little to redress the balance. So today I am posting a gorgeous recipe for something that may well come to be the last piece of cake for some time; except that it’s not a cake at all. It’s a torte and it’s so dark and satisfying, that I couldn’t think of anything better to finish my run of gluttony on.

Oh, I’ll be posting yummy goodness as usual, but I’ll be doing my best to preserve my arteries too. A tricky balance to strike. We all need a cheat day though and that’s when I’ll be cooking up a sugary storm and sharing it with you. You didn’t think this was going to become one of those healthy lifestyle blogs did you? Ha! Onwards! Chocolate awaits!

Dark chocolate torte.

600ml double cream 

300g dark chocolate (70% cocoa solids)

3 tblspoons golden syrup

1 packet cookies (crushed) to cover the torte

Such an easy recipe. It’s no wonder staying in shape is a challenge for me.  Begin by lining a 20cm loose-bottomed cake tin with cling film. 

Melt the chocolate, syrup and 200ml of the cream in a saucepan on the lowest heat. Stir frequently to get rid of lumps. People recommend placing the chocolate in a bowl and heating it gently over a pan of hot water, but I’ve got a life to live and I just want the ingredients melted…this is a kitchen, not a spa retreat.

Meanwhile, whisk the rest of the cream in a bowl until it is just about to form stiff peaks.

Leave the melted ingredients to cool slightly before folding them into the cream. Be sure to take time with this stage. Patience will pay off because you’ll achieve a smooth and even consistency throughout the torte.

Carefully pour the torte mixture into the lined tin. You could leave this in the fridge overnight, but that’s what boring people do. Instead, reclaim some of your teen spirit by putting the torte carefully in the freezer for a couple of hours. Stick a knife through the middle to test it. The torte is ready when the centre is firm. Turn the torte upside onto a plate and slowly remove the  cling film.

To finish, I blitzed a dozen Maryland chocolate chip and hazelnut cookies and then covered the entire torte. Done.

Just a small note: this torte is darker than a January morning and the chocolate hit is deeper than an abandoned mine shaft…be careful. 


A month of sundaes- The Jaffa Cake Sundae.

SAM_1903

If you’ve never eaten a Jaffa Cake, there’s still time!  Despite its biscuit-like dimensions, the Jaffa Cake is just that; a cake.  Don’t believe me?  Simply leave one on the side for a day or so, and it’ll go hard, not soft like biscuits do.

If you’re still wondering what a Jaffa Cake is, well it’s a round little sponge cake containing orange jelly and topped with a thin layer of chocolate.  Actually, that description really doesn’t do any favours for what must be one of my most beloved treats.  There are few other snacks that I devour as quickly (popcorn, pretzels, honey roasted nuts and crisps are up there).  Jaffa Cakes are just so easy to eat and so much fun.

So where do they come into the realm of recipes?  Well, with spring beginning to gain momentum, I’m looking forward to the return of ice-cream and treats that refresh rather than stodgy puddings.  A recent meal at a nearby pub inspired me to come up with a fun sundae that I could enjoy.  Pubs have started to shift their focus toward good value meals and several chains have revamped their menus to include desserts topped with this and that and tagged with a catchy name.  Sadly, I’ve yet to taste one that lives up to the lively description in the menu.  My sundae arrived with little fanfare and amounted to three pieces of honeycomb floating in a pool of melted vanilla ice-cream.  Hardly the show-stopper pictured on the glossy menu.  I knew I could do better.  I knew my kids could do better.  Enter the Jaffa Cake Sundae.

It’s become something of a trend to use branded confection to sell below-standard food to the brand-loving consumer.  I wanted to avoid this kind of unimaginative approach.  I didn’t want ice-cream simply topped with a bar of my favourite chocolate.  Instead, I wanted components that would work together to give an overall taste and texture of things that I love.  The chocolate, orange jelly and sponge of a Jaffa Cake could be an interesting experiment.  With that in mind, I decided to load up on simple items that could create a satisfying sundae based on Jaffa Cakes.

What follows is less a recipe and more a description of what I did with several shop-bought items.  It’s so simple, I don’t know why I didn’t do it before and it’s delicious!

Jaffa Cake Sundae

Packet of orange flavoured jelly (prepared according to packet instructions)

Madeira cake

Vanilla ice-cream

For the sauce

50g dark chocolate

50g milk chocolate

Lyle’s Golden Syrup

butter

SAM_1905

This is an out and out assembly job, hence the lack of detailed measurements.  In truth, you can add as little or as much as you like of each ingredient to suit your taste and whatever you are choosing to serve your sundae in.  This time, I chose a chubby tumbler to stuff full of Jaffa goodness!

Begin by making the chocolate sauce.  In a bowl, melt the chocolate with a little butter and a good table spoon of golden syrup.  Stir and set to one side to cool slightly.

Next, slice a thin piece of Madeira cake and press onto the bottom of the glass.  Add a generous layer of jelly.  Top the jelly with a few scoops of vanilla ice-cream and pour plenty of the sauce over it all.  You can repeat these layers if you’re using a tall glass.

This is now my new guilty, summer pleasure!

SAM_1907

Caramel Tiramisu.

SAM_1455

If you’re of Italian descent, look away now.  I’m going to share a recipe for tiramisu, but not as you know it.

It would probably be fair to describe Italy’s cuisine as the most popular in the world.  Can the contribution of pizza really be surpassed?  I think not.  Perhaps most appealing is the versatility of Italian dishes.  The U.S has taken the basic concept of pizza and taken it to another level, though sometimes with questionable results and much to the horror of Italians, I’m sure.

Today, Italian flags are used to sell all kinds of food products in a bid to attract those with an eye (and a palate) for the authentic.  Italian food is predominantly marketed by relying heavily on tradition and the heritage of the food in question.  It seems that the public would much rather buy food with a long history and preferably a lineage that guarantees reliable production techniques and a family feel to the branding.

I can certainly identify with that preference.  Buying from a family-run company with history and heart makes for a much more satisfying purchase.  However, you can have too much of a good thing.

Bound into the long-standing traditions of many an Italian recipe, are conservative attitudes that can border on severe.  What is a traditional pizza?  When is a pizza not a pizza?  What is the definitive recipe for [insert popular Italian dish with highly disputed ingredients and/or cooking methods]?  At one time, questions like these would have mattered to me.  However, I’ve eaten enough to know that in the end, what matters most is the taste.

For some, twists, variations, innovations and improvements are unacceptable in certain recipes.  Much to the chagrin of any conservative Italian readers, I would like to share a recipe that would not perhaps qualify as a tiramisu in certain circles.  You can call my recipe whatever makes you happy.  I call it my Caramel Tiramisu and it’s about as good as a pudding gets.

SAM_1454

Caramel Tiramisu

250g mascarpone cheese

395g sweetened condensed milk

2 Daim bars

6 sponge fingers

4 shots of espresso

20ml caramel syrup

cocoa powder for dusting

I made 3 individual pots using the quantities shown above.  Daim bars are widely available in the UK and parts of Europe, but may not be easy to find in America.  They are a buttery almond caramel coated in milk chocolate and they’re delicious!

SAM_1456

I used an electric mixer to blend the condensed milk and mascarpone cheese in a bowl.  I used a pestle and mortar to crush the Daim bars into a caramel rubble and then stirred them into the cheese mixture.

Next, I put the coffee in a shallow bowl, stirred in the caramel syrup and dipped the sponge fingers in.  If you let them soak up too much coffee, they’ll be very soggy.  I used two sponge fingers for each individual pot.  To begin with, I broke a sponge finger in half and pushed it into the base of the pot.  Then I added a big layer of the cheese mixture and gave it a good dusting with the cocoa powder.  I then put another layer of sponge finger on top and repeated with the cheese mixture and plenty of cocoa powder to finish.

The pots went into the fridge overnight.  You have a choice:  You can eat the tiramisu immediately and the Daim bar pieces will be crunchy OR you can do what I did.  Wait until the pots have been in the fridge overnight and then enjoy the caramel swirls created by the Daim bar pieces that have dissolved.  This creates a truly delicious treat!

A warning- this is an extremely sweet pudding.  If you prefer a lighter dessert, you may wish to double up the quantity of mascarpone.  Yes, that will increase your yield, but it will also make the result less rich.  It goes without saying that I would not dream of doing any such thing.

SAM_1449

Peanut butter cheesecake. Let’s do this!

SAM_1397

Summer is here again, though not for my good friends in Melbourne.  As the ice begins to cover my friend’s truck, sun bakes the ground dry around my olive tree and feeds my mint until it is waist high!  Regardless of the weather, there’s always an opportunity to share a good peanut butter recipe and tempt you back into the kitchen.

SAM_1403

I don’t need to dress this bad boy up at all.  It is quite simply a combination of a no-bake cheesecake recipe and the salty goodness of peanut butter.  I spent quite a while getting this just right, so my hope is that you try it and love it as much as I did.  The recipe below makes a rather large cheesecake; plenty for all the family.  Rain or shine, it won’t last long at all!

SAM_1405

Peanut butter cheesecake

340g peanut butter

300g cream cheese

284ml double cream

160g caster sugar

130g Reece’s Pieces

100g butter

22 chocolate digestive biscuits

12 chocolate covered pretzels

2 tblspoons chocolate sprinkles

I began by crushing all of the biscuits and putting them into a mixing bowl.  I melted the butter and poured it in.  After mixing the biscuits and butter together, I tipped the mixture into a 9 inch springform cake tin and pressed it down to form the base of the cheesecake.  This went into the freezer for about half an hour to firm up.

For the cheesecake mixture, I used an electric mixer to whip the double cream until peaks formed.  I then added the cream cheese, sugar and peanut butter and continued to mix until fully combined.

At this point, I threw in the sprinkles and Reece’s Pieces.  These are optional, but fun.  I spread this mixture over the biscuit base and popped the cake back in the freezer to make it firm before decorating it.

SAM_1399

Once the cheesecake was firm to the touch, I placed chocolate covered pretzels around the edges to make it easy to portion out when serving.  I also drizzled some chocolate and peanut butter sauce to give it yet more peanut butter beauty!  No half measures here.  Now if that isn’t a fun cheese cake, I don’t know what is!

SAM_1404

Spare donuts? Try this!

What do you do with spare donuts? Who even has spare donuts? Just me then?There’s no way I’m going to start throwing donuts away; it goes against everything that I stand for. My mind began looking for ways to use the donuts in a new recipe.

Before I knew it, I was making custard and preparing the donuts for their next incarnation as a delightful take on bread and butter pudding. This is such an easy recipe and yet the result is delicious. The next time you’ve got too many donuts, you’ll know exactly what to do!

Donut pudding

6 donuts (I used 3 jam and 3 custard)

300ml double cream

100ml milk

3 eggs

100g  soft light brown sugar

1 teaspoon vanilla paste/ vanilla essence 

Quarter the donuts and place in an oven proof dish that’s deep enough to fill with custard almost to the top of each piece. In a bowl, whisk the eggs and then add the remaining ingredients.  Whisk thoroughly and have fun pouring the mixture over the donuts.  Cover the dish with foil and place in the middle of an oven at 180 degrees for about 40 minutes. 

The custard will be wobbly, but set and the donuts will be hot and very soft.  They’ll simply yield to your spoon.  Yum!


Baklava.

Who needs a snappy title when you’re posting about baklava?  It’s the sweetest, most indulgent thing I make and it’s about time I stopped holding out on you.

Baklava has many variations, but essentially, it is crushed nuts between layers of filo pastry soaked in syrup or honey.  You can find baklava everywhere from Syria to Serbia served with tea or the thickest, darkest coffee you can imagine.  Baklava seems to have remained in a number of cultures after the spread of the Ottoman Empire and I’m happy to say that the Greeks continued to make it long after the invaders were gone.  Head to a zaxaroplasteion (a bakery that makes and sells lots of sweet pastries and biscuits) and you’ll have a choice of rich and glossy delights.

Recently, my local community organised an International Night at our parish hall.  The idea was to invite everyone in the area to bring food from their culture and share it.  There was African drumming, a food quiz, cheese tasting, chocolate tasting for children and of course, food from around the world!  It was a great evening.  The highlight for me and my son (The Tomato Monster) was definitely the gołąbki (Polish cabbage rolls).  We shared them and were devastated when they were all gone.  N was happy because she didn’t have any trouble getting him to sleep.  A belly full of Polish food ensured a restful night!

Last year I took along a big pot of beef stifado and a tray of baklava.  This year, I was pushed for time and decided to take my orzo and tomato bake and another tray of baklava.  You see, making bakalava isn’t that difficult, but it isn’t cheap and a full dish of baklava sitting in the house just isn’t conducive to a healthy heart.  Therefore, I only make baklava for larger gatherings.  International Night was the perfect excuse.  It meant that I could finally share with you one of the most special recipes from my kitchen.

There’s good baklava to be had in Mostar. The views aren’t bad either!

I’ve had some brilliant baklava in Bosnia where there are large Muslim communities who continue to make it and serve it with a host of other sweet treats.  The best examples were in Mostar which also had some of the most pleasant views.  Predictably, however, my preference is for the syrup-soaked offerings of Greece and so my recipe is closer to what you’d find there.

Get ready for the sweetest thing on the menu!

Baklava

12 sheets filo pastry

600g caster sugar

250g butter (melted)

200g walnuts

200g almonds

120ml golden syrup or clear honey

2 tblspoons ground cinnamon

1 tspoon vanilla extract

Begin by the chopping the almonds and walnuts in a food processor with the cinnamon.  Don’t turn them to dust.  We just need them finely chopped.  I’ve done this by hand in the past, but it takes longer, makes more mess and the results aren’t as good.

Place a sheet of filo on the bottom of your dish or tray and use a pastry brush to cover it in melted butter.  Repeat with another four sheets.

Now begin to sprinkle the nut mixture over the filo.  Cover this layer with another sheet of pastry and brush it with melted butter.  Continue to cover each layer with nuts and add a layer of filo on top until you run out of the nut mixture.  Butter and layer any remaining pastry and finish by brushing the top with butter.

Taking a very sharp knife, carefully cut the baklava into as many pieces as you like.  Some people prefer to cut diamond shapes.  I cut mine into squares.  Cutting the filo at this point will allow the syrup to soak into it every part of the pastry and nuts.  It is also easier to cut the filo without damaging it before you bake it.

Sprinkle some water over the baklava to stop the filo from wrinkling and slide it into the oven at 180C for about forty minutes.  It should come out golden.  If it starts to burn before the time is up, cover the bakalava with foil.

While the baklava is baking, make the syrup.  Pour the sugar and 450ml water into a small pan with the vanilla and syrup or honey.  Bring it to the boil while stirring then simmer it without stirring for a full five minutes and then set it aside until the baklava is ready.

Remove the baklava from the oven and pour the syrup over it while it is still hot.  It looks like there’s too much syrup, but trust me, the pastry will soak it all up.  Leave the baklava to cool for a few hours.  During this time, the syrup will soak in and become firmer and stickier.

You don’t need to refrigerate baklava, but you can if you wish.  Keep it covered and it’ll last for a fortnight.  (Though I have to say, that I’ve never heard of that happening-  baklava is just too good to keep!)

Got a sweet tooth? Okay, prove it!

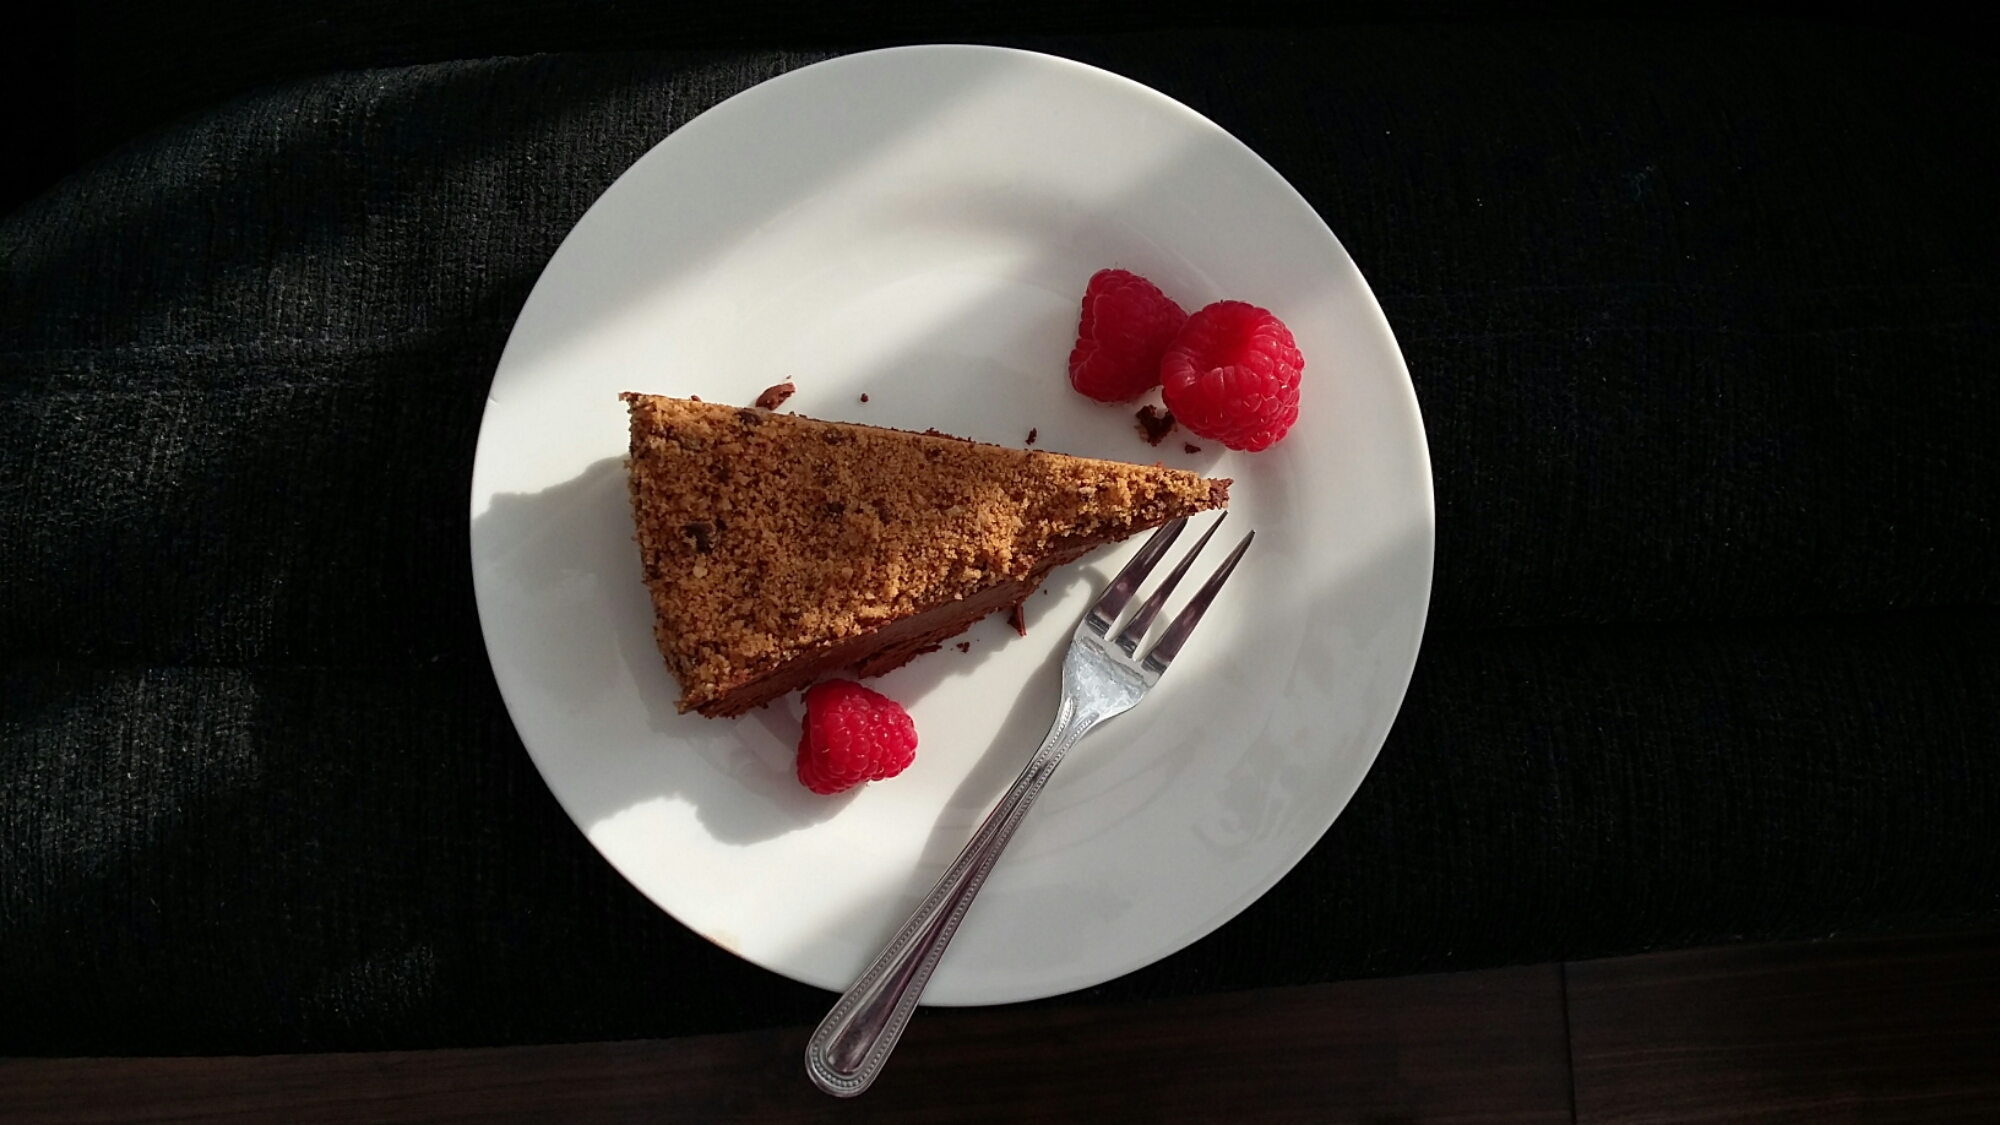
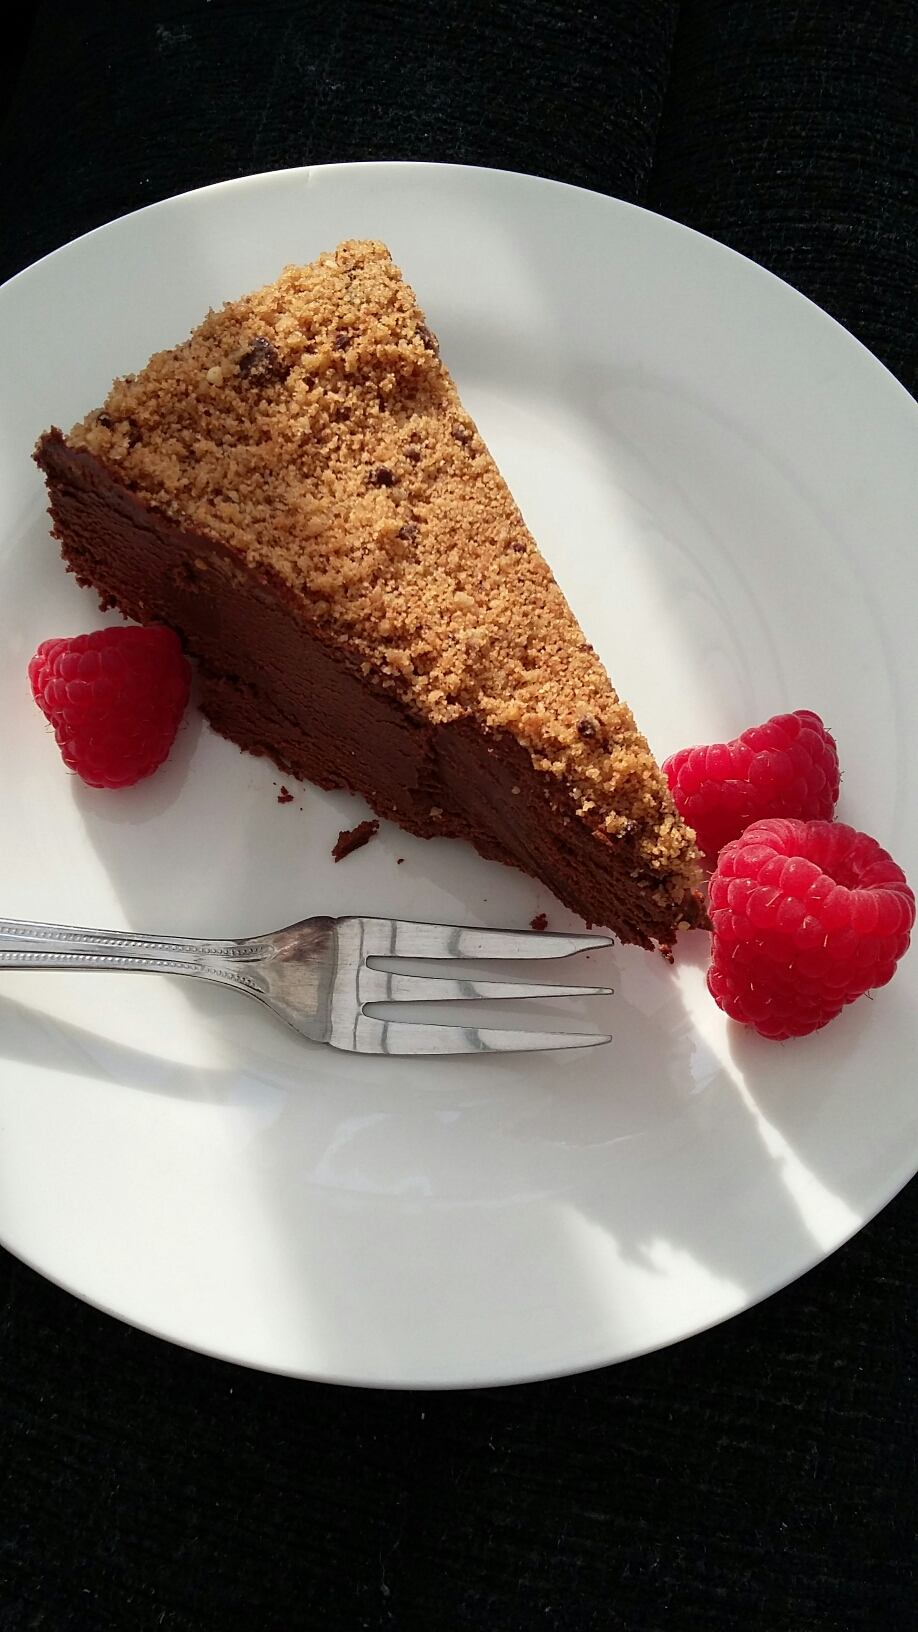
Nothing is too sweet for me.  Have I said that before?  Probably.  I’ll eat every last mouthful of every sugary delight you care to serve me.  Chocolate dome cake, caramel fudge, mud cake, baklava, treacle tart, butterscotch this and praline that;  do your worst.  My brother draws the line at halva, my mum stops at dulce de leche chocolate mousse cake.  All the more for me, I guess.

In my opinion, if a cake leaves you wanting more, it has failed.  A cake should satisfy every sugary urge and leave you wanting nothing.  If I didn’t have such a sweet tooth, I would suggest that the recipe I’m sharing this week achieves this and more.

Peanut butter and chocolate are a popular combination right now and the internet is awash with all kinds of cakes that bring together these two favourites.  One thing that I noticed was the lack of chocolate log action in this department.  Enter The Last Piece of Cake.  I tested the best components from a number of peanut butter and chocolate recipes to come up with a cake so delicious, it would surpass my previous efforts.  The result was a peanut butter and chocolate log of epic proportions.

Essentially, I made a chocolate log filled and covered with a fluffy peanut butter icing and then coated in a darkly decadent peanut butter and chocolate ganache.  This approach has been made popular by the American cake recipe book, Sky High.  My version holds true to the decadence of the original idea.  I’ve noticed, however, that some famous blogs warn readers to cut only the thinnest of slices because of how sweet the cake is.  Pathetic!  To these bloggers I say, “Halt your feeble whimpering and let the people enjoy a huge slice of one of the tastiest cakes in the blogosphere!”  To you, dear reader, I say, “Have a go at putting together this  joyful  bundle of ingredients and rest assured that it will bring a peanut butter and chocolate smile to every face that tries it.”

Peanut butter chocolate log

(For the cake)

115g caster sugar

45g melted butter

40g Fairtrade cocoa powder

4 eggs

Icing sugar

(For the icing)

250g smooth peanut butter

250g icing sugar

110g softened butter

double cream

(For the ganache)

200g dark chocolate

3 tblspoons double cream

2 tblspoons golden syrup

2 tblspoons smooth peanut butter

To make the cake, put the eggs into a glass bowl over a small pan of water and heat gently.  Whisk the eggs continuously.  Take the eggs off the heat when they are foamy and tip them into a mixing bowl.  Use an electric mixer to whisk the eggs for another five or six minutes.  Keep going on the highest speed until there are no bubbles left and the texture is silky and smooth.

Sift the flour and cocoa into the eggs and fold them in gently with a spatula until they are combined and there are no dry bits.  Gently mix in all of the melted butter.

Pour the batter onto a baking tray lined with baking paper.  My tray is about nine inches by fifteen inches.  Make sure the batter is spread equally so that it cooks evenly.  Put it into the middle of a hot oven (190C) for about ten minutes.  When a skewer comes out clean, you’ll know the cake is done.

To roll it, you’ll need to get some baking paper ready on your work surface.  Dust it with plenty of icing sugar.  This will prevent the cake sticking to the paper and breaking up.  Tip the cake out onto the dusted paper and carefully roll it up.  Take time to roll it carefully because it is hot and also delicate at this point.  Leave the roll to cool down on a wire rack.

Now it’s time to make the icing.  Yum!  Clean your electric whisk and use it to mix together the peanut butter and the softened butter.  Add the icing sugar in stages until fully combined.  Don’t put it all in at once, or you’ll finish up looking like Casper The Friendly Ghost.  If the icing gets too dry, add a little double cream.  Keep going until there is no more icing sugar to add and the icing is a nice, thick and creamy consistency.

Now it’s an assembly job.  Unroll the cake and peel off the paper without breaking it.  Using roughly half of the icing, spread a thick layer all over the cake right up to the edges.  Roll it all back up and put it on a plate.  Use a spatula to spread the rest of the icing all over the log.  It should be completely covered in the peanut butter icing incuding the ends.  There might be just a little left in the bowl for you to enjoy!  Put the log in the fridge for about half an hour to an hour to firm up.

Once the icing is firm, make the peanut butter and chocolate ganache which will coat the log.  Melt all of the ingredients together in a glass bowl over a small pan of water and mix it well.  Let it cool a little before you use it.

Okay, so I had a slice before the ganache had set. I just couldn’t resist!

The ganache should be thick and spreadable.  Pour it onto the log and spread the ganache all over.  Place the log back in the fridge for the ganache to set.  I’ll admit, I couldn’t wait and I had a slice while the ganache was still melted.  The cake tasted far better once the ganache had set, but it’s your call.

When you can tap the top of the log and it has set properly, it’s time to dig in.  My advice?  Cut a beautifully thick slice and let your cares float away!  Let me know what you think…

No chocolate, no smile.

Some people are just great bakers.  I am not one of them.  It’s an effort for me and I have to concentrate to achieve anything approaching average or good.  This only makes me more eager to try new recipes and get better each time.

It can be disheartening when N’s good friend comes round with a gorgeous coffee and walnut cake and says, “Oh, I just threw it together before I came round.”  You “threw it together”?  I’d have spent the best part of an afternoon trying to make it and would probably have thrown it in the bin at the end.

Well, fear not!  The recipe that I’m sharing with you today is one that anybody could follow for a successful outcome.  I know this to be true because I managed to get a tasty result without any gnashing of teeth or pulling of hair.  This chocolate pudding is fool-proof and packs plenty of chocolate too.

I know what you’re thinking: Why a chocolate pudding when it is spring in England?  Honestly?  I’ll tell you why.  A week or so ago, I went for a meal with colleagues and was outraged to find that the set menu we had booked for did not contain a chocolate option for pudding.  To clarify, the puddings on offer contained not one ounce of chocolate between them.  There was souffle, sorbet and the like, but no chocolate.  There was more fruit than anything else and you know how I feel about fruit rearing its healthy head in a pudding menu.  Disgraceful!  I was sick to the stomach, but not sick enough to put me off my starter and main.  Jamais!

To be fair, I don’t always want a chocolate-based pudding after a meal, but I feel it is only fair to have the option.  Feeling disappointed, I returned home and decided to make a chocolate pudding that was quite traditional, but easy to make.  Steamed puddings were not in my repertoire, but now that I’ve had a go, I will definitely be making more!  What follows is my recipe for a chocolate pudding that is uncomplicated and satisfying.  The texture is pretty is dense, but I won’t apologise for that.  It’s a pudding that will stick to your ribs and finish your meal with a chocolate thud.  Hurrah!

What’s your favourite pudding?

Chocolate pudding with Bailey’s chocolate sauce

100g melted butter

100g melted dark chocolate

100g caster sugar

3 eggs

75g plain flour

50g cocoa powder

(For the sauce)

100g dark chocolate

50g butter

5 tblspoons water

50ml Bailey’s Irish Cream Liqueur

1 tblspoon caster sugar

This recipe will make four steamed puddings.  Begin by putting the eggs and caster sugar into a glass bowl over a pan of simmering water.  You’ll need to whisk the eggs and sugar for about ten minutes until they are light and frothy.  It’s not fun, but it’s good exercise.

Once this is done, take the bowl off the heat and gently fold in the cocoa powder and the flour with a spatula or wooden spoon.  Once combined, do the same with the melted butter.  Repeat with the melted chocolate until you have a luscious, dark liquid that is begging to be steamed into pudding glory.

Grease the inside of four pudding pots with a little butter and pour in the chocolate mixture.  Cover the puddings with foil and seal tightly around the edges.  You could use baking paper and string for this, but I didn’t and the results were good.

Pop the pudding pots into a big pan on the hob and pour in hot water.  The hot water should reach just over halfway up the sides of the pudding pots.  Keep the water simmering and steam the puddings for about forty minutes.  You can do this with the lid on the pan, but be careful not to let the water bubble up and into the puddings.  Alternatively, you can simmer the water without a lid on and just top up the water as it evaporates.

The puddings will rise up (and take over the world) and become firm on top when they are done.

To make the sauce, put everything except the Bailey’s into a small pan and melt together.  Stir the sauce, take it off the heat and then stir in the Bailey’s.  If you prefer not to have alcohol in the sauce, simply omit the Bailey’s and you’ll have a very nice chocolate treat to pour over your puddings.  You could use a liqueur of your choice.  I served mine with the sauce poured over and some coffee beans for decoration.

These steamed chocolate puddings are cute, but be careful.  I had stomach ache after finishing a second pudding.  Perhaps it’s best to eat just one.  Hmmm…an interesting idea.  I’ll certainly consider it.

All’s fair in love and cheesecake.

Which wonders of the food world make you salivate at the mere thought of them?  For me, it’s a good pizza, a slice of bougatsa, Japanese curry, Cajun shrimp, souvlaki or egg and chips- probably all served on separate plates, but not necessarily.

For my favourite little food guinea pig (N), it’s likely that white chocolate cheesecake will make the list.  Alongside blondies, white chocolate cheesecake is one of my few creations that provokes such an excited reaction from her.  I always have white chocolate and cream cheese on hand in case there’s trouble at the ranch.

Perhaps there are wives or husbands across the world right now, preparing a favourite meal for their spouse: a tasty cushion to soften the blow of some bad news, an apology for dessert.  Perhaps there are families gathered around their go-to dish for particular events.  Does anyone else have an “In case of emergency eat this” dish?

I’m happy to report that I’ve not needed to break the glass on the emergency white chocolate for a long time.  In fact, it’s been over a year since the cake has made an appearance (and even then, it was to brighten up a rainy weekend).  Time then to share with you that most precious of recipes: the recipe that puts smiles on me and my dearest no matter what.  Her smile for the cheesecake, mine for her smile.  “For goodness sake!  He’s supposed to be writing about  food!  What’s is he playing at?”  Relax, here’s the oh-so easy recipe.  Enjoy.

White chocolate cheesecake

300g cream cheese

200g white chocolate

175g digestive biscuits

100g caster sugar

120g butter (melted)

60ml double cream

1 tspoon cinnamon

1 tspoon vanilla extract

Begin by crushing the biscuits and stirring in the melted butter and cinnamon.  Press the biscuits into the base of an eight inch round cake tin and place in the fridge for at least thirty minutes.

Next, use an electric whisk to combine all of the sugar, vanilla, cream cheese and cream in a bowl.  Melt the white chocolate gently over a pan of hot water and blend into the cream cheese mixture.

Tip the mixture onto the biscuit base and spread evenly using a plastic spatula.  Place the cake in the fridge for an hour or more to make it firm and easier to cut.  You can now decorate it in any way you wish, but I’ll be honest, I never get as far as that stage.

No bake chocolate cake.

I can only apologise for the delay in food action this week.  Preparation for my baby boy’s baptism have given me little or no time to get close to my beloved oven.

There’s no way that I can resist making something, so it was a real guilty treat to knock together my no bake chocolate.  Essentially, it is nothing more than melted chocolate and some tasty bits, but it does the trick.

No oven, no special techniques or weird ingredients.  Just plenty of chocolate and a gorgeous cake in no time at all.  Been promising to try a recipe out, but not had the time?  Perhaps this is the one for you.  Enjoy!

No bake chocolate cake

250g dark chocolate

230g butter

200g chocolate digestive biscuits

60g demerara sugar

4 tblspoons black coffee

100g pecans

100g glace cherries

100g mini marshmallows

half tspoon vanilla extract

Melt the butter, chocolate and sugar together in a pan and then stir in the vanilla extract.  Crush the biscuits, but not too finely.  Plenty of biscuit chunks is what you’re looking for.  (Plain digestives work just fine, but I’ll take any excuse to get more chocolate into the recipe!)

Stir the biscuits and cherries and pecans into the chocolate.  Add the marshmallows last so that they don’t melt into the chocolate, but keep their shape.

Tip the mixture into a lined loaf tin and place in the fridge until it is set.  Cut thin slices and serve with coffee.


A frangipane recipe for tough guys.

The stereotypical hunk: tall, dark, handsome and able to make a darn good frangipane.  I know what you’re thinking and the answer is no, I don’t quite fit the bill.  I’m short and my brother reckons he got all the looks.  Still, I rarely burn in the sun and my frangipane tartlets are as good as any you’ll find in these parts.  I can pretty much guarantee that last statement since I live in a part of the world that does not tolerate anything that is less than truly manly.  You’ll be surprised to learn that frangipane tartlets don’t rank very highly in the manly charts.  I know, I was as surprised as you.

A pint of bitter, a minced beef and onion pie, rugby and some sporadic sexism clock up way more in the manly stakes.  Funny then, that the top chefs in the world and some of the top pastry chefs are male.  There has always been a disparity between those who cook for a living and those who cook at home.  The former may be a cook with a modest repertoire and a list of previous employers longer than the menu of his current traditional English pub, or he might be a professional line cook with a good grounding in French cuisine and hopes of becoming his own boss one day.  Both at different ends of the spectrum, but equally understood as being dignified in their own way.

Then there’s the home cook.  Views on the male food enthusiast have begun to change over the last ten years.  For many, dad’s role was to carve meat and, if the weather permitted, cook a variety of sausages and burgers rather badly outside while the neighbours called the fire brigade.  The idea of men in the kitchen has been a source of mirth among housewives for decades.  Men not knowing their way around a kitchen, using every pot, pan and plate in the house to make even the simplest of meals and the dreadful offerings of heart-felt dross that grace tables every Valentine’s Day.  Sadly, some of these stereotypes have a firm historical truth.  In 2011, however, things are very different indeed.

As women have found their independence, so too have men found it necessary to fend for themselves in the kitchen.  Without writing an essay on social history, I think it’s safe to say that men and women have spent the last forty years re-defining their roles and the kitchen is one area that has changed dramatically.  It’s acceptable for men to cook for the family, women who lack any form of culinary knowledge are not embarrassed to say so, television chefs continue to make home-cooking a popular past time among young men and televised cookery competitions have no doubt inspired countless adolescents to pursue a career in a professional kitchen.

No matter how much things have changed, there is one thing that I suspect will not.  Your average bloke will not be boasting to the lads about his latest frangipane tartlet recipe over a pint of lager and a packet of pork scratchings.  Even with a wife and baby boy, a decent amount of self-esteem and the ability to eat my own body-weight in pizza, I feel slightly self-conscious about posting a recipe for apricot and almond frangipane tartlets.  They’re a delicate balance of flavour and texture and I think it’s impossible to make them at all manly.  Anyone for mangipanes?  Frangimans?  No, I didn’t think so.  Therefore, if my friends ask me what I’ve been making, I’ll just say something like beef brisket.

Almond and apricot frangipane tartlerts

250g shortcrust pastry

1 jar apricot jam

125g butter

125g icing sugar

125g ground almonds

40g plain flour

1 tspoon almond extract

whole almonds for decoration

Roll out the pastry and cut to the size of your tartlet trays.  Line each tray with the pastry and prick the base with a fork all over.  Trim the edges and place in the fridge until you’ve made the frangipane mixture.

To make the mixture, beat the butter and sugar together until fluffy and light.  Add the eggs and beat until well combined.  Next, add the almond extract and the ground almonds.  Beat again and finally add the flour.  Beat one last time and don’t worry about the mixture having small lumps in it.

Spread jam over the base of the pastry and then pour the frangipane mixture over the top.  Don’t fill the tartlet tins to the top because the mixture will puff up in the oven and will ooze over the sides.  Leave at least a centimetre between the mixture and the top of the pastry case.  Decorate with flaked or whole almonds.

Bake in the oven at 200C for between twenty and thirty minutes.  The top will be golden and firm when the tartlets are done.  Lower the heat if the tartlets begin to burn and make sure that you leave them to cool before serving.  The jam will be extremely hot.

Where’s the treacle?

Is the following recipe any good?  Well, put it this way; it’s so good, that my wife went back for a secret slice and accidentally destroyed my beautiful, sugary creation.  It slid off the plate as N was putting it back (with an unnoticable slither missing) and was sadly reduced to a crumpled wreck.  It wasn’t intentional, but the fact remains: this is a treacle tart you’ll go back to again and (if it’s still in tact) again.

As a child, treacle tart held no appeal for me.  It was always served hot (a no-no for Dimitri) and didn’t look particularly exciting.  Nothing looks as exciting as chocolate cake.  Even the name of this super-sweet pudding seemed strange to me.  What on Earth is treacle and why would anyone eat it? 

As an adult, I’ve spent time discovering the food that I rejected at earlier intervals in my youth.  The dishes eaten by my parents and grandparents, the food that was popular before the advent of television chefs and giant supermarkets.  My mum is the Queen of Puddings and describes her favourites with delight and a wonderfully descriptive style.  Listening to her describe a good treacle tart is enough to inspire anyone to make this classic pudding.  The ingredients are simple, widely available and for me, surprising.  For a start, where’s the treacle?

Perfect treacle tart

350g golden syrup

250g shortcrust pastry

125g wholemeal breadcrumbs

125g double cream

1 tspoon vanilla extract

Roll out the pastry and use it to line a 20cm cake tin.  Trim the edges and prick the base with a fork repeatedly.  Put the tin into the fridge for half an hour and set aside the pastry trimmings.

Meanwhile, put the breadcrumbs into a medium bowl and pour in the syrup.  Add the cream and the vanilla extract and mix well.

Use the pastry trimmings to make some shapes that you can place on top of the tart before baking.

After thirty minutes, take the cake tin out of the fridge, pour the mixture into it and place your pastry shapes on top.  Bake on the middle shelf of the oven at 190 degrees Celsius for about thirty-five minutes.  The tart will be golden and just set when ready.

If you value your tongue, let the tart cool for some time before attempting to taste it.  When baking, the tart itself is hotter than the surface of the sun.  I like to serve it with ice-cream, but some double cream would be good too.

If you decide to get a sneaky slice when nobody is looking, be careful not to let the tart slide off the plate.  I forgave my lovely wife, but I got the impression that she felt the loss of the tart more deeply than the pang of guilt.  I don’t blame her!

Tower of turnovers.

Are food bloggers only writing to fuel their inflated egos?  I think not, but I did read a very aggressive post while checking out some food-related blogs recently.  The blogger was angry at food bloggers who wanted nothing more than to show off about what they were eating, where they were eating and how skillful they were in the kitchen.  Fair enough, nobody wants to read a blog full of boasting, but sadly the writer of this post did not believe that people were genuinely passionate about food.  In fact, he said that the only types of food blog that he could possibly permit were those written by experts in the field, or those that provided recipes for people with special dietary requirements.  Thankfully, I do cater for those with special requirements.  In fact, I’m sure that many of the loyal readers of this blog are butter and sugar-dependent just like me.

Well, there’s only so much negativity I can put up with and it wasn’t long before I’d stumbled across a much more interesting article about the proposed Kingdom Tower in Jeddah that could exceed a kilometre in height!  Yeah, that’s gonna need some serious window cleaners.  Now, if we’re talking about self-aggrandisement, surely there is no greater project that exemplifies this.  It seems such a waste.  All that work and cost for another Four Seasons hotel?  Instead, why not get hold of some cherry jam and some puff pastry and construct a tower made of cherry turnovers? I did! Okay, it didn’t create any jobs and the impact on the economy was negligible, but boy is that cherry jam putting a smile on my wife’s face!

Cherry & marshmallow turnovers

1 block puff pastry (500g)

1 jar cherry jam

80 mini marshmallows

1 egg

coarse white sugar

This is such an easy recipe.  Looking for inspiration and a way to use up the frozen pastry I had, I spotted a jar of unopened Morello cherry jam.  Turnovers sprang into my head, but suddenly, a little food blogger with mini devil horns appeared on my shoulder and hissed, “You’re so obvious!”  I was incensed and let my eyes dart around the cupboard shelves for more ideas.  “Aha!  Mini marshmallows!  Not so obvious now, am I?”  Of course, there was nobody there; just me and some marshmallows, so I got on with the task in hand and tried hard to remember when exactly I first started talking to that little shoulder blogger.

Preheat the oven to 180 degrees Celsius.  Cut the defrosted pastry block into four equal pieces.  Lightly flour your work surface and gently roll out one of the pieces until it is quite thin (less than a centimetre thick).  Cut it into four squares.  Put a tablespoon of jam in the middle of the square.  Place about five mini marshmallows on the jam.  Beat the egg in a small bowl and then brush it around the edges of the square.  This will help to seal it.  Pull one corner over to meet the opposite corner and seal the edge by pressing with a fork.  This will create little ridges around the edge and you’ll have a smooth little triangular parcel.

Repeat these steps and then place the parcels on a foil-lined baking tray.  Brush each turnover with the egg wash and sprinkle lots of course white sugar onto them.  Using a sharp knife, make a couple of slits on the top to allow steam to escape during baking.  Bake in the centre of the oven until golden.  This should take no more than twelve to fifteen minutes.  Let the turnovers cool properly before biting into one.  Hot jam is painful!

I managed to make sixteen turnovers.  More than enough to make a tower.  It’ll never be a kilometre high, but the view (and the smell) from the top was much better than any skyscraper.  It’s amazing what I’ll do to entertain myself.  Feel free to just enjoy your turnovers with a coffee and don’t feel pressured to construct pastry fortifications.  However, if you feel compelled to make a tower and it turns out to be bigger than mine, I promise not to try to beat it.  Promise!

Aerial view of the tower. It houses over 80 mini marshmallows and is 8 turnovers tall.

6000 miles and a ferry ride to chocolate heaven.

Thousands of lights sparkled on the water as little tug boats puttered across the black harbour.  I knew it was going to be a special night.  My mum and brother were coming to visit us and were arriving early evening.  That meant we could take them into the city and give them a great meal!  When they arrived, we spent an hour or two drinking champagne, laughing together and gazing out at my favourite skyline in the world.

We took a ferry across the harbour and made our way to a popular Australian-run restaurant.  I’d chosen it specifically because of their great puddings and if there’s one thing that lights up my mum’s world, it’s a good pudding.  The finale to the meal was Mars bar cheesecake and some chocolate filo parcels with chocolate sauce for pouring.  My mum was in chocolate heaven, and to this day, I think those little parcels of molten indulgence were the highlight of her trip to Hong Kong.

I’ve been dying to make these for a few years now and finally, very late last night, I did.  Realising that there was no need to make a ganache or mess around with hazelnuts and other distractions, I grabbed the filo out of the fridge and a bar of chocolate and fired up the oven.  I knew exactly what I was going to do and I knew it would take a matter of minutes.

Twelve minutes later, I bit into the crispy filo, felt the warm chocolate ooze onto my tongue and was transported back to that night in Hong Kong.  My mum doesn’t know it yet, but soon she’ll be back in Hong Kong too; and this time, she won’t have to fly six thousand miles.

Chocolate filo parcels

100g of your favourite chocolate

filo pastry

salted butter (melted)

icing sugar

Lay one sheet of filo on a dry surface and brush all over with melted butter.  Gently lay another sheet of filo over the top and smooth it out.  Use a plastic spatula to cut squares with sides measuring about two inches.  Place a square of chocolate in the middle and brush melted butter around it.  Lift the corners to the middle, pinch and twist them gently to seal the parcel.

Brush a line of melted butter onto a baking tray and place each parcel along this line.  Finally, brush a little more (yes, more!) melted butter onto the parcels and put them into the oven at 200 degrees Celsius until they are golden.  They’ll take around six or seven minutes.  Remove the parcels from the oven and place them gently on kitchen paper to cool slightly.  Taking a bite now will leave you with plenty of burns to your mouth, so resist the urge and give them some time.  Dust the parcels with icing sugar and serve.

I’ve tried a few different ideas using the filo parcel premise.  I’ve put half a glace cherry inside with a square of chocolate on top (it worked, but you’ll have to make the filo square slightly bigger).  Serving this at the end of a meal means you can have fun by serving a trio of white, milk and dark chocolate parcels.  You could add chopped nuts, peanut butter, marsh mallow, all kinds of little surprises!  They would also be nice served with a little extra chocolate sauce, if you’re a real chocoholic.  Whatever you do, it’ll feel like a wonderful little treat!  Enjoy!