To choc or not to choc. Is that really a question? 

Seems silly to post a recipe for chocolate torte on the day I decide to get into shape. I never was one for convention. I stare down at my tummy with a mixture of contempt and satisfied pride…it’s been a fun journey. Now things must change.

For some time I’ve managed to consume inordinate amounts of sugar and fat through various favourite treats and done little to redress the balance. So today I am posting a gorgeous recipe for something that may well come to be the last piece of cake for some time; except that it’s not a cake at all. It’s a torte and it’s so dark and satisfying, that I couldn’t think of anything better to finish my run of gluttony on.

Oh, I’ll be posting yummy goodness as usual, but I’ll be doing my best to preserve my arteries too. A tricky balance to strike. We all need a cheat day though and that’s when I’ll be cooking up a sugary storm and sharing it with you. You didn’t think this was going to become one of those healthy lifestyle blogs did you? Ha! Onwards! Chocolate awaits!

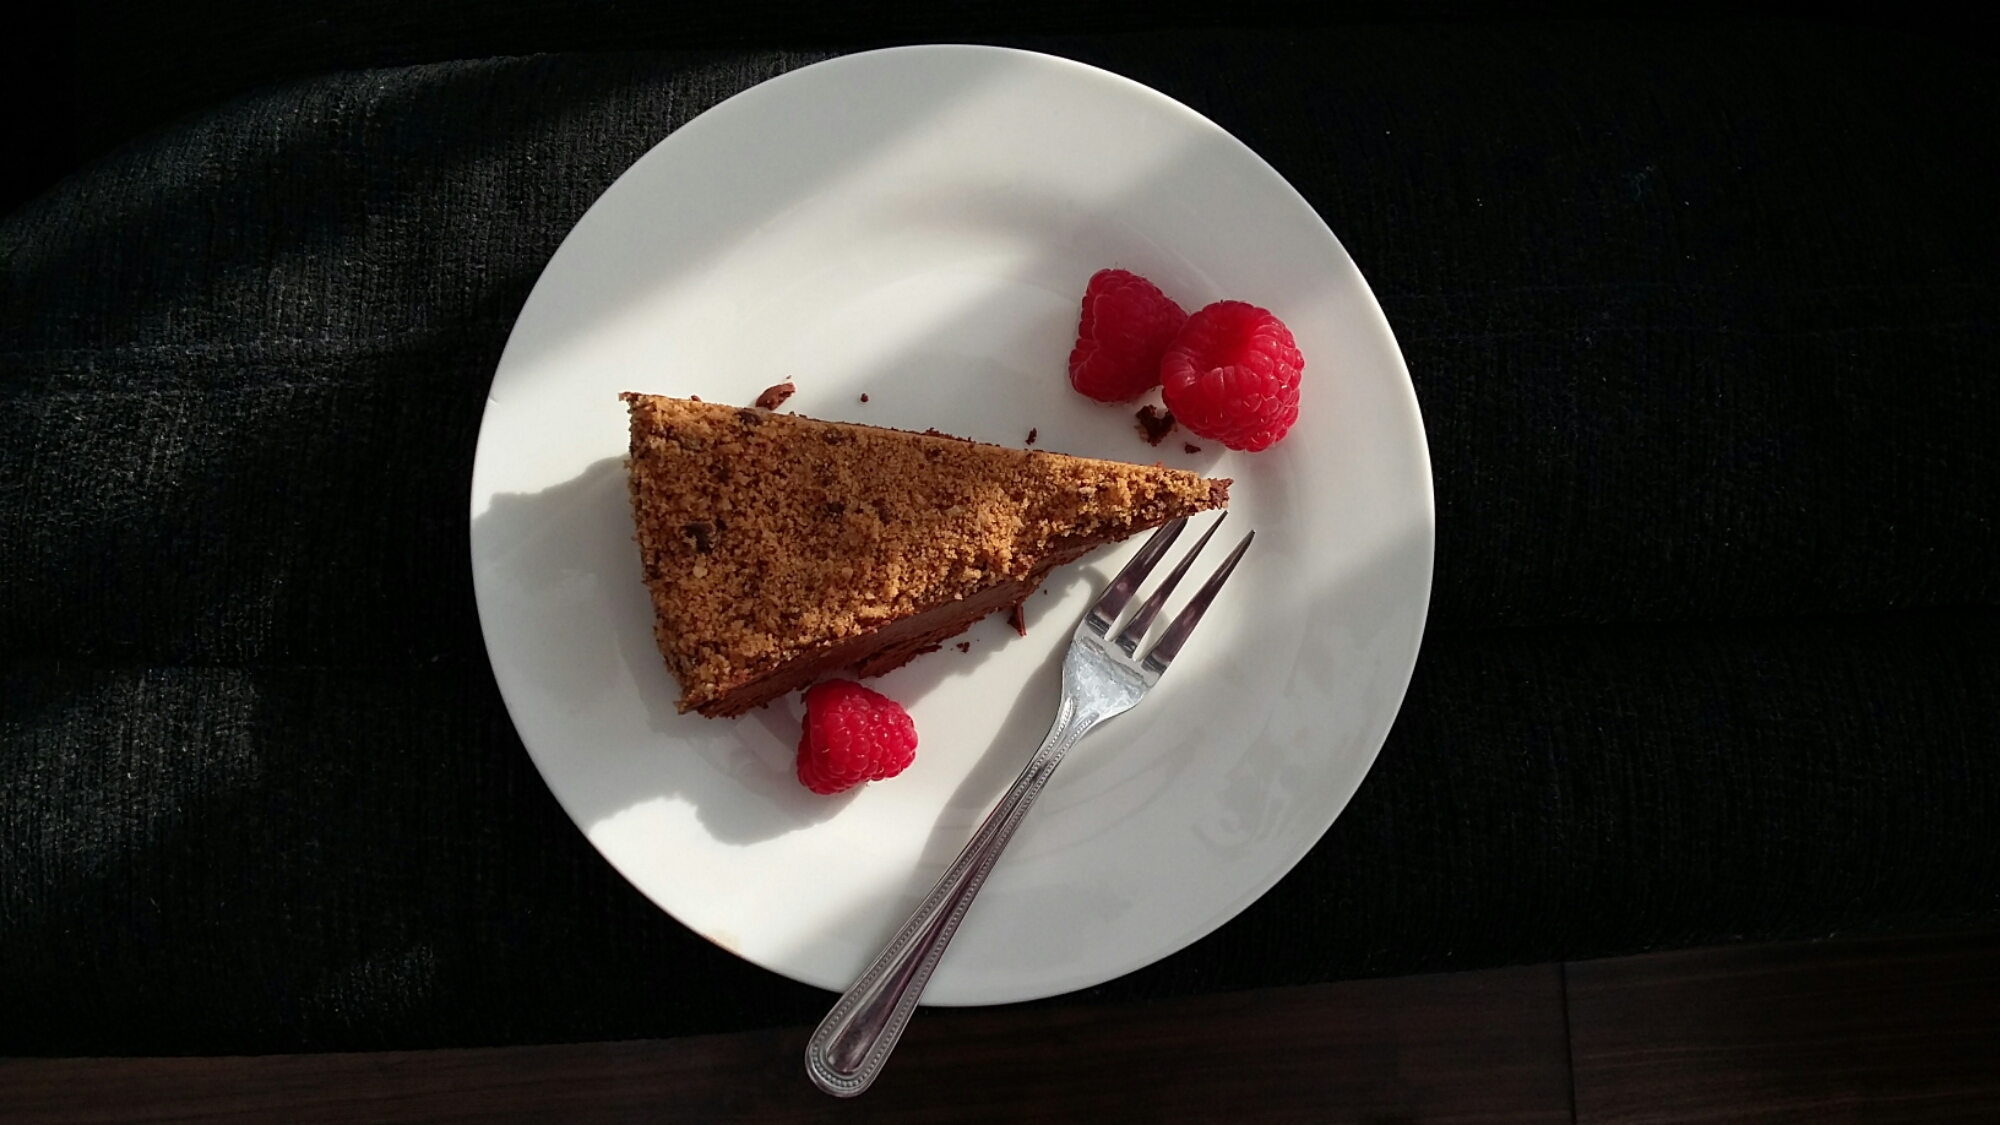
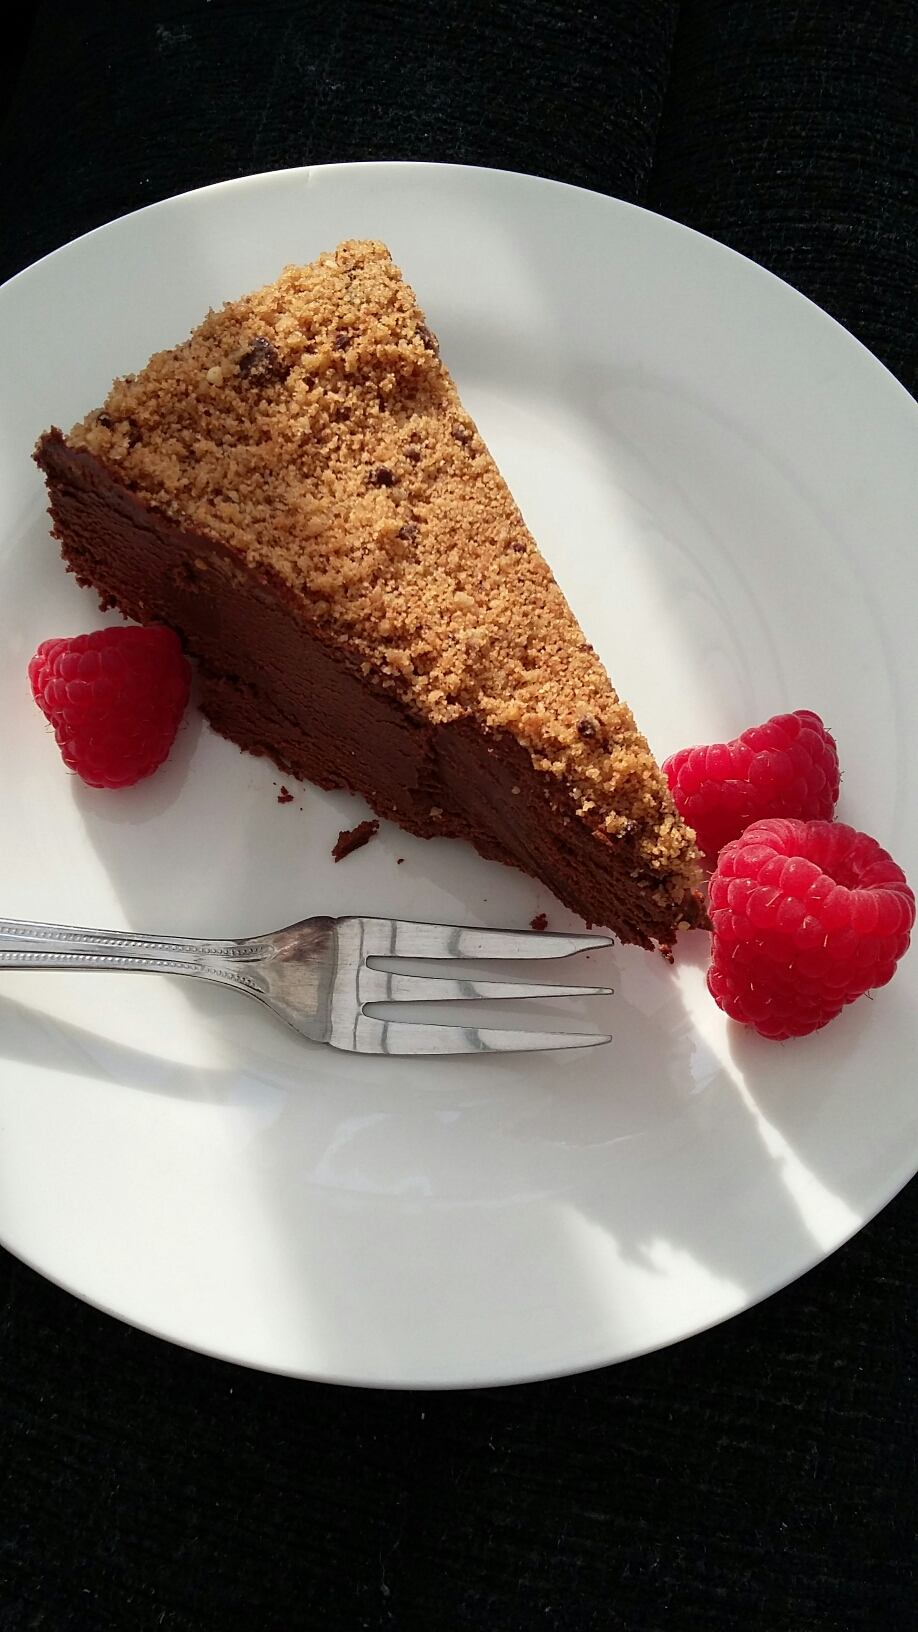
Dark chocolate torte.

600ml double cream 

300g dark chocolate (70% cocoa solids)

3 tblspoons golden syrup

1 packet cookies (crushed) to cover the torte

Such an easy recipe. It’s no wonder staying in shape is a challenge for me.  Begin by lining a 20cm loose-bottomed cake tin with cling film. 

Melt the chocolate, syrup and 200ml of the cream in a saucepan on the lowest heat. Stir frequently to get rid of lumps. People recommend placing the chocolate in a bowl and heating it gently over a pan of hot water, but I’ve got a life to live and I just want the ingredients melted…this is a kitchen, not a spa retreat.

Meanwhile, whisk the rest of the cream in a bowl until it is just about to form stiff peaks.

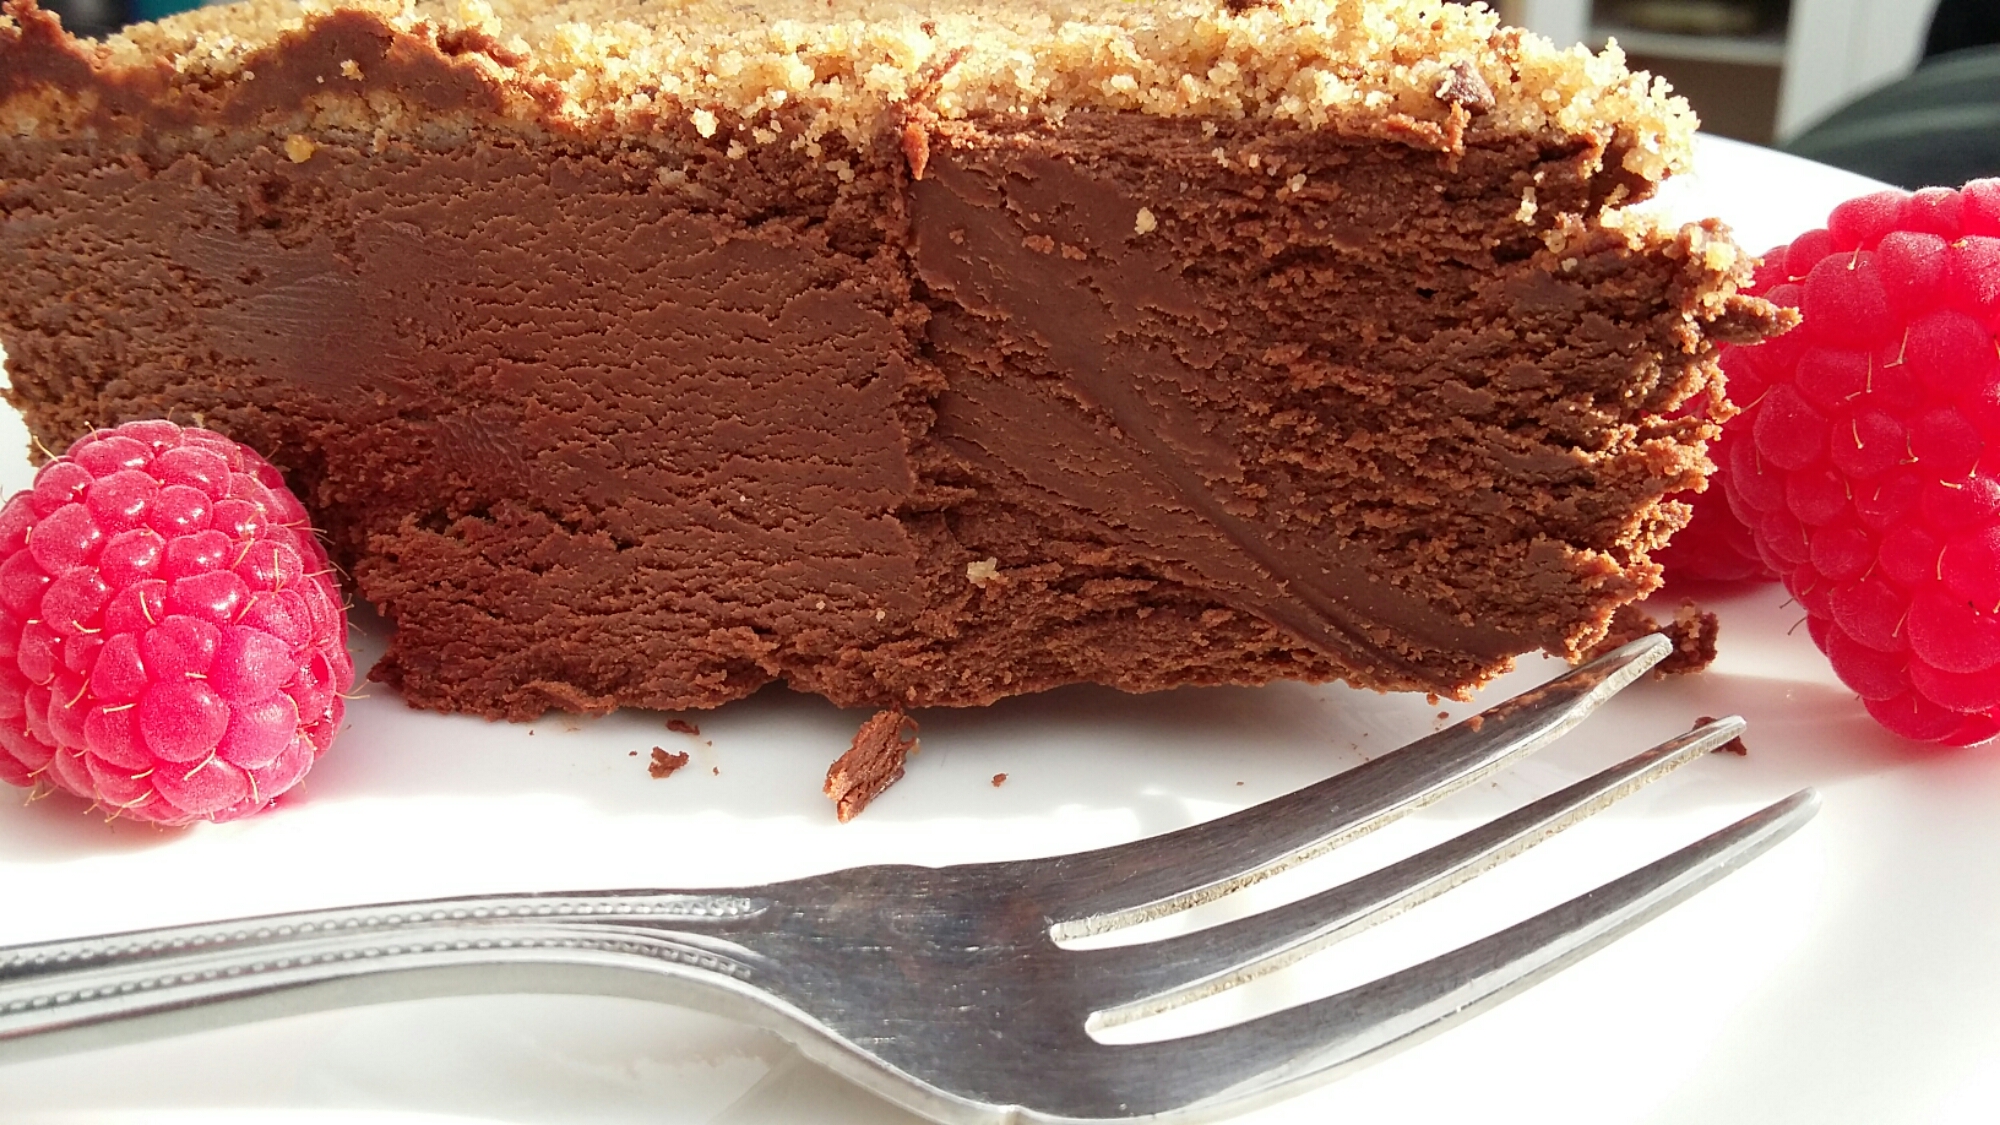
Leave the melted ingredients to cool slightly before folding them into the cream. Be sure to take time with this stage. Patience will pay off because you’ll achieve a smooth and even consistency throughout the torte.

Carefully pour the torte mixture into the lined tin. You could leave this in the fridge overnight, but that’s what boring people do. Instead, reclaim some of your teen spirit by putting the torte carefully in the freezer for a couple of hours. Stick a knife through the middle to test it. The torte is ready when the centre is firm. Turn the torte upside onto a plate and slowly remove the  cling film.

To finish, I blitzed a dozen Maryland chocolate chip and hazelnut cookies and then covered the entire torte. Done.

Just a small note: this torte is darker than a January morning and the chocolate hit is deeper than an abandoned mine shaft…be careful. 


Mushroom & black pudding ravioli.

Almost two years ago, my mum came round for dinner and I made a small starter of wild mushroom ravioli served with a little rocket and some crispy slices of black pudding. The combination of black pudding and mushrooms worked well and since then, lots of different ideas have been floating around in my subconscious.

The success of my first pasta attempts emboldened me enough to resurrect this flavour combination and see if I could make it work as a whole dish. Here is my recipe and a few photographs of that successful experiment. Is it something you’d eat?

Mushroom & black pudding ravioli with creamy mediterranean herb sauce

For the pasta-

300g ’00’ flour

3 eggs

1 tablespoon olive oil

2 tsp salt

For the filling-

250g chestnut mushrooms (sliced)

150g Bury black pudding

3 tablespoons olive oil

2 tsp salt

For the sauce-

150ml double cream

large nob of butter

small bunch of thyme

small bunch of oregano

salt & pepper

I combined the ingredients for the pasta in a bowl and mix to a soft dough.  I then kneaded the dough for ten minutes until it was smooth and silky.  Then it was time to chill the dough by wrapping it well in clingfilm and putting it into the fridge for an hour.  I fried the mushrooms on a very high heat until they began to brown and set them aside.  Then I sliced the black pudding thinly and fried it at an equally high temperature, making sure to break it up and cook it until it was crispy.  Once it had cooled, I blitzed it with the mushrooms using a hand blender.  A little seasoning finished the filling.

Back to the pasta.  I don’t have a pasta machine.  I may well invest.  Apart from great results and inner satisfaction, rolling your own pasta also provides you with a workout.  Slightly out of breath (but no less happy), I made sure that I could see through the pasta before stopping.  At this point, I spooned the filling onto the sheet of pasta at regular intervals.  I used a pastry brush to wet all around the filling.  This would act as glue when the top sheet was laid upon it.

Ravioli waiting to be cut.

The hardest part was laying the top sheet over the filling and getting rid of all the air in between.  This is where the water helped to bind the pasta.  Pressing firmly around the filling, I pushed as much of the air out of the sides as possible.  This would prevent the trapped air expanding in the pan and bursting the ravioli.  Admittedly, as a novice, I hated this part of the process and was extremely relieved when it was accomplished.  I hadn’t done a great job of shaping the pasta sheets into regular shapes.  This made cutting a little tricky.  All went well, though one thing I’ll remember for next time is to leave less pasta between the filling and the edge of the ravioli.  Frightened of the ravioli not being secure, I left far too much pasta around the edges.

Fresh ravioli and some herbs from the garden.

I started the sauce a few minutes before dropping the ravioli into a pan of boiling water.  Loads of butter into a milk pan.  Chopped fresh oregano and thyme straight into the foaming butter.  Then the double cream with brisk stirring and a little salt and pepper.  More butter if necessary and then a gentle simmer.

The ravioli needs three or four minutes of cooking once it has risen to the surface of the water.  In terms of taste, the flavours all worked well and the creamy sauce softened what is quite a bold pasta dish.  In retrospect, I would serve two or three ravioli with this sauce as a starter.  It was way too filling as a main.  It’s a really distinctive dish and one that I’m proud of.  It’s certainly a great way to enjoy Bury’s best in a unique format.

A lovely dish, but so filling.