The taste of home.

SAM_1354

I spent a couple of weeks in Crete rediscovering the tastes and smells from my early days there. It was surprising to find that the food which brought back the most memories was not the most memorable itself.

Sitting at a table by the sea, I looked at the myriad of plates and began to add this and that to my own. There was one dish, however, which I mistook for houmous until I tasted it. I dipped in some beautiful bread and suddenly I was four years old again. The taste was rich and comforting and so familiar. “What is this? I recognise the taste, but I don’t know it’s name”. It was fava.

The reason that I love fava so much is because it is a fantastic vehicle for olive oil. It’s very simple to make and there are very few ingredients. The main ingredient is yellow split lentils. When cooked down to a thick consistency, they carry the flavour of extra-virgin olive oil like few other foods can. If peasant food isn’t your thing, or you don’t care for the taste of good olive oil, this is perhaps your time to bail and return when there’s a pudding recipe (next week). If you are like me and crave the good stuff, then fava is a truly wonderful way to make use of that oil in your cupboard reserved for only your best dishes. Will fava wow your friends at a dinner party? Nope, but your tummy will love it!

SAM_1339

Fava

250g yellow split peas

2 onions (sliced)

1 garlic clove (chopped)

extra-virgin olive oil

juice of half a lemon

sea salt

Rinse the split peas in cold water and then put them into a pan of boiling water with the onions.  Bring back to the boil and simmer.  I usually put just enough water in to cover the peas and then add more as it is absorbed.  When the split peas are thick and mushy, I transfer them to a container that I can use my hand blender in without getting spattered.  I add the garlic, lemon juice and a lot of extra-virgin olive oil and blitz it.  The fava should be soft and full of the flavour of the oil.  Be careful not to add too much lemon juice and then season with a little salt until you’re happy with it.

I like eating fava on its own, but it’s also great served alongside fish and any Greek dishes.  Drizzle more oil onto it just before serving.  Fava refrigerates well and can be brought back to life in the microwave and the addition of (yet more) olive oil.  Serving it warm, rather than hot is the way to go.  So grab a chunk of your favourite bread and dive into my favourite comfort food!

SAM_1353

Advertisement

The Tomato Monster.

Tomatoes are one of the best foods you can eat regularly.  They contain lots of lycopene which behaves in a similar way to antioxidants and can help fight cancer.  Eating ten servings of tomatoes each week can reduce the risk of lung cancer by up to sixty per cent.  The good news is that those ten servings can be in a variety of forms.  We can enjoy the benefits of lycopene by eating pizza, adding ketchup to food and even including tinned tomatoes in our diet.  This is because the cancer-fighting qualities of lycopene are not reduced by exposure to high temperatures.  In fact, cooking tomatoes in olive oil increases the amount of lycopene that is absorbed by the body.  French, Italian and Greek cooking feature numerous tomato-based dishes, so it’s no wonder that cancer is less prevalent among the mediterranean population.  Tomatoes feature heavily in our house too.

I’ve nicknamed our boy, The Tomato Monster.  He eats everything in sight and has yet to refuse any type of food that we’ve offered him.  However, tomato dishes provoke extra approving groans and lip-smacking from him.  He just loves tomatoes and we love watching him eat plenty of dishes containing that most glorious of fruits!  Today, I’m going to share two great recipes full of tomatoes that are brilliant for a family meal.

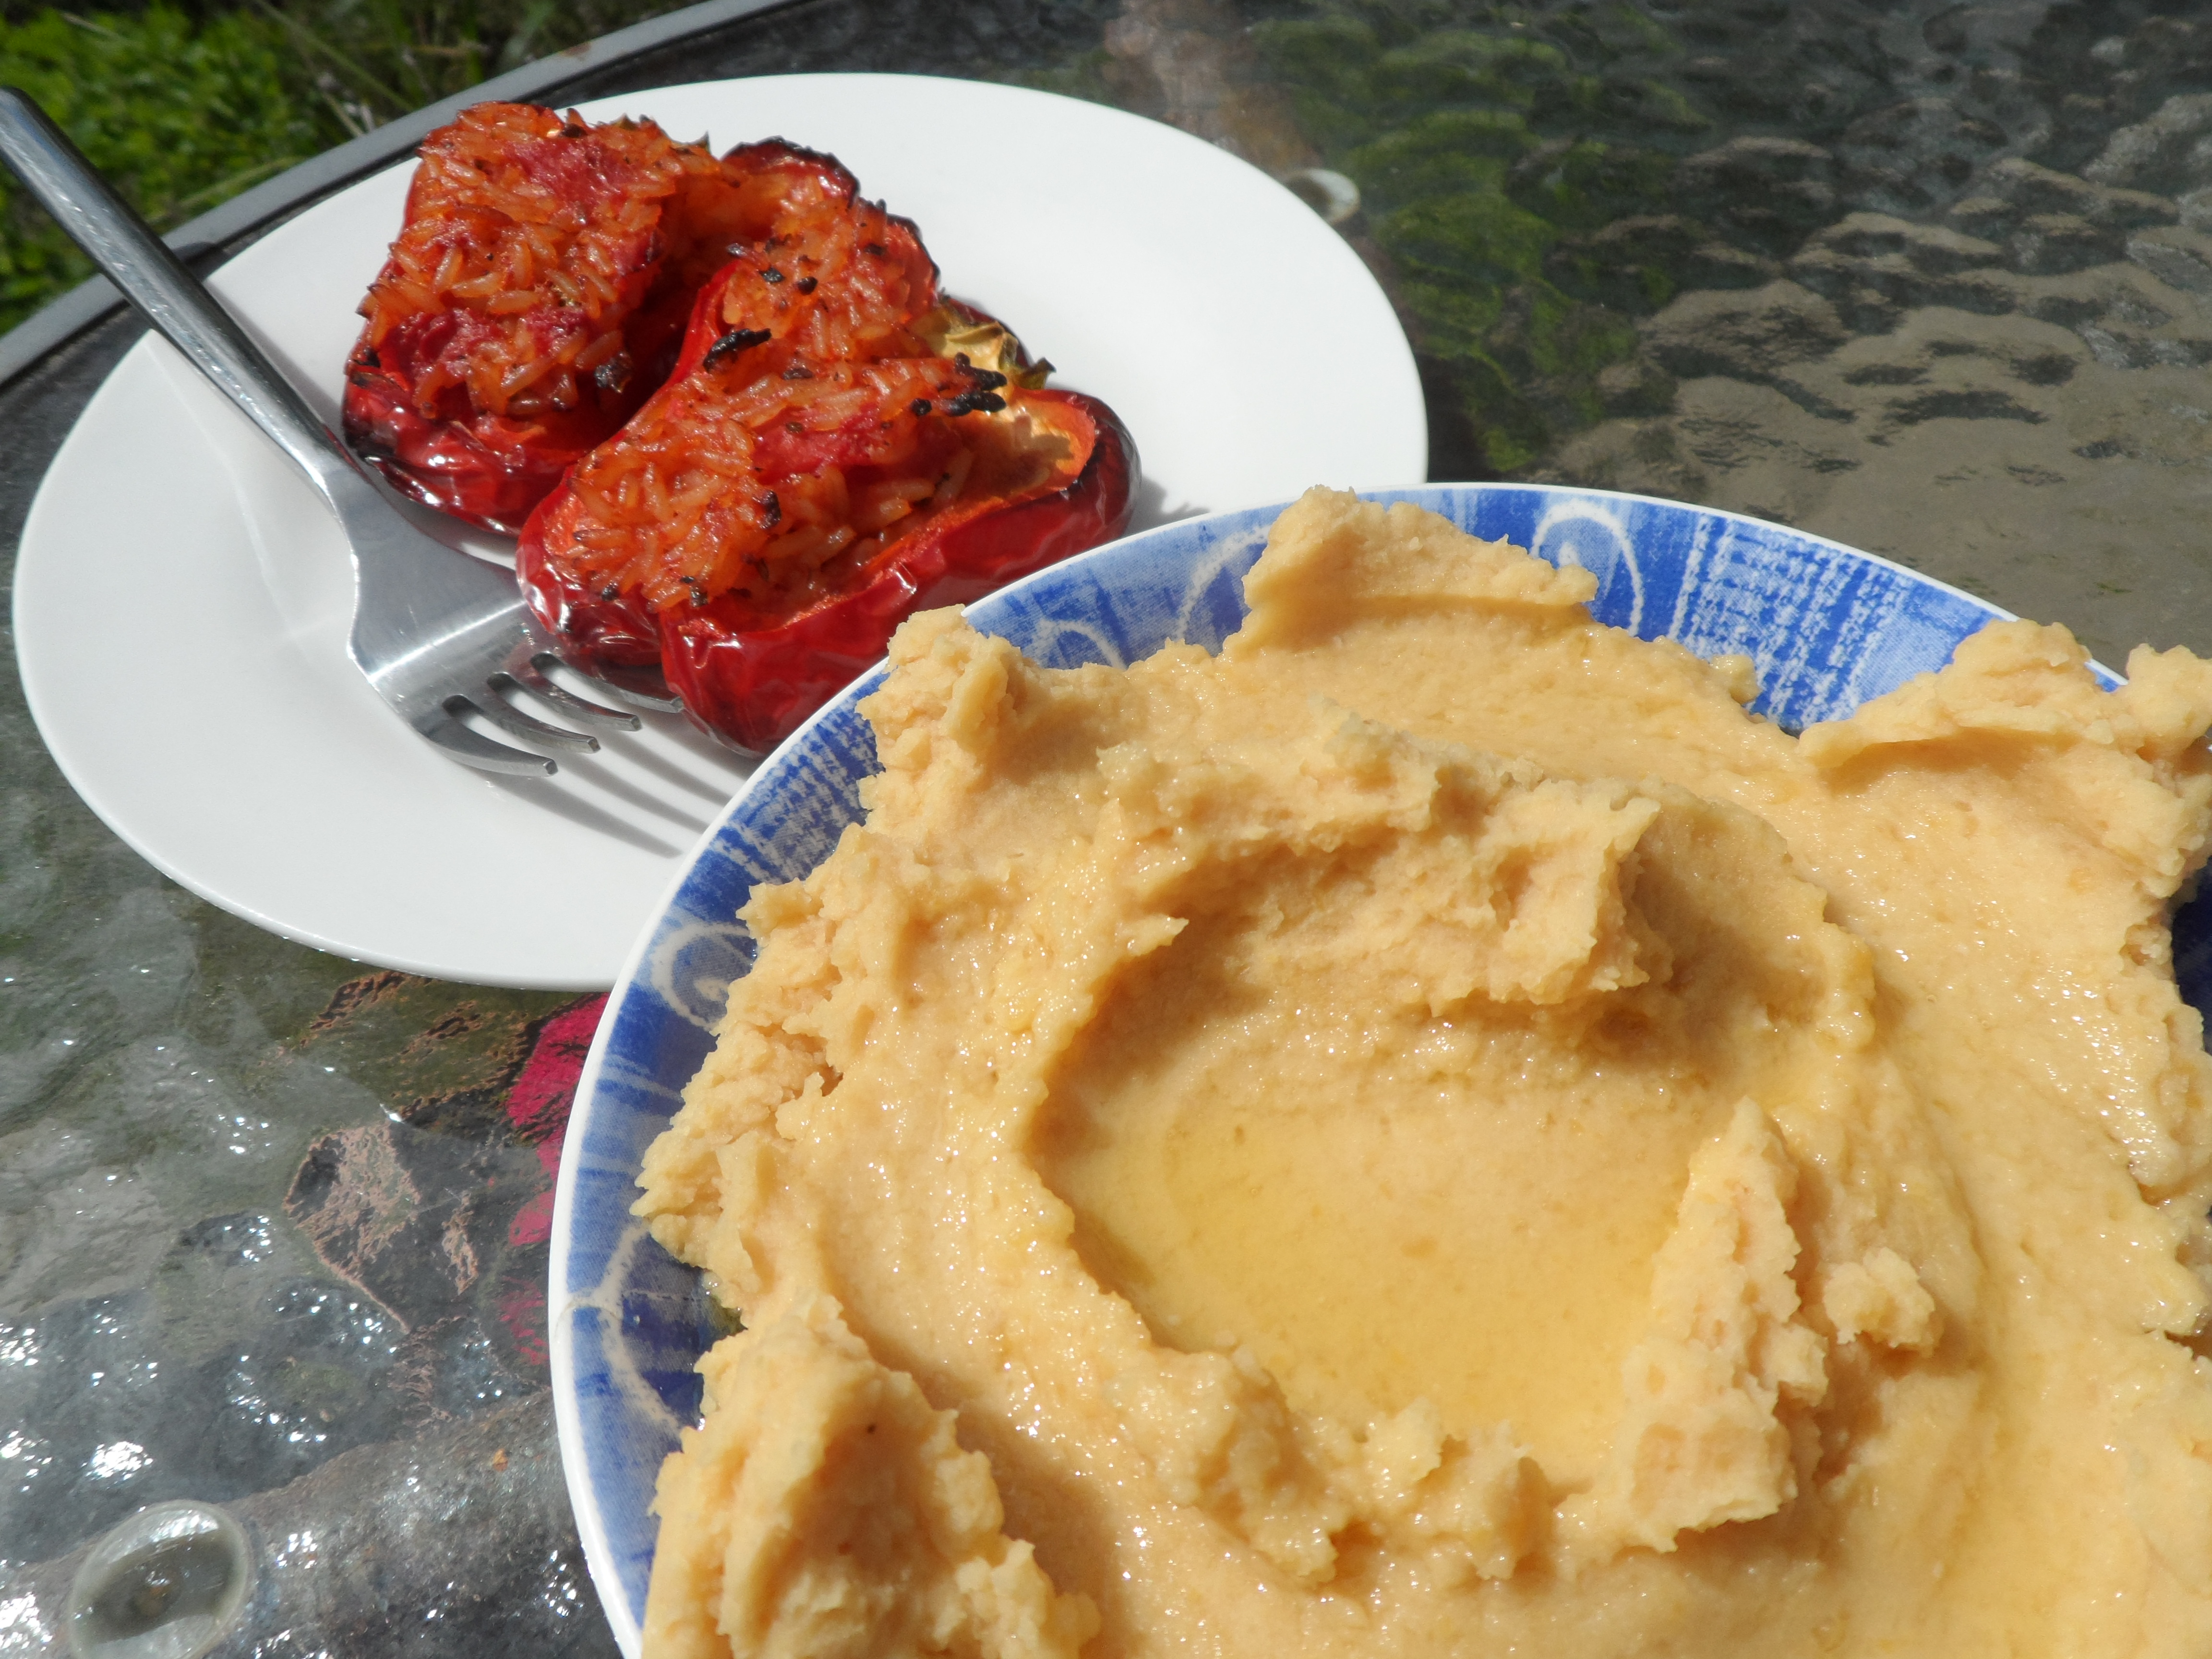
On a day when the sun was splitting the trees and a summer atmosphere prevailed in this normally rain-soaked region, I decided to cook up a tomato storm to enjoy in the garden.  N and the boy were out for coffee and cake (or water and baby rusks) all afternoon.  This left me free to make a complete mess in the kitchen and play my music as loud as I liked.  By the time the family was assembled for dinner, I’d managed to make a herb bread with tomato and a baked orzo dish full of tomatoes, beef mince and a cheesy, golden bechamel topping.  Me and N enjoyed a glass of wine with the food and felt like we were somewhere on the Northern coast of Crete.  The Tomato Monster savoured every bite of bread and every mouthful of orzo with extra satisfied grunts and spent the rest of the evening beaming.  In my book, that’s reason enough to put tomatoes on the menu every single day of the week.

Herb bread with tomato

400g chopped tomatoes

250g plain flour

120ml warm water

5 tblspoons olive oil

3 tblspoons chopped fresh herbs (mint & Greek oregano)

2 tblspoons tomato puree

2 tblspoons tomato ketchup

1 tblspoon honey

1 and a half tspoons dried yeast

1 tspoon dried oregano

1 tspoon Dijon mustard

This recipe will make a flatbread that can be torn and shared.  Put the flour, salt and dried yeast into a medium-sized bowl and mix in the dried oregano.

Create a well in the middle and pour in the water, honey and one tablespoon of olive oil.  Add all of the fresh herbs.  Mix gently to form a soft dough.  Brush with olive oil and place the bowl in a warm place for the dough to increase in size.  About half an hour will do it.

Mix the tomatoes, tomato puree, ketchup, the remaining oil, mustard and some dried oregano together and heat in a frying pan for a few minutes until you have a thick sauce.

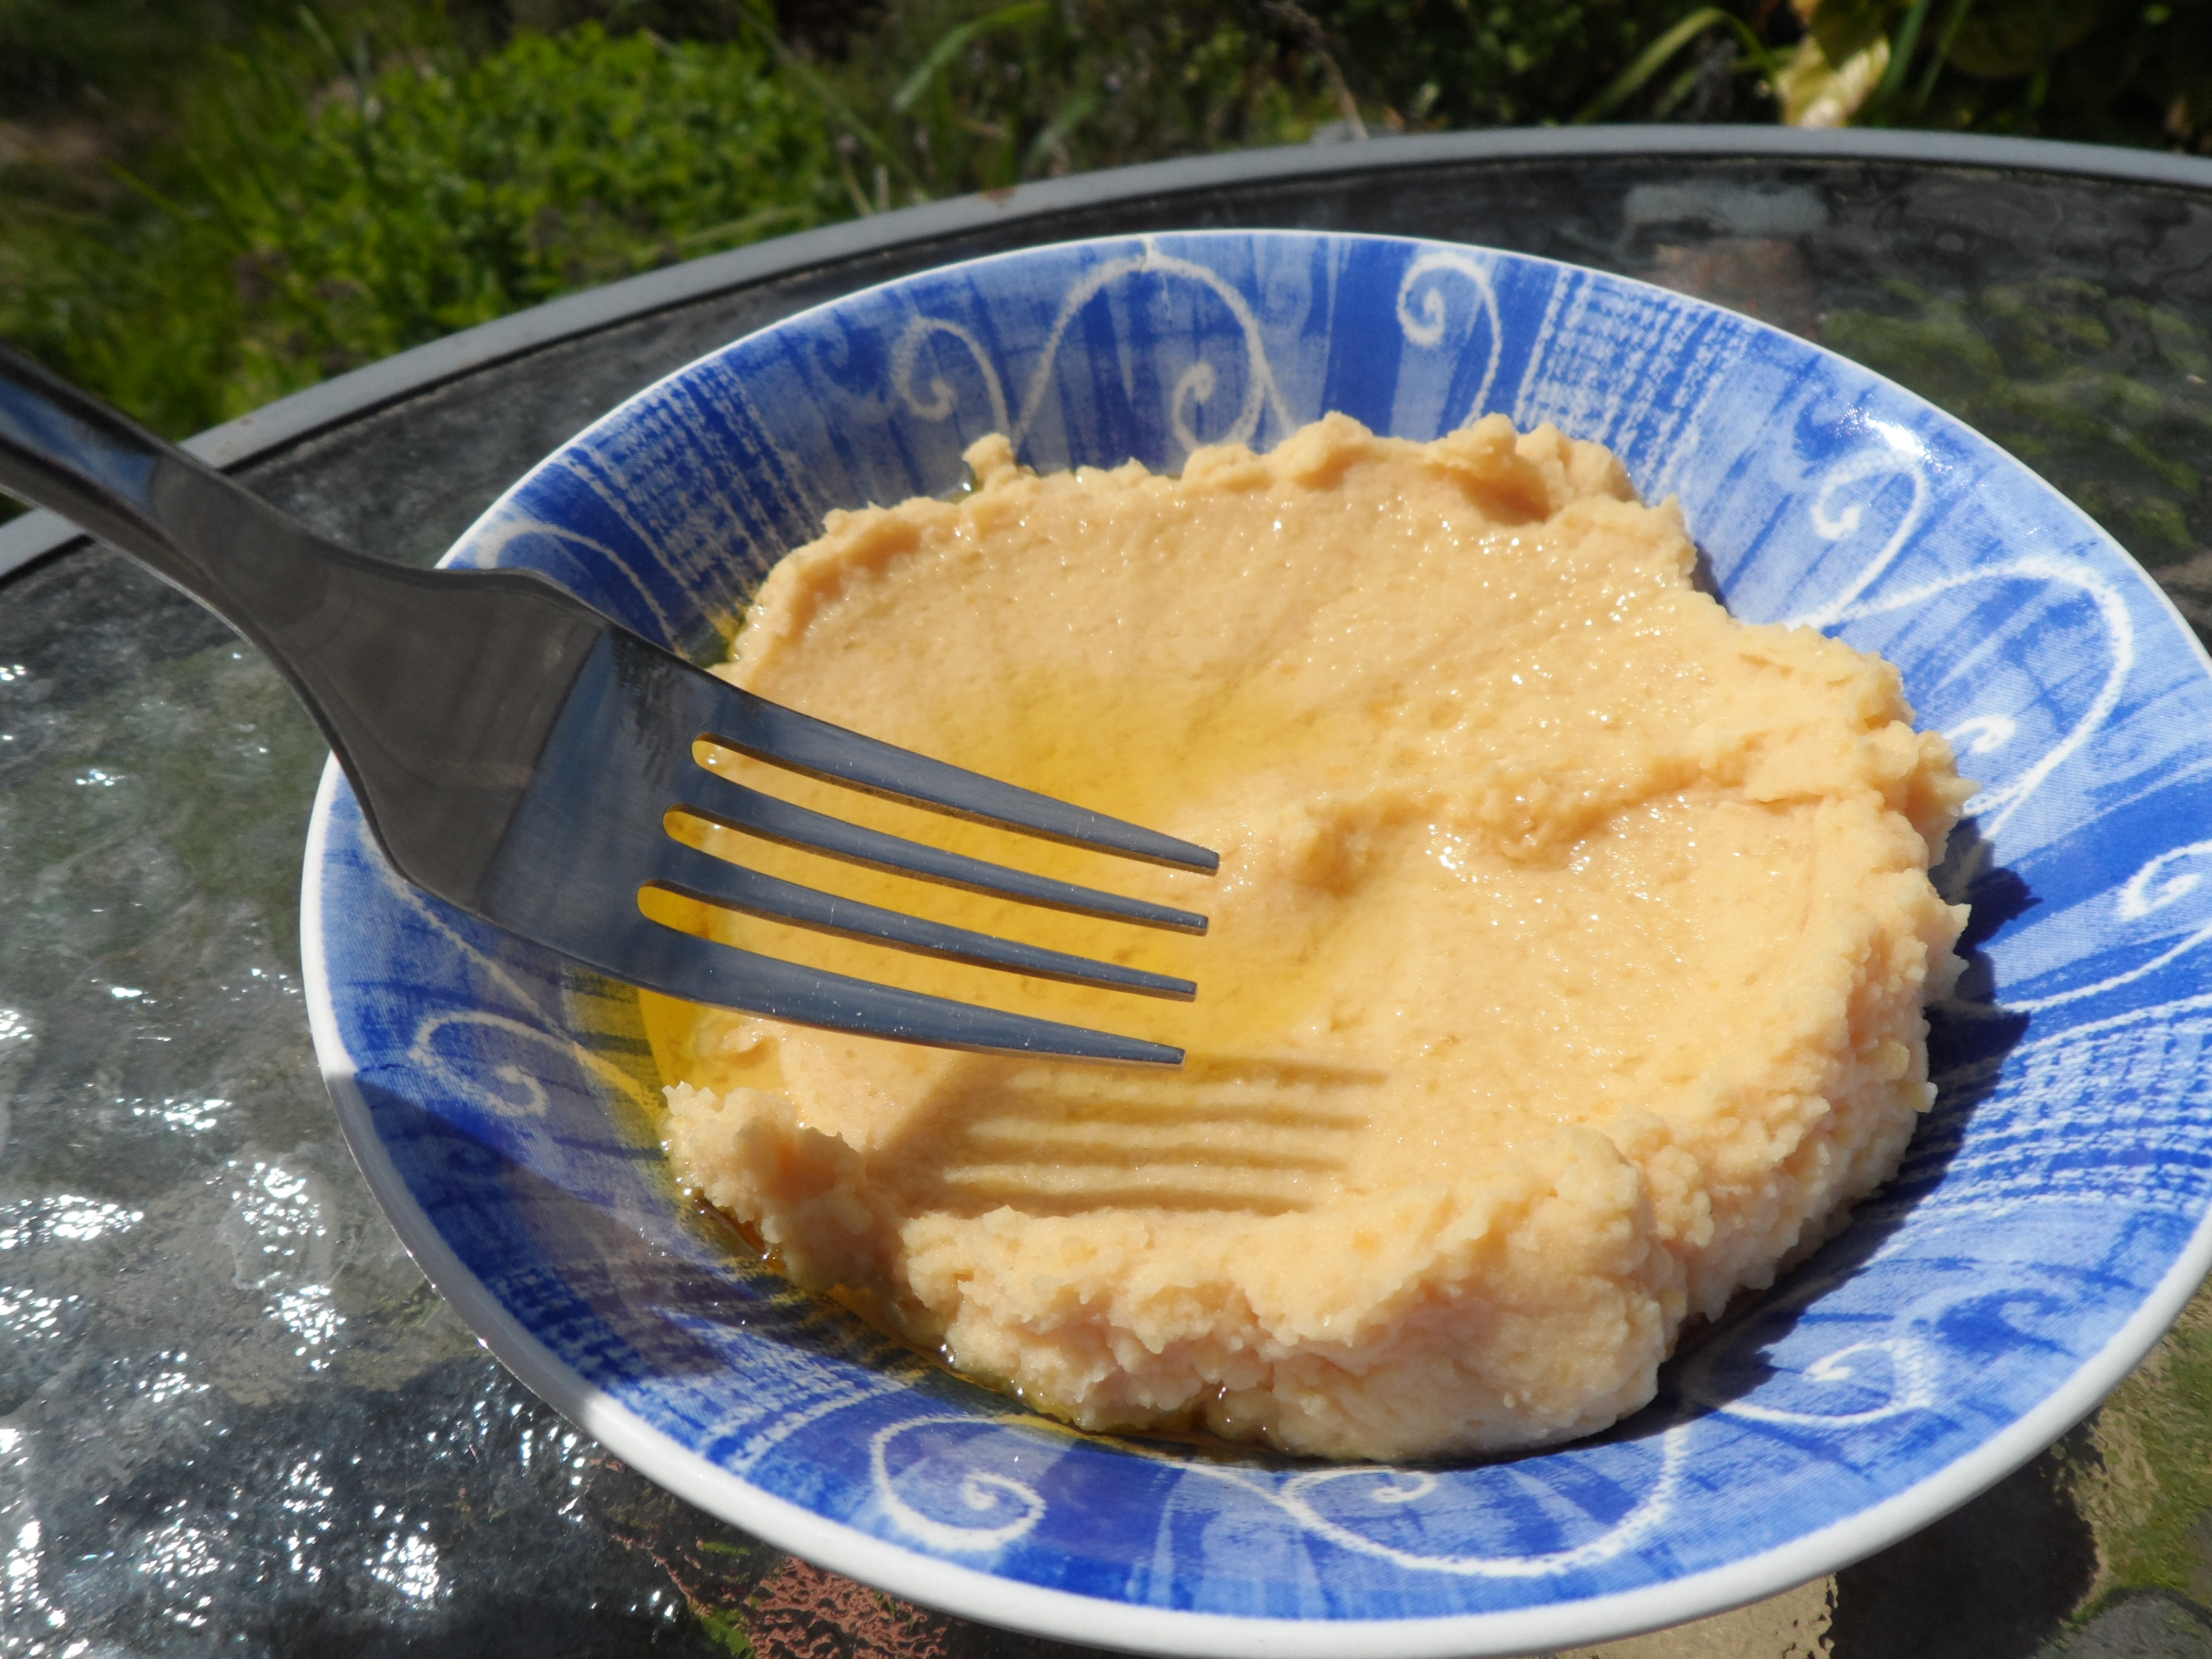
Roll out the dough on a lightly floured surface and press it into a baking tray.  Add the tomato mixture on top and spread it evenly with the back of a spoon leaving a small gap around the edges.  Leave the bread for about fifteen minutes and then sprinkle some more oregano on top.  Bake in the oven at 200C for about twenty minutes until lightly browned.  Serve with a fresh salad, or even better, why not pair it with the awesome orzo recipe below?

Orzo & tomato bake

400g chopped tomatoes

250g minced beef

1 onion (chopped)

2 tblspoons tomato puree

3 tblspoons chopped fresh herbs (mint & Greek oregano)

1 tblspoon dried oregano

2 tspoons dried cinnamon

olive oil

salt and pepper

(For the topping)

150g mature Cheddar (grated)

2 tblspoons butter

2 tblspoons plain flour

milk

1 tspoon Dijon mustard

1 pinch of grated nutmeg

salt and pepper

Orzo is pasta that looks very much like rice.  Boil it in lightly salted water until cooked through and set aside.

Brown the beef mince in some olive oil and mix in the cinnamon and dried oregano.  Add the onion and fry gently until it is cooked, but not yet browning.  Add the tomatoes and a little more olive oil and stir thoroughly.  Bring to the boil and then stir in the tomato puree.  Lower the heat and cook gently until the liquid reduces.

Drain the orzo and mix it with the beef sauce in whichever pan is bigger.  Stir in the fresh herbs and transfer it all to a deep, ovenproof dish.  Set aside while you prepare the sauce to go on top.

The orzo, tomatoes and beef before being topped with a cheese sauce.

Begin by making a roux.  Melt the butter in a milk pan and then add the flour.  Stir immediately with a whisk for a few seconds until the flour and butter become a loose paste.  Don’t panic.  Now you can pour in a little milk and continue to whisk.  Keep adding a little milk at a time until you have a thick sauce in the pan.  Now it’s time to add flavour!  Stir in the Dijon mustard, grate a little nutmeg in and then tip lots of grated Cheddar in for good measure.  You don’t really have to measure the amount of cheese you put in.  Add however much you need to achieve a full cheesy flavour and make sure there are no lumps.

Season the sauce to taste and then pour it over the orzo.  Spread it out evenly and then grate a load more cheese on top to cover.  Place the dish in a hot oven until the cheese is bubbling.  200C for about ten minutes is a good start.  I like to finish the dish under the grill to get the cheese golden and crispy on top.  You can serve this dish immediately or play the long game and eat it the next day.  I’d made enough to feed us for two days and I’m so glad that I did.  It tasted even better the next day.  Am I becoming predictable?  Maybe a little.

Note:  I’ve included guidance on seasoning, but I didn’t add any salt when I cooked this dish recently.  Instead, we added salt to our own portions once I’d served it.  This meant that our little Tomato Monster could eat the same meal as Mummy and Daddy without added salt.

Pastitsio vs Stifado

“You can’t beat a good stifado” he said, pointing at me and grinning mischievously.  Years later, surrounded by the aroma of tomato and beef infused with cinnamon, I’m tempted to say that the maths teacher was right.

At high school, I had a perfectly friendly maths teacher who did his best to get his pupils to where they should be, but every now and again, a colleague of his would stride into the classroom and on his way in or out, would strike up some friendly banter with me about the merits of various Greek dishes.  His opening line was always the same: “Had any stifado recently?”

Having guessed that my origins were Greek from my name, this chirpy maths teacher (Mr. J) enjoyed sharing his memories of beef stifado and seemed to like hearing about my own affections for pastitsio: a dish that my mum made and that I still make now with a mixture of love and utter glee.  Note to self: must update the recipe to include my own bechamel sauce which has been perfected recently.

The maths teacher and I would continue our faux argument over which dish was champion until it was time for him to let the lesson continue and for me to focus once more on things more likely to help me gain qualifications.  I wished that the stifado enthusiast was my teacher, but he wasn’t and so our conversations rarely moved beyond sauce and seasoning.

Stifado is essentially pieces of meat cooked slowly in tomatoes and red wine with baby onions.  I like beef stifado, but it can also be made with rabbit.  It’s a wonderfully warming dish with a rich sauce and satisfying flavour.  I wonder what Mr. J would make of my version of the classic Greek dish?  I dare say he’d prefer it to my first attempts at high school maths.

Beef stifado

500g best braising beef

500g baby onions

1 glass red wine

2 tins chopped tomatoes

half cup olive oil

4 cloves garlic

2 tspoons ground cinnamon

1 tblspoon dried oregano

If you want to marinate the beef in red wine and garlic overnight, be my guest.  It does help.  If you don’t have that kinda time or forethought, then begin by shallow frying the peeled baby onions until golden.  Remove from the oil and set aside.

Next, brown the beef in the onion oil and add the cinnamon and oregano.  Pour in the chopped tomatoes and bring to the boil.  Add the red wine and boil for a minute or so to burn off the alcohol.  Drop some cloves of garlic into the pot.  I usually give them a quick bash with the back of my knife so that they release their flavour during cooking.

Simmer with the lid on for an hour.  Keep the heat low enough not to burn everything in the pot, but just high enough to keep everything on a gentle simmer.

After an hour, add as much black pepper as you dare and plenty of salt to taste.  Tip the onions in and cook uncovered for at least another hour until the beef is very tender and the sauce thick.  If the sauce reduces too much, just top up with water or stock.  Eventually, you’ll end up with a nice thick sauce, melt-in-your-mouth beef and beautifully flavoured baby onions.

Stifado goes well with potatoes and I sometimes have a fresh cabbage salad on the side because it has quite a rich sauce.  You’ll certainly need plenty of your favourite bread to mop it all up!

Greek food tastes best the day after it’s made: The two-day tray.

Thank goodness that mum learned to cook lots of Greek dishes while in Crete.  It allowed me and my brother to keep our links with Greece during a confusing and rather chilly time.  Moving to England was strange and the comfort of familiar flavours was important.

One of the dishes that has graced mum’s dinner table over the years is stuffed vegetables.  Mum would spend time preparing the mixture of beef and rice with herbs and then cook a range of peppers and tomatoes in a roasting tin until the aromas filled the house with the memory of warmer days.

As children, the variety was a big draw and the colours brought excitement to the table.  For once, vegetables were the centre of the meal.  We didn’t care what mum served the stuffed vegetables with.  Often we’d have them on their own or with a salad.  They are quite filling and cheap to make; another reason why mum made them regularly.  The best part though, was knowing that we’d be eating them the next day too.  Mum always made what I came to regard as a “two-day tray”.  God bless you, mum!

Something I’ve enjoyed making is spanakorizo, which is a mixture of rice, spinach and tomatoes.  It makes a lovely side dish, but I decided to use the spanakorizo to stuff some tomatoes and peppers and roast them in the oven like mum used to.  We ate the vegetables over two days and really enjoyed them.  I hope you do too!

Spanakorizo-stuffed vegetables

4 peppers (halved)

3 beef tomatoes

350g long grain rice

350g spinach

1 tin chopped tomatoes

chicken stock

1 tblspoon dried oregano

1 tblspoon fresh mint (chopped)

1 tbslpoon tomato puree

olive oil

sea salt

pepper

Cook the rice in the chicken stock until it has absorbed the liquid and cooked through.  Add the chopped tomatoes and oregano and bring to the boil.  Add the spinach and tomato puree and simmer until the liquid has reduced.

At this point, I usually pour in a good glug of olive oil and stir it through the rice.  I also season the rice with sea salt to taste.  Grind plenty of black pepper over the rice and mix in.  Finally, stir in the chopped fresh mint.  Now you’re ready to stuff the vegetables.

Cut the peppers in half and drizzle some oil in each half before adding spoonfuls of the spanakorizo to them.  Cut a lid off each of the beef tomatoes and scoop out the seeds and flesh.  Drizzle some oil inside and then fill with the spanakorizo.

Roast the vegetables in the middle of the oven at 160C until the rice is beginning to brown and go crispy on top.  I love olive oil, so I usually drizzle all of the vegetables with more oil and season them again before they roast.  As the juices in the tin collect, baste the vegetables every now and again.  This keeps the flavours in your vegetables.

If you want the rice on top of the tomatoes to crisp up, just take the lids off for a while in the oven.

Me? At sea? Heehee!

My brother is far away in the sun and I can’t help feeling that I’ve lived this moment before; rain is driving against my windows and I’m about to blog in an effort to bring warmth and sunlight into my day.  I’ll count my blessings and give thanks that I’m not a Cretan fisherman.  Now those boys see some weather.

Granted, I’ve been trapped in a snow drift, roasted alive on an airless train through the mountains, drenched in tropical downpours and even caught in a thunderstorm on a boat heading down the Mekong.  However, if you’ve made a living on the sea surrounding the beautiful Greek islands, it’s a good bet you’ll have some stories to tell.  There’s a romantic image of the Cretan people battling the landscape and the elements and at the same time living with and becoming part of them.  We’re a people known for our passion, yes, but also for a stoicism rarely seen in the pampered generations that have come to the fore in the late 20th Century.  Could I brave everything that nature threw at these determined men?  Not a chance.  I’ve spent too long drinking chocolate milk, sitting close to radiators and hailing cabs.

I may have been born in Crete, but my father (a baker) would be surprised to hear me expressing a desire to fish the waters around our homeland.  Less surprising is my love of Cretan fish soup.  As with a lot of the simple dishes of Greece, it has remained unchanged for centuries and was borne of necessity.  Fisherman would cook this beautiful soup on their boats using only tomatoes, onions and some of their catch.  The long, slow cooking would disolve the tiny bones of smaller fish and produce a thick and hearty soup to warm the men at sea.  It’s a soup that has warmed my bones this very evening as our house has done all the stoic withstanding of the elements normally reserved for the wisened face of a Cretan fisherman.  Perhaps it will comfort you too.

Cretan fisherman’s soup

250g small fish

250g chopped tomatoes

400ml fish stock

1 onion (sliced)

3 carrots (sliced)

4 tblspoons olive oil

black pepper

This recipe will make enough for two large bowls.  You can use any fish for this soup.  I used some salmon, smoked haddock and a some cod.  Remove as many of the bones as you can before you begin and cut the fish into little chunks.

Cover the fish with boiling water and simmer for about fifteen to twenty minutes.  Skim any foam off the surface and then add the tomatoes, onions and carrots.  Cover and cook gently on a low heat for two or three hours.  After the first hour, you may want to add fish stock.  I find that the liquid reduces and that topping it up with fish stock is a great way of seasoning the soup.  It’s unlikely that you’ll need to add salt, but taste the soup after two hours and season if necessary.

You’ll end up with a very rich, red soup full of soft carrots and fish that has become a part of the broth.  It’s best served with big chunks of fluffy bread so that you can soak up the olive oil.

This is the soup in it’s simplest form.  My mum makes an awesome fish soup that includes rice to bulk it up.  You could add herbs to this soup and a squeeze of lemon to freshen it up, but I love how wonderful the soup is with so few ingredients.  To me, it’s alchemy.

Always take your culture with you.

Leaving Crete behind was a doddle for me.  I was five and plane journeys are another adventure with disappointingly small windows.  It was only as me and my younger brother grew older that we began to cling more and more to the scraps of Crete that were still within our grasp.  Vital to our connection was, and still is the food.  Our food.

We were blessed with a fantastic cook in the shape of our mum and even more important was her own passion and skill for creating Greek dishes.  Our weekly menu might include at least one well cooked Greek meal among the chips and potato waffles prevalent on English dinner plates.  The smell of cinnamon in meat dishes and oregano sprinkled on for good measure.  These are lingering memories that mingle with images of whole roasting trays lined with rows of stuffed peppers and bubbling pans of deep red lava dotted with meatball islands.  Finishing every meal by casting aside the fork and tearing up crusty white bread to get every last drop of flavour off the plate.  Every last drop of Crete.

One of our family favourites is without doubt pastitsio (pass-teech-ee-oh).  A dish of this lasted a couple of meals because of its size and in my opinion, the second sitting was always superior- the flavours had completely developed and the dish held itself together well.  Mum reckons it’s best straight out of the oven, but I think that’s her English attitude towards food and I can’t convince her otherwise.

Essentially, pastitsio is a construction job that yields a satisfying outcome.  I would love to demonstrate some sort of skill in preparation or dazzle with exotic ingredients that evoke rural Greece and its traditions.  However, the ingredients are basic and the method couldn’t be simpler.  I’ve adapted the recipe to suit my own taste and lifestyle.  This is another way of saying that I season it just the way I like it and I use ingredients that will allow me to get in from work and still get it on the plate without major effort.

Pastitsio.  My pastitsio.

500g minced beef

1 packet thick macaroni

1 large onion (finely chopped)

1 tin chopped tomatoes

1 glass red wine

1 tblspoon tomato puree

2 tblspoons dried oregano

2 tspoons ground cinnamon

1 tspoon ground nutmeg

Cheddar cheese (grated)

olive oil

salt & pepper

1 jar white lasagne sauce

The sauce must be thick.

I always chop the onion and fry it with the mince to begin with.  Before the meat is fully cooked, I add the cinnamon.  Adding it at the start means that the flavour will carry through the whole dish.  Too much cinnamon ruins everything so go easy.  It’s a nice background flavour and nothing more.  I also add the oregano and stir the beef thoroughly.  Once you’re happy that the mince is browned, add the tomatoes and gently simmer.  Add the puree at the same time and stir through.  Once it has reduced a little, add the wine.  I tend to bring everything to a rapid boil to get rid of the alcohol and then reduce the heat after a couple of minutes and simmer.

Tesco started selling this pasta last year.

At this point, it’s a good idea to get the pasta going.  If you can’t get the long macaroni in the photograph, do what my mum had to do for years- use penne.  Cook it according to the packet instructions and set aside in water until needed.  I season the meat sauce towards the end and keep tasting it.  The sauce needs to be quite thick, but not dry.  Once you’re happy with the sauce, it’s time to begin construction of the pastitsio.  I begin with a layer of the macaroni and then alternate between that and the sauce. until I reach the top of whichever deep dish I’m using.  Recently I’ve tended to use a circular ceramic dish because it’s the deepest thing I’ve got and pastitsio is a tower of awesomeness, not a flimsy lasagne.  When you’re nearly at the top, use a final layer of macaroni and then pour on the cheat ingredient- white sauce from a jar.  Some may tut in disgust, but it’s not very often that I make my own bechamel.  If you want to, fill your boots.  Grate or sprinkle the nutmeg onto the white sauce and then top with as much grated cheese is you can lay your hands on.

Macaroni, sauce, macaroni, sauce. You get the idea...

The best thing here is that you don’t need to do anything else until you want to eat.  This can be made in the morning and then put in the oven later that day.  Middle shelf at 180 degrees is enough to heat this through.  Obviously it will depend on how deep your dish is.  Mine was large and needed a while.  It is really important that you let the cheese melt and then go really brown and golden before removing it from the oven.  You can always grill the cheese if it isn’t brown and crispy enough.  My advice on serving is to eat it the next day.  If you really can’t wait, then give the pastitsio time to cool so that it firms up.  This will make it so much easier to cut and serve.  This is key to making a good pastitsio.  It should be able to stand on its own once cut.  It’s filling, but serving it with a nice cabbage salad with oil and lemon really helps cut through the rich flavours.  This is a slice of culture, memories and hearty nourishment.  It’s great at any time of year too.  Enjoy.

Is it as good as mum's?