You’ve just created something and it’s really good. It’s so good that you want to jump and laugh and shout out, so you do. Then you want to go and tell someone, show someone and point at what you’ve created and exclaim, “Look what I made!” Joy is kindled.
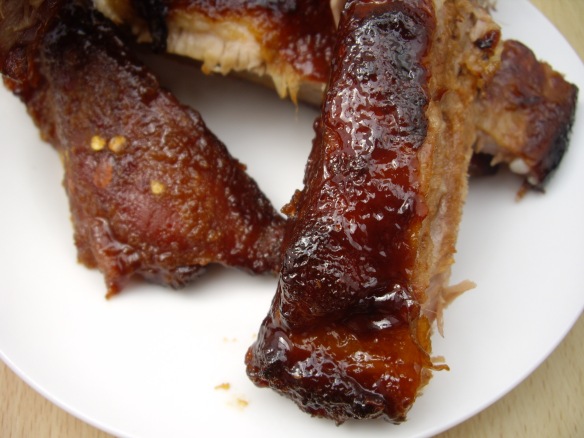
As an adult, there seem to be fewer and fewer of those moments. Children seem to be constantly in the throes of creation and discovery is just around every ordinary corner. Imagine the reaction I just wrote about happening in my kitchen about a year ago. I’d just finished making barbecue ribs without the help of a book, a friend, or that white page with the little box for you to type in a question and click enter. I’d just finished making barbecue ribs, I did it on my own, they were wondrous and they were mine. Now I’m going to share the recipe for them.
My recipe for sweet and sticky barbecue ribs is tailor-made for domestic kitchens. I know that you can get amazing results by cooking outside and getting so much smoke and flavour from blah blah blah. Let’s get a cab and head for Real Street. I live in a wet and windy part of the world with only glimpses of sunshine and a default setting of grey with a chance of greyer. If you’re blessed enough to live in the sun and are adept at cooking outdoors, then…can I come and stay with you for a while?
The ribs require two hours of uninterrupted cooking, so plan ahead. You’ll also have to trust me on a couple of things; namely the amount of sugar in the recipe. I used all the things that I love for the ribs. You could easily adapt the recipe for your own taste.
Sweet & sticky barbecue ribs
1 sheet of pork ribs
500g light brown sugar
40g garlic salt
1 tblspoon chilli flakes
half cup water
(For the glaze)
4 tblspoons clear honey
2 tblspoons dark soy sauce
3 tblspoons barbecue sauce
Preheat the oven to 160 degrees Celsius. Place the ribs in a roasting tin ready for the rub. Pour the garlic salt and the chilli flakes into a pestle and mortar and grind for a few minutes. Rub this all over the ribs including the underside, making sure to be thorough. Next, tip all of the sugar onto the top of the ribs and pat it down so that you have a thick layer of sugar on top with no meat uncovered. I’m serious, trust me!
Pour the water into the bottom of the roasting tin (not over the ribs). The water is going to help steam the meat during cooking. This will keep it moist and soft. Cover the roasting tin with two layers (or more) of foil and make a tight seal around the outside. We don’t want any of that wonderful steam to escape.
Cook in the centre of the oven for two hours. Don’t be tempted to take a peek lest all that steam disappear.
About five minutes before the ribs are due out of the oven, mix all the glaze ingredients together with a pastry brush in a little pot or ramekin. Take the ribs out of the oven and carefully remove the foil. Fire up your grill (or broiler if you’re from over the pond) ready for the final part. The ribs will now be cooked through, but looking rather pale and sad. Time to glaze!
Place the ribs on another tray lined with foil. Brush the ribs with the glaze and put them under the grill on a medium heat. As the glaze sets, remove the ribs and brush them with more glaze. Continue to do this until you run out of glaze. The idea is to build up sticky layers. It won’t be long before the sugar in the glaze caramelizes and begins to burn at the edges giving you lovely crispy bits and oodles of flavour. Did I just say oodles? Hmmm…I’ve not seen that in type before. Anyway, don’t panic if edges begin to burn. A little here and there is perfect. Just keep a close eye on the ribs because sugar burns quickly.
That’s it! Done! Now you just need to cut them up for your friends and soak up the silence as everyone tucks in. There’s nothing like the slience that settles upon a table of happy eaters. It’s up there with “Look what I made!”


